Slice and Print Conformal Cooling Channel Molds with Cura
- Conformal cooling channels enhance thermal efficiency and part quality.
- Optimal slicing settings in Ultimaker Cura are crucial for successful prints.
- Proper design and post-processing maximize cooling channel effectiveness.
Understanding Conformal Cooling Channels
Conformal cooling channels are intricately designed pathways that mimic the shape of the object being produced, enabling even heat distribution throughout the mold. With traditional molds, cooling channels are often straight and fixed, leading to uneven cooling and longer cycle times. Conformal cooling reduces these issues substantially and enhances the surface finish of the parts.
Designing Cooling Channels
Before delving into Cura settings, it’s crucial to focus on the design of the cooling channels. These designs typically use CAD software and should be parameterized to fit the specific part geometry. When designing cooling channels, consider the following principles:
- Pathways must be continuous: Ensure they do not have abrupt turns, which can create hot spots.
- Maintain a minimum distance: Prevent warping or surface defects.
- Use appropriate materials: Materials with good thermal conductivity are preferred.
For practical examples and design templates, you can check resources like CIMdata for insights into industry practices.
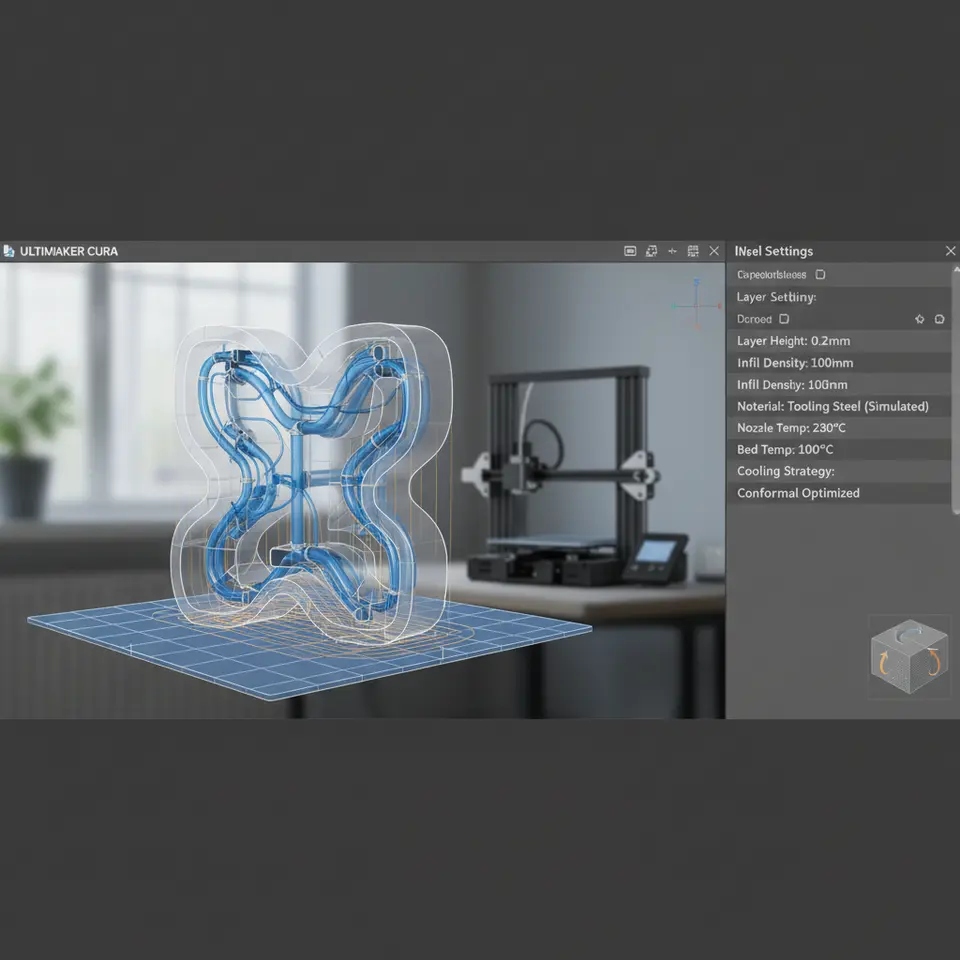
Slicing with Ultimaker Cura
Now that you have a design ready, it’s time to move to Ultimaker Cura for slicing. This step is crucial for achieving prints that incorporate conformal cooling channels.
Step-by-Step Slicing Process
- Import Your Model: Open Ultimaker Cura and drag your 3D model with conformal cooling channels into the workspace.
- Set Layer Height: For molds, a layer height of around 0.1 mm works well to ensure fine detail in the cooling channels.
- Print Speed: Set your print speed to 40-60 mm/s. Slower speeds tend to yield better details, especially in intricate designs.
- Infill Settings: Use a higher infill percentage (around 40-60%) for structures that require strength. Consider using the Grid or Cubic infill pattern for even weight distribution.
- Cooling Options: Ensure that Enable Cooling is checked but customize the fan speed based on the material used.
- Support Structure: Conformal cool channels can complicate the support structure. Consider using tree supports or breakaway supports to simplify removal.
- Build Plate Adhesion: Select a brim for better adhesion during the print.
- Post-Processing: Plan on using post-processing techniques such as sanding and polishing to achieve a clear mold surface.
- Slice the Model: Once all settings are finalized, click on the Slice button.
- Review and Export: Be sure to review your print preview for any potential issues before exporting your G-code.
Printing Your Mold
With your model sliced and settings optimized, it’s time to proceed to the printing stage. Ensure that your printer is calibrated correctly to maintain the accuracy of small features and the integrity of conformal cooling channels.
Printer Settings Tips
- Optimize the extrusion temperature based on the filament used, e.g., PLA usually prints at 190-220°C.
- Pay attention to first layer settings; ensuring a smooth first layer is essential to stabilize your mold during the print (see our guide on perfect first layer tuning).
Cooling Performance and Considerations
After printing, the real test comes in evaluating the cooling efficiency of your conformal channels. A simple cold water test can help assess the effectiveness of the cooling design:
- Fill the mold with a liquid that retains heat (such as hot water).
- Measure the temperature change over time using a thermal imaging camera or thermometer.
Performance Notes
- Logs on mold cycle times compared to traditional molds should be maintained for valuable feedback.
- Expect design tweaking and adjustments during post-processing to ensure perfect thermal dynamics.
Conclusion
Slicing and printing conformal cooling channel molds using Cura can significantly enhance your manufacturing capabilities, improving both cycle times and part quality. It’s an exciting frontier in mold design that leverages the power of additive manufacturing.
If you’re interested in diving deeper into related topics, consider reading our guides on support settings for effective cooling or different slicer strategies for advanced molds. You can also follow us on social media for the latest updates and tips in the 3D printing world.
Explore more practical advice and insights on Cura and 3D printing at CuraSlicers.com to enhance your workflow today!
FAQ
A1: Conformal cooling channels are designed pathways within a mold that closely follow the shape of the molded part to provide uniform cooling during the manufacturing process.
A2: Proper slicing settings ensure that the molds are printed accurately, which is vital for the effectiveness of the cooling channels and the overall quality of the final product.
A3: You can conduct a cold water test by filling the mold with a hot liquid and measuring the temperature change over time to assess cooling efficiency.