Mastering Cura Slicer Spiralize Outer Contour
Estimated Reading Time: 5 minutes
Key Takeaways:
- The **Cura Slicer Spiralize Outer Contour** feature helps in creating elegant, hollow prints.
- This technique is ideal for decorative models, such as vases and lampshades.
- Proper model geometry and settings are crucial for successful prints.
- Experimentation with designs and post-processing can greatly enhance your results.
Table of Contents:
Understanding Spiralize Outer Contour
The Spiralize Outer Contour, also known as Vase Mode, is a slicing technique that allows users to print models in a continuous, spiral manner, creating a single-layer shell. This process eliminates the need for infill and multiple layers, making it an excellent option for models where structural integrity isn’t a priority but rather an elegant appearance and efficient filament usage.
According to the official Ultimaker documentation, using Spiralize Outer Contour produces a thin-walled print without sacrificing aesthetic value (source). The result is a smooth, visually appealing model suitable for decorative purposes, small vases, lampshades, and more.
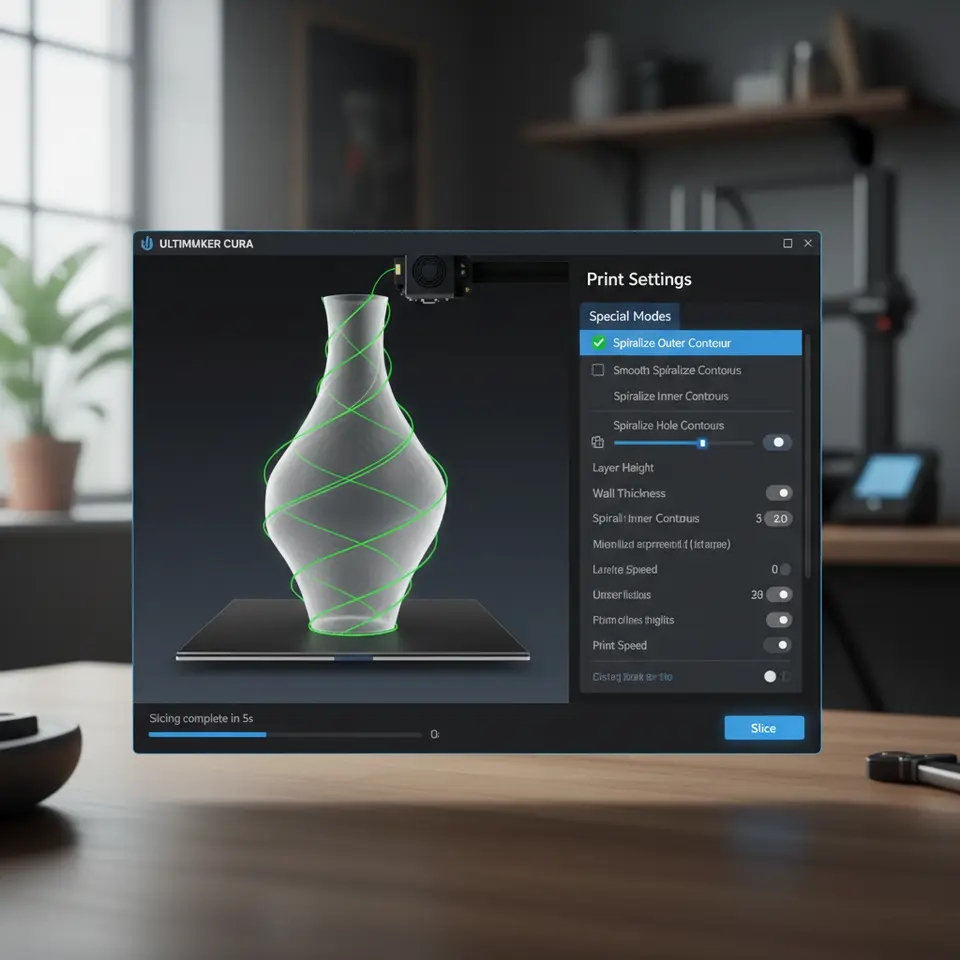
How to Enable Spiralize Outer Contour in Cura
Activating the Spiralize Outer Contour feature in Ultimaker Cura is a straightforward process. Follow these steps:
1. **Load Your Model**: Open Ultimaker Cura and import the 3D model you wish to print.
2. **Select Settings**: Navigate to the ‘Print Setup’ panel.
3. **Change to Vase Mode**:
– Go to **Mode** and select **Custom**.
– In the **Shell** section, find the **Spiralize Outer Contour** checkbox and select it.
4. **Adjust Print Settings**: Set your print parameters like layer height, printing speed, and material type.
5. **Slice and Print**: Once your settings are configured, slice the model and prepare to print!
Use Cases for Spiralize Outer Contour
Spiralize Outer Contour is particularly effective in several use cases. Below are some popular applications where this mode shines:
- Decorative Vases: Create unique vases that can showcase flowers or serve as standalone decor items.
- Toys and Figurines: Print hollow toy models that are lightweight and visually interesting.
- Lampshades: Produce beautiful lampshades that allow light to filter through smoothly.
- Test Prints: Use this mode for rapid prototyping and testing design concepts without wasting material.
For hobbyists and makers exploring small cosmetic prints, the Spiralize Outer Contour is an excellent choice to ensure print quality while minimizing resource use. You can read our guide on how to optimize Cura for small cosmetic prints for more tips on this topic.
Common Mistakes and Troubleshooting Tips
While utilizing Spiralize Outer Contour, some users often run into issues. Here are a few common mistakes and how to resolve them:
1. **Incorrect Model Geometry**: Ensure that your model is designed properly for vase mode. It should not have any overhangs or complex internal structures. Models with holes or inconsistent wall thickness might lead to unwanted results.
2. **Layer Height Settings**: When using Spiralize Outer Contour, a finer layer height often results in a smoother finish. However, if the layer is too thick, it can lead to visible snags. Aim for a layer height between 0.1 mm and 0.2 mm for best results.
3. **Print Speed Adjustments**: High print speeds may cause the filament to not adhere correctly, resulting in flaws. For delicate items, a slower speed will usually yield better outcomes.
4. **Wrong Material Selection**: Some materials are more suitable for vase mode than others. For example, PLA works well due to its low warping characteristics, while others like ABS may require careful handling.
5. **Overextrusion Issues**: This can lead to blobs and zits on the surface of your print. Ensure your flow rate and extrusion multiplier are set correctly, and if print quality is still lacking, consider tuning your extrusion multiplier.
For more troubleshooting tips, check out our guide on Cura slicing errors and fixes for efficient troubleshooting.
Making the Most of Your Spiralized Prints
To maximize the potential of this technique, consider these tips:
– **Test Different Designs**: Explore various designs to understand how different geometries react to Spiralize Outer Contour. This will help you fine-tune your models and improve your print results.
– **Experiment with Colors**: The continuous nature of this printing technique lends itself well to multicolor prints. For example, you could set up color changes at specific heights for interesting visual effects.
– **Post-Processing Techniques**: After printing, consider techniques such as sanding, painting, or coating your print to enhance aesthetics and durability.
Conclusion
The **Cura Slicer Spiralize Outer Contour** feature is a game-changer for those seeking to elevate their 3D printing projects. From beautiful vases to intricate models, this technique offers the perfect balance between aesthetics and efficiency. As you embark on your journey with this fascinating feature, keep in mind the common pitfalls and the practical tips provided above to ensure successful prints every time.
For additional insights and expert troubleshooting, visit our main page at Cura Slicers for more 3D printing tips.
Call to Action
Are you ready to delve deeper into the world of Cura slicer and 3D printing? Explore our related articles on effective support settings for overhangs and devising a reliable workflow to enhance your printing efficiency. Don’t forget to follow us on social media for the latest updates and join our community of enthusiastic makers!
Embrace the future of 3D printing today with the Spiralize Outer Contour feature in Cura Slicer, and watch your creativity unfold!
FAQ
Q: Can I use Spiralize Outer Contour for larger prints?
A: Yes, but keep in mind that larger prints may require more careful settings to ensure quality.
A: Yes, but keep in mind that larger prints may require more careful settings to ensure quality.
Q: Is there a specific material that works best with this feature?
A: PLA is generally recommended due to its low warping characteristics, but other materials can be used with care.
Q: How do I troubleshoot layer adhesion issues?
A: Adjusting print speed and ensuring the correct temperature settings are key to improving layer adhesion.
Q: What types of designs are best suited for Spiralize Outer Contour?
A: Designs that are simple and have no overhangs work best for this mode. Complex internal structures should be avoided.