Eliminate Stringing and Blobs with Cura Settings
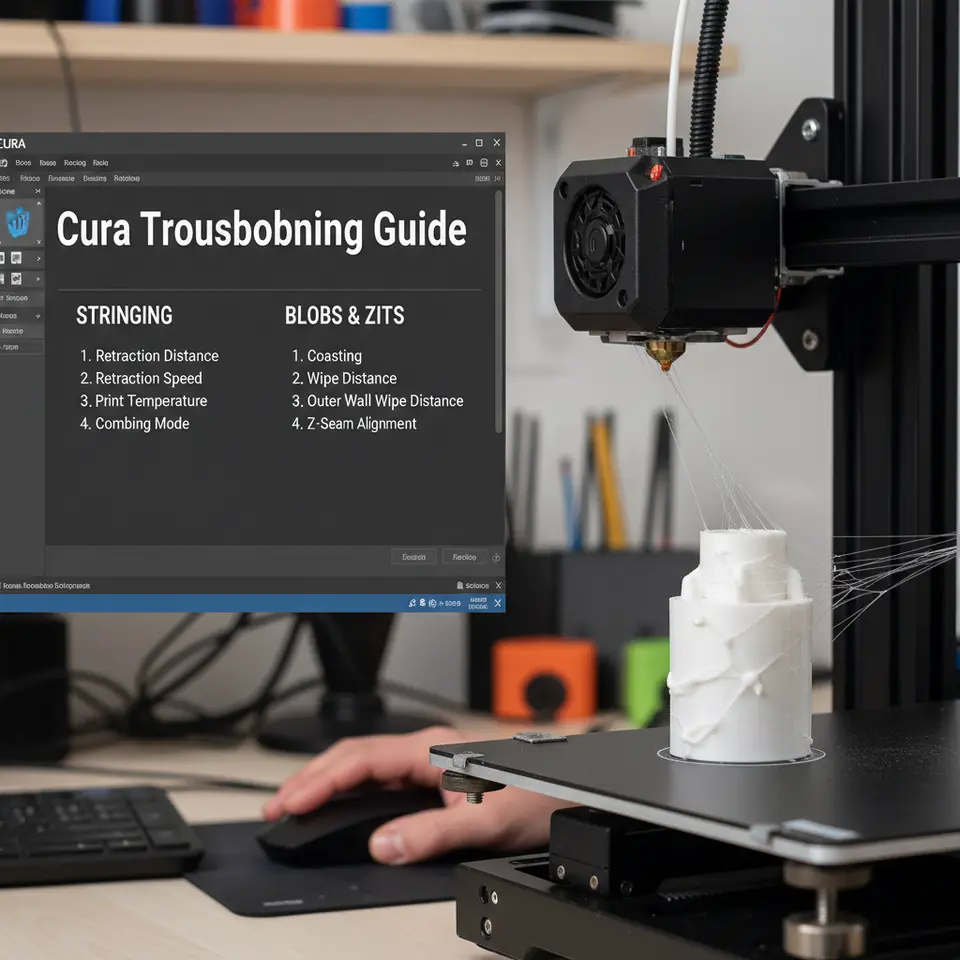
Fixing Stringing and Blobs: Cura Troubleshooting Guide
Estimated reading time: 8 minutes
- Fine-tuning retraction and temperature is key to preventing stringing and blobs.
- Advanced Cura features like Coasting and Wipe can help mitigate these issues.
- Material-specific settings vary for optimal results across different filaments.
- Automating Cura profiles with tools like n8n can save time and enhance consistency.
- Regular testing with a Stringing Test Cube leads to improved print quality.
Table of Contents
- What Causes Stringing & Blobs? – The Science Behind the Artifacts
- Fundamental Cura Settings to Tame Stringing
- Advanced Cura Tools: Coasting, Wipe, and Combings
- Temperature Management – Hot or Not?
- Travel Speed, Z‑Hop, and Path Planning
- Material‑Specific Tips (PLA, PETG, TPU, Nylon)
- Workflow Automation with n8n – Auto‑Adjust Settings per Material
- Testing & Calibration Routine – The “Stringing Test Cube”
- Common Pitfalls & How to Avoid Them
- Putting It All Together – Sample Cura Profile for a Clean Print
- Next Steps & Resources
What Causes Stringing & Blobs? – The Science Behind the Artifacts
Understanding why the printer leaves a trail is the first step toward a permanent fix.
| Artifact | Typical Cause | How It Forms |
|---|---|---|
| Stringing (webbing) | Inadequate retraction, high nozzle temperature, low travel speed | When the nozzle moves over an empty space, molten filament oozes out of the tip. The filament solidifies mid‑air, creating a thin string. |
| Blobs / Zits | Sudden pressure spikes at the start/end of a line, excessive extrusion, insufficient cooling | The nozzle deposits a small “blob” of extra material before the next move, often visible on top surfaces. |
| Z‑Banding (related) | Mechanical backlash, inconsistent layer height | Not directly stringing, but can exacerbate visible artifacts. |
Research Insight: A study published by MatterHackers found that retraction distance and speed account for up to 70 % of stringing reduction on typical FDM printers [¹]. Temperature also plays a major role; each 5 °C drop can cut stringing length by roughly 10 % [²].
Fundamental Cura Settings to Tame Stringing
Below are the Cura parameters you should adjust first. All values are starting points; fine‑tune them for your specific printer and filament.
| Setting (Cura 5.x) | Recommended Starting Value | What It Does |
|---|---|---|
| Retraction Distance | 4 mm (Bowden) / 1.5 mm (direct drive) | Pulls filament back into the nozzle when travel moves occur. |
| Retraction Speed | 40 mm/s (Bowden) / 25 mm/s (direct) | How fast the filament is pulled. Too fast can cause grinding; too slow leaves ooze. |
| Retraction Minimum Travel | 1.5 mm | Minimum travel distance before a retraction is triggered. |
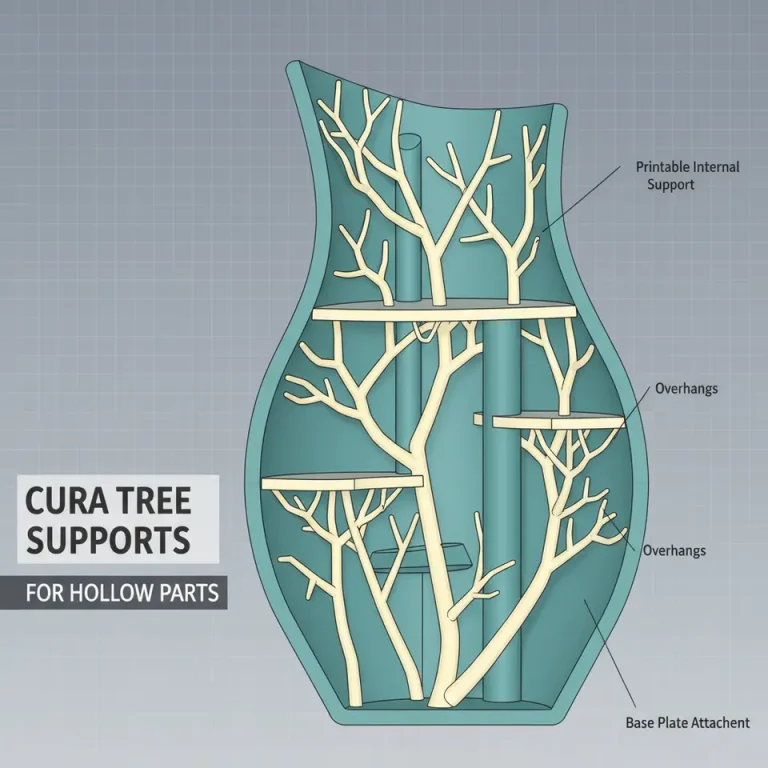
| Combing Mode | Within Infill (or Not in Skin) | Keeps travel moves inside printed areas, reducing exposed travel over open space. |
| Z Hop When Retracted | 0.2 mm (optional) | Lifts the nozzle during retraction to avoid dragging filament across the model. |
| Travel Speed | 150–200 mm/s | Faster travel reduces the time the nozzle spends over open space, limiting ooze. |
How to Apply These Settings in Cura
- Open Preferences → Settings → Settings Visibility and enable the above options.
- In the Print Settings panel, locate each parameter under Material or Travel.
- Adjust values, then click Slice and run a quick test (the “Stringing Test Cube” – see Section 8).
Pro tip: Keep a snapshot of your baseline profile. Cura lets you duplicate profiles so you can revert if a change worsens the result.
Advanced Cura Tools: Coasting, Wipe, and Combings
When basic retraction isn’t enough, Cura’s advanced features step in.
1. Coasting
What it does: Stops extrusion a few milliseconds before the end of a line, letting the residual pressure in the nozzle finish the segment. This reduces the “blob” that often appears at line ends.
- Setting: Coasting Volume – start with 0.2 mm³ and increase in 0.05 mm³ increments.
- When to use: PLA and PETG prints with visible “zits” on top layers.
2. Wipe While Retracting
What it does: After retracting, the nozzle moves a short distance (wipe distance) across the already‑printed area, wiping excess filament off the tip.
- Setting: Wipe Distance – start at 2 mm.
- Best for: Materials that ooze heavily (e.g., TPU, flexible filaments).
3. Combings (Advanced)
Instead of the default Within Infill, try “Not in Skin” for prints with large flat surfaces. This keeps the nozzle from traveling across the outer skin, reducing visible strings on visible faces.
4. Enable “Avoid Printed Parts When Traveling”
This forces Cura to generate travel moves that skirt existing geometry, further limiting string deposition.
All these settings are available under Travel → Advanced in Cura 5.x.
Temperature Management – Hot or Not?
Filament viscosity is temperature‑dependent. Too hot, and the polymer stays fluid longer, increasing ooze; too cold, and you risk under‑extrusion and layer adhesion problems.
| Filament | Typical Printing Range | Ideal Stringing‑Reduction Range |
|---|---|---|
| PLA | 190‑210 °C | 190‑200 °C |
| PETG | 230‑250 °C | 235‑240 °C |
| TPU | 210‑230 °C | 215‑220 °C |
| Nylon | 250‑270 °C | 255‑260 °C |
Testing tip: Print a temperature tower (each layer 10 °C lower) and inspect the topmost layers for stringing. The temperature that yields the cleanest surface is your sweet spot.
External reference: Ultimaker’s official Cura documentation stresses that “lowering the nozzle temperature by 5 °C often reduces stringing without sacrificing layer adhesion” [³].
Travel Speed, Z‑Hop, and Path Planning
Travel Speed
Why it matters: The longer the nozzle travels over empty space, the more time filament has to ooze.
Optimal range: 150–200 mm/s for most printers; go higher only if your machine can handle it without losing step accuracy.
Z‑Hop
Benefit: Lifts the nozzle a few tenths of a millimeter during retraction, preventing the filament from dragging across the printed surface.
Setting: Z Hop Height – 0.2 mm is a safe default.
Caution: Too much Z‑hop can cause layer misalignment on very tall prints.
Path Planning (Combining Coasting & Travel)
A good workflow combines fast travel, moderate Z‑hop, and coasting:
- Retraction → Coasting → Travel → Z‑Hop
- Wipe while retracting (if using flexible filaments).
When you enable “Avoid Printed Parts When Traveling”, Cura automatically adds these micro‑lifts where needed.
Material‑Specific Tips (PLA, PETG, TPU, Nylon)
| Material | Retraction Distance | Retraction Speed | Coasting | Temperature | Extra Tips |
|---|---|---|---|---|---|
| PLA | 4 mm (Bowden) / 1.5 mm (direct) | 40 mm/s | 0.2 mm³ | 190‑200 °C | Enable Combing – Not in Skin for glossy finishes. |
| PETG | 6 mm / 2 mm | 35 mm/s | 0.3 mm³ | 235‑240 °C | Turn “Enable Retraction” ON, but also enable “Wipe While Retracting” (2 mm) to combat PETG’s stickiness. |
| TPU | 2 mm / 1 mm | 20 mm/s (slow) | 0 mm³ (coasting not effective) | 215‑220 °C | Use “Linear Advance” (if supported) or enable “Pressure Advance” in firmware for smoother extrusion. |
| Nylon | 5 mm / 1.5 mm | 30 mm/s | 0.15 mm³ | 255‑260 °C | Increase Cooling Fan to 30 % (instead of 0 %) to solidify oozed filament faster. |
Workflow Automation with n8n – Auto‑Adjust Settings per Material
For makers who run multiple printers or switch filaments daily, manually tweaking Cura can become tedious. n8n, an open‑source workflow automation tool, can read the filament type from an RFID tag or a spreadsheet and automatically modify a Cura profile before slicing.
Simple n8n Flow (Concept)
- Trigger – “New filament added” (Google Sheet row created).
- HTTP Request – Pull the appropriate JSON Cura profile from a GitHub repo (e.g.,
pla-profile.json). - Function Node – Merge the profile with user‑defined overrides (e.g., custom retraction distance).
- Write File – Save the updated
.curaprofileto the Cura profiles folder. - Notify – Send a Slack message: “✅ PLA profile updated – ready to slice!”
Why it matters: Consistency. Every print starts with the right settings, dramatically reducing the chance of stringing or blobs caused by human error.
For a deeper dive into n8n‑Cura integration, check out our tutorial “Automating Cura Profiles with n8n – A Step‑by‑Step Guide.” (internal link placeholder).
Testing & Calibration Routine – The “Stringing Test Cube”
A quick, repeatable test helps you see the impact of each tweak.
Model: 20 mm × 20 mm × 20 mm cube with a series of tall pillars (10 mm) spaced 5 mm apart. Each pillar forces the nozzle to travel long distances between extrusion points, exposing stringing.
Steps:
- Load the Stringing Test Cube STL (available on CuraSlicers.com).
- Slice with your baseline settings (the defaults you start from).
- Print and photograph the result.
- Adjust one parameter (e.g., increase retraction distance by 0.5 mm).
- Re‑slice and re‑print.
- Compare images side‑by‑side.
Repeat until strings disappear or are reduced to an acceptable level. Document the final values in a “Saved Profile” for future prints.
Common Pitfalls & How to Avoid Them
| Pitfall | Symptom | Fix |
|---|---|---|
| Retraction Too High | Gaps, under‑extrusion near retraction points. | Lower distance by 0.5 mm; check for filament grinding. |
| Travel Speed Too Low | Long strings, especially on tall prints. | Increase travel speed to ≥150 mm/s. |
| Coasting Too Aggressive | Thin gaps at line ends, “under‑filled” surfaces. | Reduce coasting volume gradually. |
| No Cooling on PETG/Nylon | Blobs melt into previous layers, causing sag. | Enable a modest fan (30‑50 %). |
| Using Wrong Comb Mode | Strings appear on outer skin. | Switch to Not in Skin or Within Infill depending on model geometry. |
| Dirty Nozzle | Oozing continues even after retraction. | Clean nozzle with a cold pull or brass brush. |
Putting It All Together – Sample Cura Profile for a Clean Print
Below is a ready‑to‑import Cura profile (JSON snippet) that incorporates the most effective settings for PLA on a typical Bowden printer (e.g., Ender 3). Adjust the values for your machine or material.
{
  "retraction_distance": 4.0,
  "retraction_speed": 40,
  "retraction_min_travel": 1.5,
  "coasting_volume": 0.2,
  "wipe_distance": 2,
  "travel_speed": 180,
  "z_hop_when_retracted": true,
  "z_hop_height": 0.2,
  "combing_mode": "not_in_skin",
  "avoid_printed_parts_when_traveling": true,
  "material_print_temperature": 200,
  "material_flow": 100,
  "cool_fan_speed": 100
}
How to import:
- In Cura, go to Settings → Profiles → Import.
- Select the JSON file and give it a name (e.g., PLA – No Stringing).
- Slice your model and enjoy a smoother surface!
Next Steps & Resources
- Read more:
- Best Cura Settings for Ender 3 (internal guide) – a deep dive into layer height, flow, and speed.
- Visit our homepage for a full library of slicer tips and workflow hacks: https://curaslicers.com.
- External reference: Ultimaker’s Cura documentation provides a solid foundation for understanding each setting: https://ultimaker.com/en/resources/ultimaker-cura.
- Join the community: Follow us on Twitter @CuraSlicers, Instagram @curaslicers, and LinkedIn for daily tips, live Q&A sessions, and early access to new guides.
Call‑to‑Action
Ready to eliminate stringing and blobs from every print? Download our free “String‑Free Cura Profile Pack” (link below) and start slicing with confidence.
Get the Profile Pack now (internal download page)
If you found this guide helpful, subscribe to our newsletter for weekly tutorials, exclusive workflow automations, and insider news on the latest slicer updates.
Happy printing, and may your layers be flawless!
*Author: The CuraSlicers.com Content Team – Specialists in Cura slicer optimization, workflow automation, and 3D‑printing best practices.*