Print Multi‑Color Models in Cura – Step‑by‑Step Guide
How to Print Multi‑Color Models in Cura: A Complete Step‑by‑Step Guide
Estimated reading time: 7 minutes
- Unlock the full potential of Ultimaker Cura for vibrant, multi-colour prints.
- Learn methods for single-extruder and dual-extruder setups.
- Understand how to troubleshoot common issues and optimize your print jobs.
- Explore automation solutions for efficient multi-color printing workflows.
- Get practical takeaways with recommended Cura settings.
Table of Contents
- Why Multi‑Color Printing Matters
- Prerequisites: Hardware & Cura Version
- Method 1: Single‑Extruder Filament Swaps (Color Change)
- Method 2: Dual‑Extruder Set‑Up (Two‑Material Printing)
- Method 3: Layer‑Swap Technique for Gradient Effects
- Common Pitfalls & Troubleshooting
- Optimizing Print Speed & Quality for Multi‑Color Jobs
- Automation with n8n: Streamlining the Workflow
- Practical Takeaways & Cura Settings Cheat‑Sheet
- Next Steps & CTA
Why Multi‑Color Printing Matters
Adding color isn’t just about aesthetics; it can convey functional information (e.g., different material properties, assembly cues) and improve part identification in a production line. For makers, a splash of color turns a prototype into a showcase piece, while for professionals it can reduce post‑processing time by eliminating the need for painting or dyeing.
According to a recent All3DP survey, 68 % of desktop‑printer owners consider multi‑color capability a “must‑have” feature for future upgrades. By mastering Cura’s built‑in tools, you position yourself at the forefront of this trend.
Prerequisites: Hardware & Cura Version
| Requirement | Details |
|---|---|
| Cura version | 5.0 or newer (the “Color Change” script was introduced in Cura 4.8, but newer releases provide a more stable UI). |
| Printer | • Single‑extruder (e.g., Creality Ender 3 V3) – for filament swaps. • Dual‑extruder (e.g., Prusa i3 MK3S+ with MMU2S, or any printer with two independent hotends). |
| Filament | Same diameter (usually 1.75 mm) and compatible material (PLA, PETG, TPU). For dual‑extruder, ensure both filaments have similar printing temperatures to avoid hot‑end clashes. |
| Bed adhesion | Use a reliable first‑layer setup – see our guide on Best Cura Settings for Ender 3 V3 to Improve First‑Layer Adhesion for tips. |
| Firmware | Must support “pause at height” G‑code or “tool change” commands (most Marlin‑based firmwares do). |
Tip: If you’re unsure whether your printer supports pause commands, check the firmware documentation or run a quick “M25” test from your host software.
Method 1: Single‑Extruder Filament Swaps (Color Change)
1.1 When to Use This Method
- You have only one hotend.
- You need up to 2–3 colors per print.
- The model’s color changes are limited to distinct sections (e.g., a logo, a handle, or a decorative stripe).
1.2 Preparing the Model
- Separate the model into parts (or use a slicer that supports “color change at height”). In Cura, you can add a “Pause at Height” script that triggers a filament change.
- Determine the Z‑height where each color transition should occur. Use the “Layer View” (press
L) to pinpoint the exact layer number.
1.3 Configuring Cura
- Open Cura → Settings → Custom → Scripts → Post‑Processing → Add a script → “Pause at Height”.
- Fill in the fields:
| Field | Recommended Value |
|---|---|
| Pause Height | The Z‑height (in mm) where you want the change. |
| Retraction Distance | 6 mm (default, but adjust if you see stringing). |
| Retraction Speed | 40 mm/s. |
| Unretract Extra Prime Amount | 0.2 mm (helps start the new filament cleanly). |
| Lift Z | 0.5 mm (prevents nozzle dragging on the print). |
| Park X/Y | Move the head to a safe spot for filament loading (e.g., X = 200, Y = 200). |
Source: Ultimaker’s official Cura documentation explains each parameter in depth.
- Enable “Enable Retraction” in the main print settings (found under Material → Retraction). For PLA, a retraction distance of 5–6 mm at 40 mm/s works well.
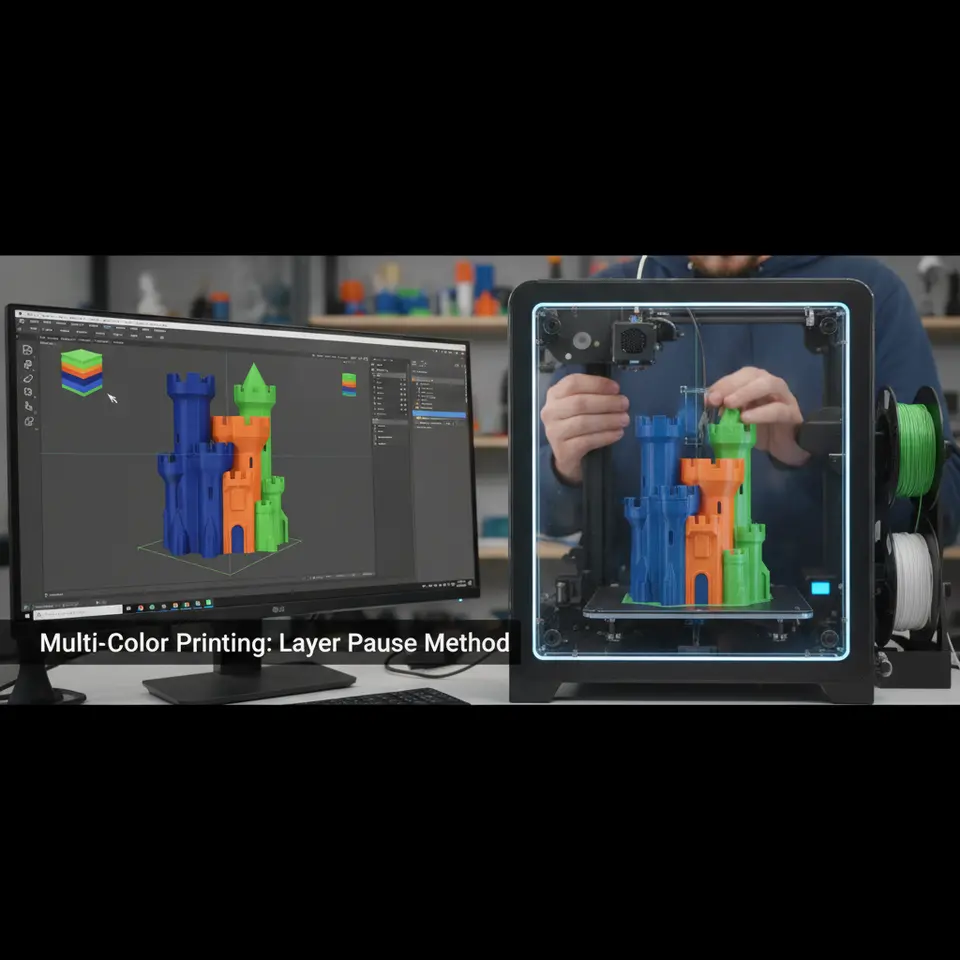
1.4 Running the Print
- Start the print. When Cura reaches the programmed height, the printer will pause, lift the nozzle, and move to the parking position.
- Swap filament: unload the current filament, load the new color, purge ~10 mm, then confirm the filament is feeding smoothly.
- Resume: Press the resume button on your printer’s LCD or via your host software (OctoPrint, PrusaSlicer, etc.). Cura will continue printing with the new filament.
1.5 Fine‑Tuning Tips
| Issue | Cura Setting | Adjustment |
|---|---|---|
| Stringing after change | Retraction distance | Increase by 0.5 mm. |
| Visible seam at change point | Z‑hop when retracted | Set to 0.2 mm. |
| Filament jam | Temperature | Lower by 5 °C for PLA, 10 °C for PETG. |
Method 2: Dual‑Extruder Set‑Up (Two‑Material Printing)
2.1 When to Use This Method
- You own a printer with two independent hotends (or a Multi‑Material Unit).
- You need simultaneous printing of two colors or a support material (e.g., PVA).
- You want seamless color transitions without pauses.
2.2 Configuring Printer Profile in Cura
- Navigate to “Settings → Printer → Manage Printers → Add Printer” and select your dual‑extruder model (or create a Custom printer).
- Define two extruders:
| Parameter | Extruder 1 (E0) | Extruder 2 (E1) |
|---|---|---|
| Nozzle Diameter | 0.4 mm | 0.4 mm |
| Material Diameter | 1.75 mm | 1.75 mm |
| Temperature | 200 °C (PLA) | 200 °C (PLA) |
| Retraction | 6 mm / 40 mm/s | 6 mm / 40 mm/s |
- Enable “Extruder Switch” in the Print Setup → Advanced → Extruder Switch section. Cura will automatically insert the appropriate
T0/T1commands.
2.3 Preparing the Model
- Assign colors in your 3D modeling software (e.g., Blender, Fusion 360) by creating separate meshes for each color. Export as an OBJ or STL with groups.
- Import into Cura. The software will list each mesh under “Model” with a color swatch. Click a mesh → “Extruder” dropdown → assign Extruder 1 or Extruder 2.
2.4 Slicer Settings for Dual‑Extruder
| Setting | Recommended Value |
|---|---|
| Infill Overlap | 15 % (helps bond between colors). |
| Combing Mode | “Not in Skin” (reduces oozing across color boundaries). |
| Support Placement | “Everywhere” if you need support material in a different color. |
| Z‑Hop When Retracted | 0.2 mm (prevents nozzle collisions). |
2.5 Printing & Post‑Processing
- Start the print. Cura will handle tool changes automatically.
- Monitor the first few tool changes to ensure both nozzles are properly primed. Use a small “wipe tower” (Cura can generate one automatically) to purge excess filament.
- After the print, you may need a brief cleanup of the wipe tower, but the part itself will have clean color boundaries.
Pro tip: For fine details, reduce the Print Speed to 40 mm/s for the extruder that prints the intricate sections. This minimizes ghosting between colors.
Method 3: Layer‑Swap Technique for Gradient Effects
If you want a smooth color gradient rather than distinct blocks, you can program Cura to switch filaments every few layers.
3.1 Setting Up a “Layer Change” Script
- Add a post‑processing script: “ChangeAtZ” (available in Cura 5.0+).
- Define a list of heights where the filament should change. For a 20 mm tall part with 0.2 mm layer height, you could change every 10 layers (2 mm).
{
  "change_heights": [2,4,6,8,10,12,14,16,18],
  "new_extruder": 1
}- Enable “Prime Tower” (under Support → Experimental). This tower will purge the old filament and prime the new one at each change.
3.2 Choosing Filaments
- Use filaments with similar melt flow (e.g., two PLA colors). Mixing PLA with TPU will cause temperature mismatches and may lead to clogs.
- For a true gradient, select colors that blend well (e.g., light gray → dark gray → black).
3.3 Calibration Checklist
| Check | How to Verify |
|---|---|
| Temperature consistency | Keep the hotend temperature constant; adjust only if one filament prints too soft. |
| Retraction sync | Ensure both extruders have the same retraction settings to avoid over‑retraction on the second filament. |
| Prime tower height | Set the tower height to at least 5 mm per color change to give enough material for cleaning. |
Common Pitfalls & Troubleshooting
| Symptom | Likely Cause | Cura Fix |
|---|---|---|
| Visible seam at color change | Insufficient Z‑hop or nozzle dragging. | Increase Z‑hop When Retracted to 0.3 mm. |
| Filament oozing onto previous color | Retraction too low. | Raise Retraction Distance to 6.5 mm and speed to 45 mm/s. |
| Layer shift after pause | Printer resumes before the bed is fully settled. | Add a “Delay after pause” of 5 seconds in the Pause at Height script. |
| Color mixing at boundaries | No wipe tower or insufficient purge. | Enable Prime Tower (under Support → Experimental) and set Prime Tower Size to 10 mm. |
| Dual‑extruder nozzle collision | Incorrect nozzle offset. | Calibrate Extruder Offsets in Cura → Machine Settings → Extruder Offsets. |
For a deeper dive into retraction and stringing fixes, see our Cura Retraction Settings Guide.
Optimizing Print Speed & Quality for Multi‑Color Jobs
Multi‑color prints demand a balance between speed and precision. Below are proven settings that work across PLA, PETG, and TPU.
| Parameter | PLA | PETG | TPU |
|---|---|---|---|
| Layer Height | 0.12 mm (high detail) | 0.16 mm | 0.20 mm |
| Print Speed | 45 mm/s | 40 mm/s | 30 mm/s |
| Infill Density | 20 % (grid) | 25 % (cubic) | 15 % (gyroid) |
| Cooling Fan | 100 % after first layer | 50 % (to avoid warping) | 0 % (TPU needs less cooling) |
| Flow Rate | 100 % | 98 % (slightly lower for PETG) | 105 % (helps with flexible filament) |
Reference: “Cura Layer Height Speed Optimization” provides detailed charts on how layer height impacts speed and surface finish.
Key takeaway: When you introduce a color change, the printer momentarily slows down. To compensate, you can raise the Print Speed by 10 % for the sections that don’t involve a change, but keep the speed low (≤40 mm/s) around the transition zones.
Automation with n8n: Streamlining the Multi‑Color Workflow
If you regularly produce multi‑color prints, consider automating the preparation steps with n8n, an open‑source workflow automation tool.
Sample n8n Flow
- Trigger: New STL uploaded to a cloud folder (e.g., Google Drive).
- Node: Run a Python script that parses the STL, detects separate meshes, and generates a Cura project file (.3mf) with the appropriate extruder assignments.
- Node: Call CuraEngine via CLI (
CuraEngine slice -j project.3mf -o output.gcode). - Node: Send the G‑code to OctoPrint using its REST API.
- Node: Post a Slack notification with a preview image and a link to the print job.
This pipeline eliminates manual re‑assignments and ensures consistent settings across dozens of prints per week.
Learn more: Our post on Reduce Print Time Cura Guide explains how to integrate CuraEngine into automated pipelines.
Practical Takeaways & Cura Settings Cheat‑Sheet
| Goal | Cura Setting | Value |
|---|---|---|
| Smooth color transition | Prime Tower Size | 10 mm |
| Prevent nozzle drag during pause | Z‑hop When Retracted | 0.3 mm |
| Minimize stringing after filament swap | Retraction Distance | 6 mm |
| Fast dual‑extruder prints | Print Speed (outer walls) | 35 mm/s |
| Accurate layer‑by‑layer swaps | Pause Height | Exact Z‑height (e.g., 4.2 mm) |
| Consistent extrusion across filaments | Flow Rate | 100 % (adjust ±2 % per material) |
| Support material in different color | Support Extruder | Extruder 2 (set in Support → Extruder) |
| Wipe tower generation | Enable Wipe Tower | ✓ (under Support → Experimental) |
For a deeper dive into advanced profile creation, check out our Ultimate Cura Profile Settings article.
Next Steps & Call‑to‑Action
You now have a full toolbox to print multi‑color models in Cura—whether you’re swapping filaments on a single‑extruder, leveraging a dual‑extruder setup, or creating gradient effects with layer swaps.
Ready to level up?
- Explore more: Read our What Is Cura Slicer? Beginners Guide to master the basics before tackling complex multi‑color jobs.
- Join the community: Follow CuraSlicers on Instagram, Twitter, and Facebook for daily tips, printable models, and behind‑the‑scenes workflow hacks.
- Stay updated: Subscribe to our newsletter for exclusive guides, downloadable Cura profiles, and early access to our n8n automation templates.
Visit our main page for a full library of tutorials, downloadable settings, and the latest 3D printing news: CuraSlicers.
Happy printing, and may your colors always be as vibrant as your ideas!
External reference: Ultimaker’s official Cura documentation explains the “Pause at Height” script and its parameters in detail, confirming the best practices shared above.