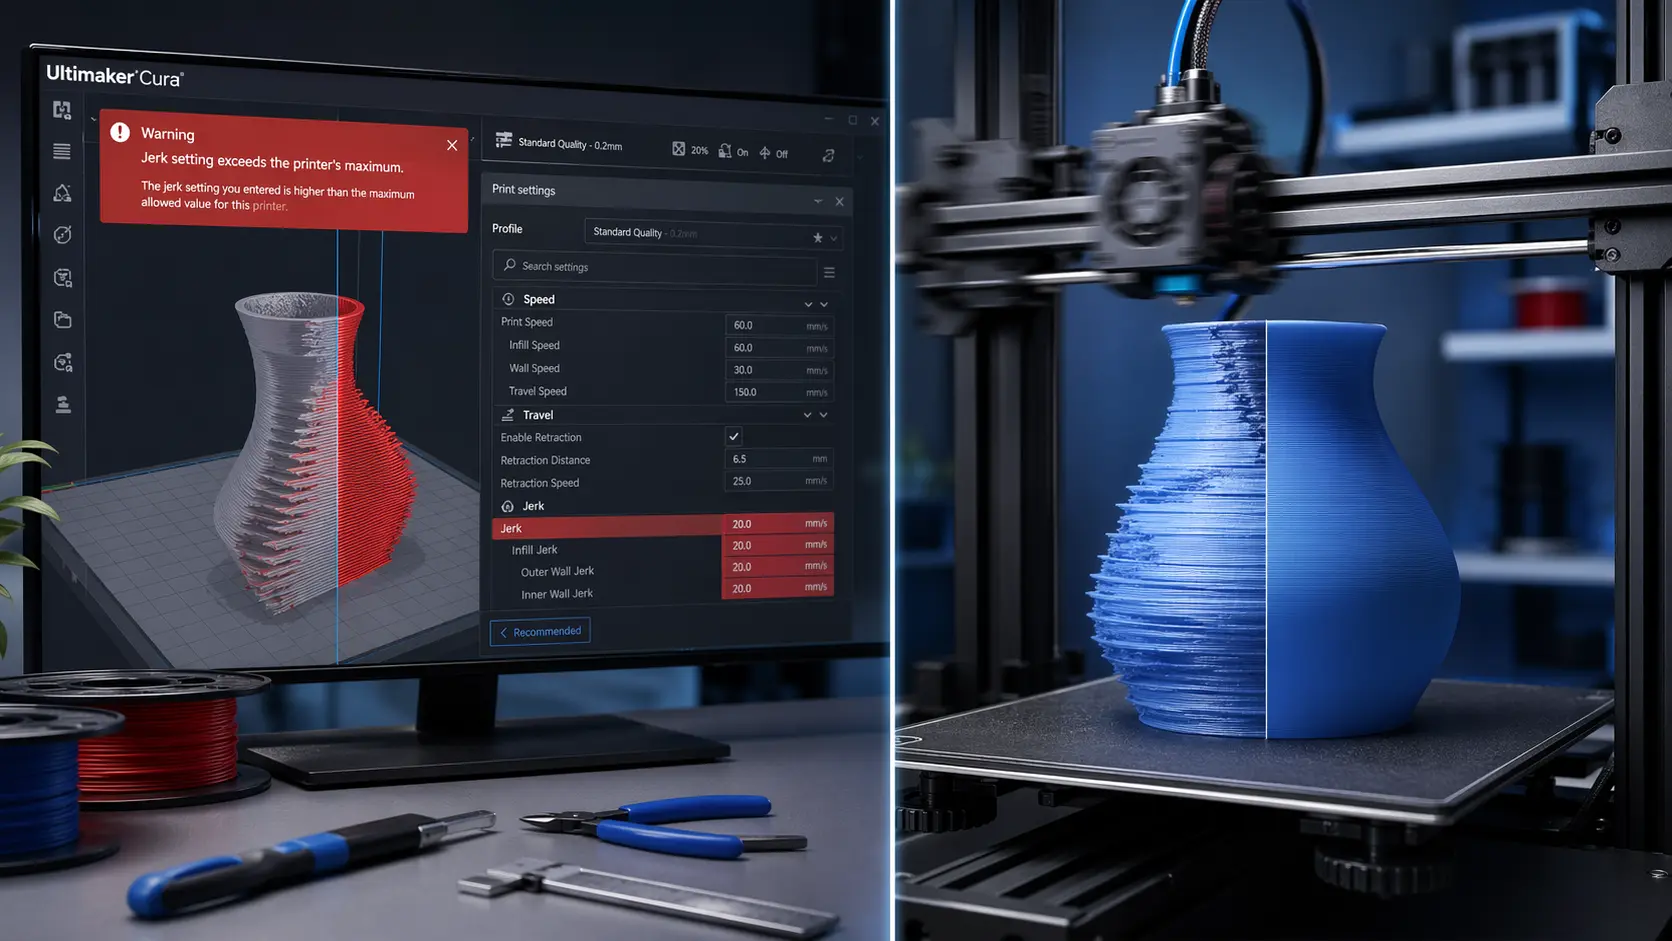
The Jerk Setting Exceeds the Printer’s Maximum – Fix Cura Error (Complete Guide)
If you’re using Ultimaker Cura and suddenly encounter the error “the jerk setting exceeds the printer’s maximum”, you’re not alone. This issue is quite common among 3D printing enthusiasts and can prevent your model from printing correctly.
While it may sound technical, the problem is actually easy to understand and fix once you know what “jerk” means in 3D printing and how Cura handles motion settings.
In this detailed guide, you’ll learn:
- What the jerk setting is in 3D printing
- Why this error appears in Cura
- Step-by-step solutions to fix it
- Best jerk values for different printers
- Tips to avoid this issue in the future
Let’s break it down in simple terms.
What Is the Jerk Setting in 3D Printing?
In 3D printing, jerk refers to the instantaneous speed change of the print head without acceleration. In simpler words, it defines how quickly the printer can change direction without gradually speeding up.
- Higher jerk values = faster direction changes
- Lower jerk values = smoother but slower movements
Jerk directly impacts:
- Print speed
- Surface quality
- Mechanical stress on the printer
If the jerk value is too high, your printer may:
- Vibrate excessively
- Produce poor print quality
- Skip steps or lose accuracy
Why Does the “Jerk Setting Exceeds the Printer’s Maximum” Error Occur?
This error occurs when the jerk value set in Cura is higher than what your printer firmware allows.
Common causes include:
1. Incorrect Printer Profile
Sometimes Cura profiles don’t match your actual printer specifications.
2. Manual Setting Changes
If you manually increase jerk in Cura, it may exceed firmware limits.
3. Imported Profiles
Downloaded profiles (especially for speed printing) often have aggressive jerk values.
4. Firmware Restrictions
Your printer’s firmware (like Marlin) sets a maximum jerk limit, which Cura cannot override.
How to Fix “The Jerk Setting Exceeds the Printer’s Maximum” in Cura
Let’s go step by step to fix this issue.
✅ Method 1: Lower the Jerk Value in Cura
This is the easiest and most effective solution.
Steps:
- Open Cura
- Go to Print Settings
- Enable Advanced or Expert Mode
- Search for “Jerk” in the settings panel
- Reduce the value to a safe range
Recommended starting values:
- X/Y Jerk: 5 – 10 mm/s
- Z Jerk: 0.3 – 0.5 mm/s
- Extruder Jerk: 5 mm/s
After adjusting, slice the model again and check if the error disappears.
✅ Method 2: Disable Jerk Control in Cura
If your printer firmware already controls jerk, you don’t need Cura to override it.
Steps:
- In Cura settings, search for “Enable Jerk Control”
- Turn it OFF
This allows the printer to use its default firmware jerk settings.
✅ Method 3: Reset Cura Profile
If you’re unsure what caused the issue:
- Go to Profile Settings
- Click Reset to Default
- Re-slice your model
This removes any conflicting or extreme values.
✅ Method 4: Check Printer Firmware Limits
Your printer firmware defines maximum jerk values.
If you’re using Marlin firmware, you can check:
DEFAULT_XJERKDEFAULT_YJERK
If Cura exceeds these values, the error appears.
Advanced users can:
- Update firmware
- Increase jerk limits (only if safe)
⚠️ Be careful: increasing jerk too much can damage your printer.
✅ Method 5: Use a Correct Printer Profile
Make sure your printer is properly configured in Cura.
- Select your exact printer model
- Avoid generic profiles
- Update Cura to the latest version
Incorrect profiles are one of the biggest reasons for this error.
Best Jerk Settings for Popular 3D Printers
Here are safe ranges used by most users:
| Printer Type | X/Y Jerk | Z Jerk | Extruder Jerk |
|---|---|---|---|
| Ender 3 | 5–8 | 0.3–0.4 | 5 |
| Prusa i3 | 8–10 | 0.4–0.5 | 5–6 |
| CR-10 | 6–8 | 0.3 | 5 |
These values provide a balance between speed and quality.
How Jerk Affects Print Quality
Understanding jerk helps you optimize prints better.
🔹 High Jerk Values
- Faster printing
- More vibrations
- Rough edges
- Possible layer shifting
🔹 Low Jerk Values
- Smoother prints
- Better detail
- Longer print times
If you want high-quality prints, keep jerk moderate or low.
Jerk vs Acceleration – Don’t Confuse Them
Many users confuse jerk with acceleration.
Jerk:
- Instant speed change
- Affects sharp movements
Acceleration:
- Gradual speed increase
- Affects overall motion smoothness
Both settings work together to control printer motion.
Advanced Fix: Editing Machine Settings in Cura
If the error persists, you can adjust machine-level settings.
Steps:
- Go to Preferences → Printers → Machine Settings
- Check start G-code
- Remove or modify jerk commands (e.g.,
M205)
Example:
M205 X8 Y8
Lower the values if needed.
Preventing This Error in the Future
Here are some best practices:
✔ Always Use Verified Profiles
Avoid random profiles from the internet unless tested.
✔ Don’t Over-Tune Settings
Extreme speed settings often cause jerk issues.
✔ Preview Before Printing
Check layer view in Cura for warnings.
✔ Update Cura Regularly
New updates improve compatibility and error handling.
✔ Understand Your Printer Limits
Every printer has physical and firmware limitations.
Common Mistakes to Avoid
- Setting jerk too high for faster prints
- Ignoring firmware limits
- Using incompatible profiles
- Not checking advanced settings
Avoiding these mistakes will save time and filament.
When Should You Increase Jerk?
In some cases, higher jerk is useful:
- Draft prints
- Fast prototyping
- Large, simple models
But always increase gradually and test results.
Troubleshooting Checklist
If the error still appears, go through this checklist:
- ✅ Lower jerk values
- ✅ Disable jerk control
- ✅ Reset profile
- ✅ Verify printer model
- ✅ Check firmware limits
One of these steps will fix the issue in almost all cases.
Final Thoughts
The error “the jerk setting exceeds the printer’s maximum” in Cura may seem complicated at first, but it’s actually a simple mismatch between software settings and hardware limits.
By understanding how jerk works and applying the fixes above, you can:
- Eliminate errors
- Improve print quality
- Protect your printer
- Optimize performance
Whether you’re a beginner or an experienced 3D printing enthusiast, mastering jerk settings will significantly improve your results.
FAQs
❓ What is a safe jerk setting in Cura?
A safe range is usually 5–10 mm/s for X/Y axes, depending on your printer.
❓ Can high jerk damage my printer?
Yes, excessively high jerk can cause vibrations and mechanical stress.
❓ Should I disable jerk control in Cura?
If your firmware already manages jerk, disabling it is often the best option.
❓ Why does Cura show this error?
Because the jerk value exceeds what your printer firmware allows.