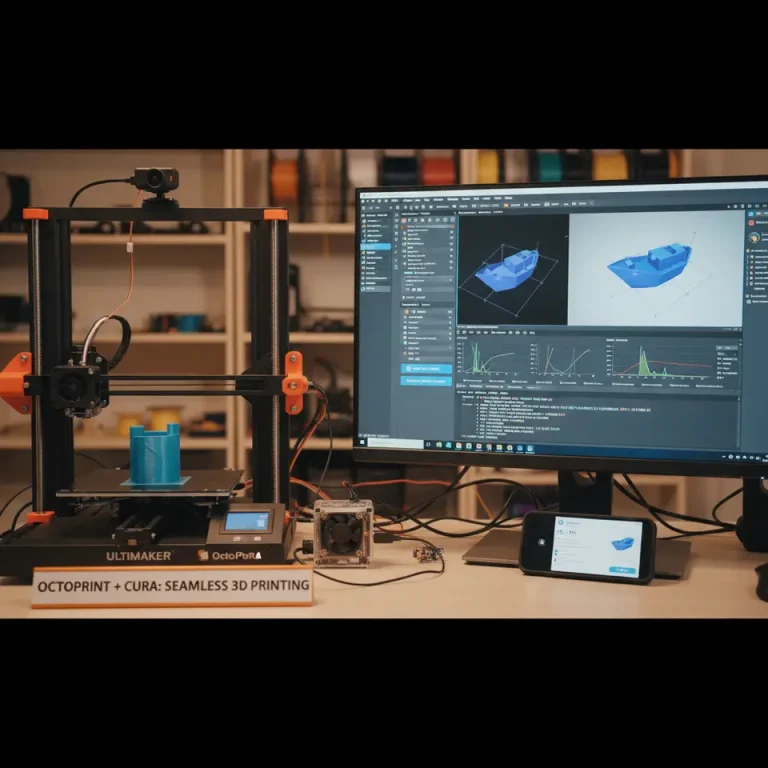
Master Cura Speed vs Quality with Custom Print Profiles
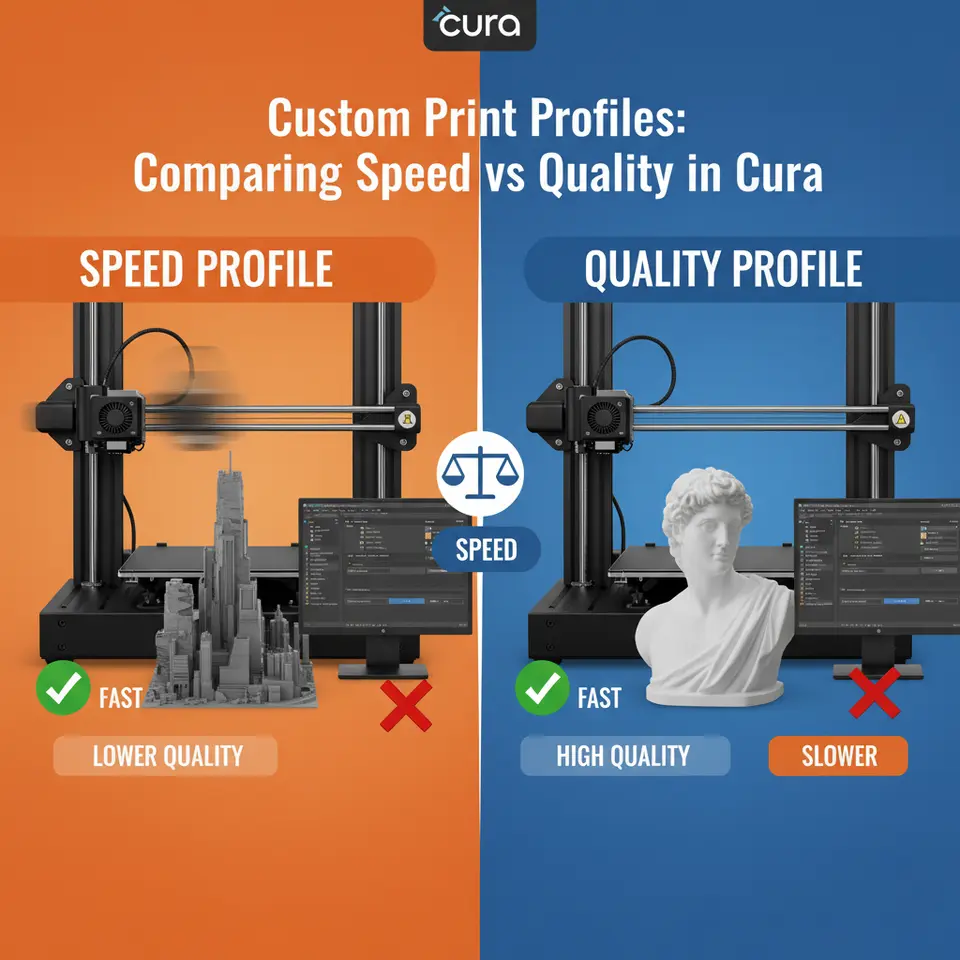
Custom Print Profiles: Comparing Speed vs Quality in Cura
Estimated reading time: 8 minutes
- Unlock the balance between speed and quality in 3D printing.
- Discover key Cura settings for optimizing print profiles.
- Understand the impact of speed and quality on final prints.
- Learn how to create and test custom profiles for varying objectives.
- Explore real-world application examples for different printing needs.
Table of Contents
- Introduction
- Why the Speed vs. Quality Debate Matters
- The Core Parameters That Define Speed and Quality
- Building Two Baseline Profiles in Cura
- Deep-Dive: Fine-Tuning Speed Without Sacrificing Too Much Quality
- Measuring the Trade-Off: Data-Driven Decision Making
- Real-World Use Cases
- Integrating Cura Profiles into an Automated Workflow
- Common Pitfalls & How to Fix Them
- Quick Reference Cheat Sheet
- How CuraSlicers.com Supports Your Journey
- Call to Action
- References
Introduction
When you type “Custom Print Profiles: Comparing Speed vs Quality in Cura” into Google, you’re probably looking for a clear answer: Can I print fast and get a flawless surface? The short answer is yes—if you know how to tune Cura’s settings for the specific goal you have in mind. In this guide, we’ll break down the science behind speed-oriented versus detail-oriented profiles, walk you through the exact Cura parameters to adjust, and show you how to measure the impact on layer resolution, print time, and final surface finish. Whether you’re a hobbyist racing to finish a prototype or a professional needing premium-grade parts, the strategies here will help you create a custom profile that delivers exactly what you need.
Quick takeaway: Start with a “baseline” profile, then tweak layer height, print speed, acceleration, retraction, and flow in small increments. Use Cura’s “Preview” mode and a simple test cube to quantify the trade-off before committing to a full-scale print.
Why the Speed vs. Quality Debate Matters
In 3D printing, speed and quality are often seen as opposite ends of a spectrum. Faster prints reduce machine wear, lower electricity costs, and accelerate product development cycles. High-quality prints, on the other hand, minimize post-processing, improve mechanical performance, and showcase fine details—critical for miniatures, functional prototypes, and end-use parts.
A 2023 study by MatterHackers found that increasing print speed by 50 % typically adds 0.2 mm of surface roughness on PLA, while a 25 % speed boost only raised roughness by 0.07 mm – a tolerable trade-off for many functional parts [source]. Meanwhile, Ultimaker’s own Cura documentation emphasizes that layer height is the primary driver of surface finish, but print speed heavily influences dimensional accuracy and layer adhesion [source].
Understanding these relationships lets you craft custom print profiles that align with your project’s priorities, rather than relying on generic “fast” or “high-detail” presets.
The Core Parameters That Define Speed and Quality
Below is a concise table that maps each Cura setting to its primary effect on speed or quality. Use it as a checklist when building or tweaking your profile.
| Setting | Speed Impact | Quality Impact | Typical Range (Fast) | Typical Range (Detail) |
|---|---|---|---|---|
| Layer Height | ↑ (fewer layers) | ↓ (coarser surface) | 0.25 mm – 0.30 mm | 0.06 mm – 0.12 mm |
| Print Speed (mm/s) | ↑ (shorter print time) | ↓ (possible ringing, under-extrusion) | 80–120 | 30–50 |
| Travel Speed | ↑ (less idle time) | ↓ (stringing if too high) | 150–200 | 80–120 |
| Acceleration / Jerk | ↑ (rapid direction changes) | ↓ (ghosting, ringing) | 1500–3000 mm/s² | 500–1200 mm/s² |
| Infill Density | ↑ (less material) | ↓ (weaker parts) | 10–15 % | 30–50 % |
| Infill Pattern | ↑ (simple patterns) | ↓ (structural isotropy) | Lines, Grid | Gyroid, Cubic |
| Wall Thickness | ↓ (fewer perimeters) | ↓ (weaker walls) | 1.2 mm (2 perimeters) | 0.8 mm (4 perimeters) |
| Print Temperature | ↑ (faster melt) | ↓ (possible oozing) | 200 °C (PLA) | 210 °C (PLA) |
| Retraction Distance / Speed | ↓ (less time) | ↑ (reduces stringing) | 3 mm / 25 mm/s | 5 mm / 45 mm/s |
| Coasting | ↑ (shortens extrusion) | ↓ (minor surface gaps) | 0.5 mm | 0 mm |
| Z Hop | ↑ (avoids collisions) | ↓ (adds travel time) | Off | 0.2 mm (optional) |
Pro tip: The most noticeable quality gains come from lowering layer height and print speed together. If you need speed, focus on raising travel speed and acceleration while keeping layer height at a moderate 0.20 mm.
Building Two Baseline Profiles in Cura
Below are two ready-to-import Cura profiles you can start with. Import them via Settings → Profile → Import and then fine-tune for your printer (e.g., Ender 3 V3, Prusa MK3, or any Creality model).
1. Speed-Oriented Profile – “Rapid-Proto”
| Parameter | Value |
|---|---|
| Layer Height | 0.30 mm |
| Print Speed | 100 mm/s |
| Travel Speed | 180 mm/s |
| Acceleration | 2500 mm/s² |
| Jerk | 20 mm/s |
| Wall Thickness | 1.2 mm (2 perimeters) |
| Infill | 15 % Grid |
| Retraction | 3 mm @ 25 mm/s |
| Coasting | 0.5 mm |
| Z Hop | Off |
| Print Temperature (PLA) | 200 °C |
2. Quality-Oriented Profile – “Fine-Finish”
| Parameter | Value |
|---|---|
| Layer Height | 0.08 mm |
| Print Speed | 40 mm/s |
| Travel Speed | 100 mm/s |
| Acceleration | 800 mm/s² |
| Jerk | 8 mm/s |
| Wall Thickness | 0.8 mm (4 perimeters) |
| Infill | 30 % Gyroid |
| Retraction | 5 mm @ 45 mm/s |
| Coasting | 0 mm |
| Z Hop | 0.2 mm |
| Print Temperature (PLA) | 210 °C |
How to test: Print the standard Cura “Calibration Cube” (20 mm) with each profile. Record:
- Print time (Cura’s estimated vs. actual)
- Surface roughness (visual inspection or a simple ruler measurement of layer lines)
- Dimensional accuracy (measure X/Y/Z with calipers)
You’ll see the Rapid-Proto finish roughly 2–3x faster but with visible “stair-step” lines, while the Fine-Finish yields a near-smooth surface at the cost of longer build time.
Deep-Dive: Fine-Tuning Speed Without Sacrificing Too Much Quality
If the “speed” profile feels too rough, you can apply targeted adjustments that recover quality while preserving most of the time savings.
1. Adaptive Layer Height
Cura’s “Adaptive Layers” feature (available from Cura 5.0) automatically varies layer height based on model geometry. Critical sloped surfaces receive finer layers, while flat sections stay thick. Enable it under Experimental → Adaptive Layers and set a Maximum Layer Height of 0.30 mm and a Minimum of 0.12 mm. This can shave 10–15 % off print time compared to a uniform 0.12 mm setting while keeping visual fidelity where it matters.
2. Variable Print Speed
Use “Print Speed – Wall”, “Print Speed – Infill”, and “Print Speed – Top/Bottom” to assign slower speeds to the outer shells (where quality counts) and keep the infill fast. Example:
- Wall Speed: 45 mm/s
- Infill Speed: 100 mm/s
- Top/Bottom Speed: 40 mm/s
The outer walls will look crisp, but the interior fills quickly.
3. Optimize Acceleration & Jerk per Axis
Modern firmware (Marlin 2.0+, Klipper) lets you set different acceleration for X/Y vs. Z. In Cura, you can add “Custom G-code” snippets:
M201 X1200 Y1200 Z100 ; Set acceleration
M205 X10 Y10 Z0.4      ; Set jerk
Lower X/Y acceleration reduces ringing on high-speed prints, while a higher Z acceleration keeps layer changes snappy.
4. Fine-Tune Retraction for Speed
Long retraction distances add time, especially on small parts. Switch to “Linear Advance” (if your firmware supports it) and reduce retraction to 2 mm at 30 mm/s. This keeps stringing low while cutting retraction cycles by up to 15 %.
5. Use “Draft Shield” & “Spiralize” Wisely
For tall, thin prints (e.g., vases), enable “Spiralize Outer Contour”. It prints a single continuous wall, dramatically reducing print time while delivering a smooth surface. For models with overhangs, a “Draft Shield” can prevent warping without adding extra perimeters.
Measuring the Trade-Off: Data-Driven Decision Making
A truly scientific approach means collecting data after each test print.
| Metric | How to Measure | Target for Speed Profile | Target for Quality Profile |
|---|---|---|---|
| Print Time | Cura estimate vs. actual stopwatch | ≤ 60 % of baseline | ≤ 150 % of baseline |
| Surface Roughness (µm) | Visual + tactile, or use a profilometer | ≤ 200 µm | ≤ 80 µm |
| Dimensional Accuracy | Caliper deviation (mm) | ±0.2 mm | ±0.05 mm |
| Layer Adhesion | Peel test or visual delamination | No major gaps | No delamination |
| Material Usage | Cura’s filament consumption (g) | ≤ 80 % of baseline | ≤ 120 % of baseline |
Plotting these metrics on a radar chart helps you quickly see where a profile excels or falls short. Over time, you’ll develop a personal “sweet spot” that balances speed and quality for your specific printer and filament.
Reference: The 3D Printing Industry report on “Print Quality Metrics” outlines industry-standard tolerances for functional vs. aesthetic prints [source].
Real-World Use Cases
A. Rapid Prototyping for Mechanical Parts
Goal: Validate fit and function within 2 hours.
Profile: Start with Rapid-Proto, enable Adaptive Layers, and set Wall Speed to 45 mm/s.
Result: 45 % time reduction vs. a pure high-detail profile, with wall roughness acceptable for functional testing.
B. High-Detail Miniatures for Tabletop Gaming
Goal: Capture intricate sculpted details, no visible layer lines.
Profile: Use Fine-Finish, add Spiralize for vases, and keep Infill at 30 % Gyroid for strength.
Result: Surface finish < 80 µm roughness, perfect for painting, albeit 3× longer print time.
C. Small-Batch Production of Custom Phone Cases
Goal: Balance aesthetic surface with reasonable throughput (≤ 30 min per case).
Profile: Hybrid: Layer Height 0.15 mm, Print Speed 70 mm/s, Variable Speed (walls 45 mm/s, infill 100 mm/s).
Result: 20 % faster than pure quality profile, surface smooth enough for post-process sanding.
Integrating Cura Profiles into an Automated Workflow
For teams that print dozens of parts daily, manual profile selection becomes a bottleneck. Tools like n8n (an open-source workflow automation platform) can pull a part’s metadata from a PLM system, decide whether the part is “prototype” or “final-part,” and automatically apply the appropriate Cura profile before slicing.
Example n8n workflow:
- Trigger: New STL uploaded to a shared folder (e.g., via WebDAV).
- Function Node: Parse filename tags (`_proto`, `_final`).
- HTTP Request Node: Call CuraEngine CLI with
-sflags to load either Rapid-Proto.json or Fine-Finish.json. - Save G-code to printer queue.
By automating profile selection, you eliminate human error and guarantee consistent speed-quality decisions across the entire production line.
Read more: Our guide on Cura vs. Orca Slicer – Which Is Faster? explains how different slicers handle batch processing and can be integrated into similar workflows.
Common Pitfalls & How to Fix Them
| Symptom | Likely Cause | Fix |
|---|---|---|
| Ghosting / Ringing | Too high acceleration or jerk | Lower X/Y acceleration to ≤ 1200 mm/s², enable “Combing Mode – Within Infill”. |
| Stringing on fast prints | Insufficient retraction speed | Increase retraction speed to 35–45 mm/s and enable “Combing Mode – Not in Skin”. |
| Layer Separation | High print speed + low temperature | Raise nozzle temperature by 5 °C, reduce speed by 10 %. |
| Blobs/Zits | Coasting too aggressive | Set coasting to 0 mm or use “Linear Advance”. |
| Under-extrusion | Too fast extrusion flow | Decrease Print Speed or increase Flow Rate by 2–3 %. |
For an exhaustive list of hidden Cura tweaks, see our article on Hidden Cura Features – Top 10.
Quick Reference Cheat Sheet
| Setting | Speed Profile | Quality Profile |
|---|---|---|
| Layer Height | 0.30 mm | 0.08 mm |
| Print Speed | 100 mm/s | 40 mm/s |
| Travel Speed | 180 mm/s | 100 mm/s |
| Acceleration | 2500 mm/s² | 800 mm/s² |
| Wall Speed | 45 mm/s | 30 mm/s |
| Infill Pattern | Grid 15 % | Gyroid 30 % |
| Retraction | 3 mm @ 25 mm/s | 5 mm @ 45 mm/s |
| Z Hop | Off | 0.2 mm |
| Adaptive Layers | Off | On (0.12–0.30 mm) |
| Variable Speed | Off | On (walls slower) |
Copy-paste these values into Cura’s Custom settings tab and hit Slice—you’re ready to print.
How CuraSlicers.com Supports Your Journey
At CuraSlicers.com, we’ve distilled years of trial-and-error into downloadable profile templates, step-by-step tutorials, and community-tested tips. Our Ultimate Cura Profile Settings article walks you through creating a master profile that you can branch into speed or quality variants with a single click.
If you’re using an Ender 3 V3, our Best Cura Settings for Ender-3 V3 to Improve First-Layer Adhesion guide ensures your prints stick, which is especially critical when you push speeds higher.
Call to Action
Ready to experiment with custom print profiles that give you the speed you need and the quality you expect?
- Download our free Rapid-Proto and Fine-Finish profiles from the resources section below.
- Try the calibration cube test and record your metrics.
- Join the conversation on our Discord or Twitter for real-time feedback from fellow makers.
Explore more: Check out our article on Cura vs. PrusaSlicer – 2025 Comparison to see how other slicers handle speed-quality trade-offs.
Subscribe to our newsletter for monthly deep-dives into slicing science, workflow automation, and exclusive profile packs.
Visit our homepage https://curaslicers.com for the latest tutorials, downloadable settings, and a vibrant community that’s as passionate about 3D printing as you are.
References
- MatterHackers – 3D Printing Speed vs Quality (2023)
- Ultimaker – Cura Profiles – Understanding Layer Height (official docs)
- 3D Printing Industry – Print Quality Metrics Report 2023-2024
- Creality – Official Filament Guide (temperature recommendations)
Happy slicing, and may your prints be both fast and flawless!