Mastering Cura’s Support Blocker for Delicate Prints
How to Use Cura’s Support Blocker and Custom Support Structures for Delicate Prints
Estimated reading time: 7 minutes
- Learn to efficiently manage supports in Cura.
- Discover the benefits of support blockers and custom structures.
- Follow a step-by-step guide for improved 3D printing outcomes.
- Explore tips to reduce scarring on delicate prints.
Table of Contents
- The Importance of Effective Support Structures
- Why Use Support Blockers?
- Step-by-Step Guide to Using Cura’s Support Blocker
- Designing Custom Supports
- Use Cases: When Automatic Supports Fail
- Tips for Reducing Scarring on Prints
- Resources for Further Learning
- Conclusion
- FAQ
The Importance of Effective Support Structures
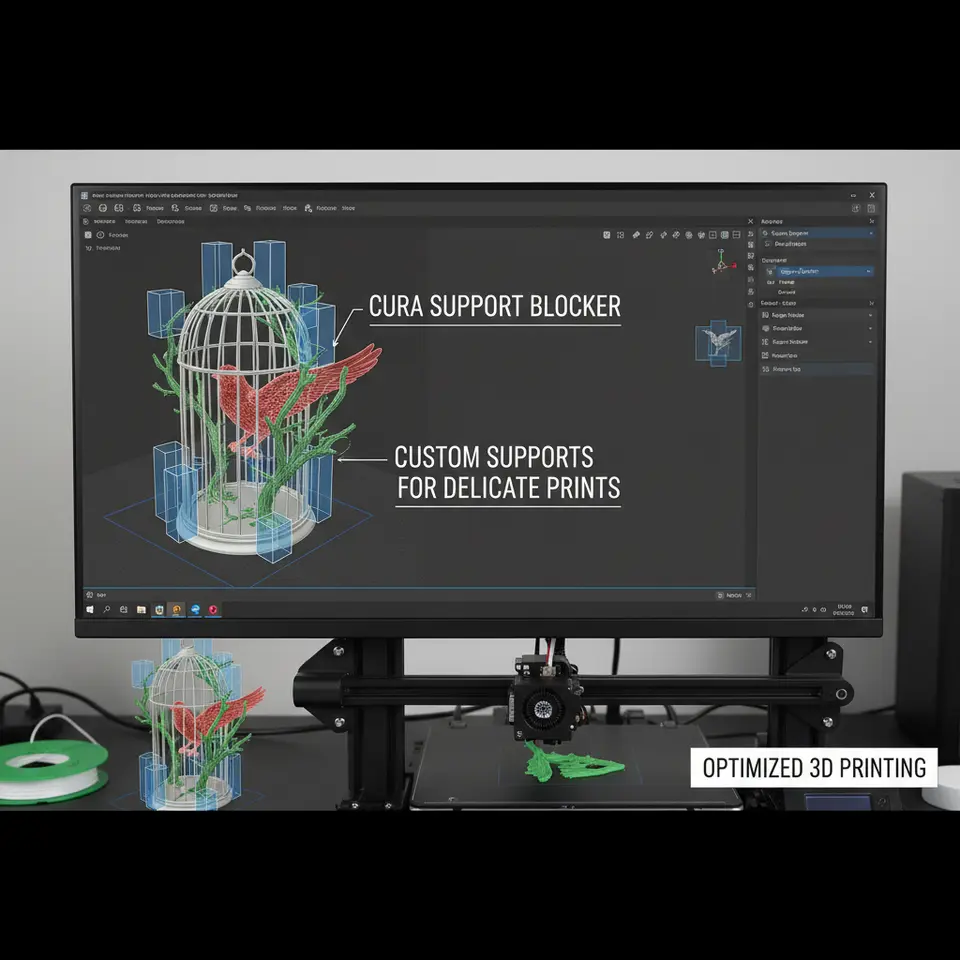
When printing intricate and delicate pieces, supports become essential for preventing sagging or collapsing during the printing process. However, utilizing automatic supports can often lead to unwanted scarring on your model’s surface or may fail to provide adequate support altogether. This is precisely where Cura’s support blocker and custom support structures shine, allowing you to selectively manage how supports interact with your model.
Why Use Support Blockers?
Support blockers are mesh objects that we can place in the slicing software to define regions where we want to prevent automatic support generation. They allow for greater customization and control over the entire printing process, ensuring that only the necessary supports are applied to the parts of your print that require them. This flexibility not only enhances print quality but also greatly reduces cleanup time post-printing.
Step-by-Step Guide to Using Cura’s Support Blocker
Step 1: Preparing Your Model
Before you dive into using the support blocker, you need an STL file of the model you wish to print. Ensure your model is clean and correctly oriented in Cura. For our demonstration, let’s assume we are working with a delicate sculpture that has overhangs.
Step 2: Adding a Support Blocker
- Open Cura: Launch Ultimaker Cura on your device and load your 3D model.
- Activate Support Blocker: Go to the sidebar menu and look for the “Support Blocker” option, typically found under the “Mesh Tools” section.
- Position the Blocker: Click and drag to create a support blocker mesh over the areas of your model where you want to avoid automatic support placement. You can resize and rotate these blockers to fit perfectly over your delicate regions.
Practical Tip: You can experiment with the placement to see how it affects the support generation by toggling the preview feature within Cura. This allows you to assess potential support contact points.
Step 3: Customizing the Support Blocker
Once you have positioned your blockers, you can adjust several settings:
- Z-Offset: Adjust how far down into your model the blocker will penetrate. This is useful for ensuring finer detailed areas remain untouched by support.
- Dimensions: Change the size of your blocker mesh as needed to cover larger or more intricate surfaces.
Step 4: Slicing the Model
With your support blockers now in place, it’s time to slice your model. Click on the ‘Slice’ button in Cura, and watch how the software generates the support structures only where you’ve indicated, leaving your delicate features free from unwanted support scarring.
Step 5: Review the Slice Preview
Always double-check the slice preview before printing to ensure your blockers were effective. Use this opportunity to confirm that your supports are placed correctly and adjust the blockers if necessary.
Designing Custom Supports
At times, the default support structures provided by Cura may not meet the unique needs of your model, leading to the next step: designing custom supports.
Why Custom Supports?
Custom supports can be tailored specifically to the unique contours of your model, particularly useful for highly detailed or fragile prints. By using custom meshes, you can minimize material usage and reduce the need for extensive post-processing.
How to Create Custom Supports
- Create a Mesh: Using 3D modeling software (like Tinkercad), create a mesh that will act as a custom support. This is often done by modeling a simplistic shape that provides the necessary lift without obstructing the model’s aesthetics.
- Import the Mesh to Cura: After designing your custom supports, export them as an STL file and import them into Cura, placing them in areas where additional support is needed.
- Adjust Settings: In Cura, you can modify specific settings for your custom support, such as layer height and infill percentages, to find the ideal balance for lightweight but effective support.
Using Example STL Files and Settings
To assist users better in applying these techniques, we at CuraSlicers.com often provide example STL files and recommended settings. You can find our example files by contacting us directly or browsing our library of useful resources tailored to common printing challenges.
Use Cases: When Automatic Supports Fail
Consider these typical scenarios where automatic supports may fall short:
- Intricate Overhangs: Automatic supports may fail to adequately support detailed parts of your design, resulting in drooping features. Custom supports ensure every aspect of your model is preserved.
- Fragile Features: If your model includes fragile arms or thin parts, leaving these areas free from harsh automatic supports can significantly improve your overall print quality.
For reference on effective support settings, check our article on Effective Cura Support Settings for insights.
Tips for Reducing Scarring on Prints
- Choose the Right Support Type: In Cura, you can select different support types based on your model’s needs, such as grid or tree supports.
- Optimize Layer Height: Using a lower layer height can mitigate scarring as layers are more closely aligned to the model’s contours.
- Post-Processing Techniques: Learn about sandpaper, solvent smoothing, or other techniques to further refine your printed parts post-printing.
Resources for Further Learning
To enhance your understanding of layer height adjustments, or if you wish to troubleshoot print quality issues, you can check out our Cura Layer Height and Speed Optimization Guide.
Conclusion
Cura’s support blocker and custom support features are indispensable tools in the arsenal of any serious 3D printing enthusiast or professional. By mastering these techniques, you can significantly improve the quality of your prints, especially delicate models that demand precision.
For more tutorials, guides, and resources on optimizing your 3D printing workflow, be sure to explore CuraSlicers.com. Don’t forget to subscribe to our newsletter and follow us on social media for the latest updates in 3D printing technology!
By leveraging these advanced features, you’ll unlock the potential of your 3D printed designs while minimizing the pitfalls of using standard automatic supports. Happy printing!
FAQ
What are support blockers in Cura?
Support blockers are mesh objects used in Cura to selectively prevent the generation of automatic supports in specified areas of your model, providing enhanced control over support structures.
How do I add a custom support structure?
You can create a custom support structure using 3D modeling software and then import it into Cura as an STL file, adjusting its position and settings for effective support.
What tips can help reduce scarring from supports?
Choosing the right support type, optimizing layer height, and utilizing post-processing techniques can all help minimize scarring on your delicate 3D prints.