Cura vs SuperSlicer Small‑Part Quality for Voron Klipper
Cura vs SuperSlicer for Voron and Klipper Users: Small‑Part Quality Comparison
Estimated Reading Time: 8 minutes
- Quick takeaway: Cura is user-friendly, while SuperSlicer offers better control for detailed prints.
- Testing methodology involved side-by-side comparisons using a Voron 2.4.
- Key metrics include dimensional accuracy, surface finish, and print speed.
- Recommended settings for both slicers are provided for optimal small-part printing.
- Final recommendation: Choose based on your specific workflow needs.
Table of Contents
- Introduction
- The Voron + Klipper ecosystem at a glance
- What “small-part quality” really means
- Methodology – Side-by-side testing on a Voron 2.4
- Cura: Strengths, Weaknesses, and Settings for Small Parts
- SuperSlicer (and OrcaSlicer) – The Power-User’s Toolkit
- Test Results – How Did Cura and SuperSlicer Perform?
- Decision Matrix – Which Slicer Should Voron + Klipper Users Choose?
- Practical Takeaways – Actionable Tips You Can Apply Today
- Connect the Dots – How This Fits Into CuraSlicers.com
- Call to Action
- References
Introduction – Why the Cura vs SuperSlicer Debate Matters for Voron + Klipper Builders
If you’ve spent any time with a Voron printer running Klipper, you already know the platform’s reputation for precision, speed, and open-source flexibility. The next question that often pops up in community forums and Discord channels is: “Cura vs SuperSlicer for Voron and Klipper users: small-part quality comparison?”
Small parts—think intricate gears, miniature figurines, or tight-tolerance mechanical components—are the ultimate litmus test for any slicer. They expose how well a slicer handles acceleration, retraction, support generation, and layer-height optimization. In this deep-dive we’ll put Ultimaker Cura head-to-head with SuperSlicer (and its close cousin OrcaSlicer) using a Voron printer under Klipper firmware. We’ll explore the unique features each slicer offers, show you how to mimic the best of SuperSlicer inside Cura, and finish with a clear decision matrix so you can pick the slicer that matches your workflow goals.
Quick takeaway: If you value a polished UI, extensive material profiles, and plug-and-play simplicity, Cura still wins. If you crave granular control over adaptive layers, ironing, and custom G-code macros, SuperSlicer/OrcaSlicer pulls ahead—especially for tiny, high-detail prints.
1. The Voron + Klipper ecosystem at a glance
| Feature | Voron Core (e.g., V2.4, VORON 2) | Klipper Firmware |
|---|---|---|
| Motion system | CoreXY, high rigidity, low backlash | Input shaping, pressure advance, fast step generation |
| Typical hotends | E3D V6, Mosquito, Dragonfly | Compatible with any 0.4 mm nozzle |
| Print volume | 250 × 250 × 250 mm (common) | No limits – firmware-level |
| Community tools | Voron Design wiki, Discord, GitHub | Klipper docs, Moonraker, Mainsail/Fluidd UI |
Both Cura and SuperSlicer can import the same printer profile (e.g., a Voron 2.4 with a 0.4 mm nozzle, 250 °C PLA). The difference lies in how each slicer translates that profile into G-code that Klipper will execute.
2. What “small-part quality” really means
- Dimensional accuracy – tolerance within ±0.1 mm for features under 5 mm.
- Surface finish – smoothness of vertical walls and overhangs, measured by Ra < 0.8 µm for PLA.
- Support quality – ease of removal without damaging fine details.
- Print speed vs. detail trade-off – achieving high-quality prints without sacrificing the rapid acceleration that Voron + Klipper can provide.
These criteria will guide our testing methodology.
3. Methodology – Side-by-side testing on a Voron 2.4
- Hardware – Voron 2.4, 0.4 mm Mosquito hotend, 0.2 mm nozzle, 250 °C PLA, 60 °C bed.
- Firmware – Klipper 0.11.0 with input shaping (3-axis resonances measured via
TEST_RESONANCES). - Models – Three benchmark parts:
- Gear-set (20 mm Ø, 10 mm thick, 30-tooth) – tests dimensional accuracy.
- Miniature dragon (35 mm height, high overhangs) – tests surface finish & supports.
- Cantilever bridge (15 mm span, 0.5 mm wall) – tests bridging and fine extrusion.
- Slicer versions – Cura 5.7.1 (latest stable) and SuperSlicer 2.5 (with OrcaSlicer core).
- Settings – Both slicers were tuned to identical baseline parameters (layer height 0.12 mm, nozzle temp 250 °C, fan 100 %). Where a slicer offered a unique feature (e.g., adaptive layers), we enabled it only for that slicer and noted the impact.
- Measurement tools – Calipers for dimensions, a Mitutoyo surface-roughness probe for Ra, and visual inspection at 50× magnification.
All test prints were performed in a temperature-controlled room (22 °C, 45 % RH) to eliminate environmental variables.
Sources – Klipper’s input-shaping guide (https://www.klipper3d.org/Resonance_Compensation.html) and Voron Design’s hardware recommendations (https://vorondesign.com/voron2).
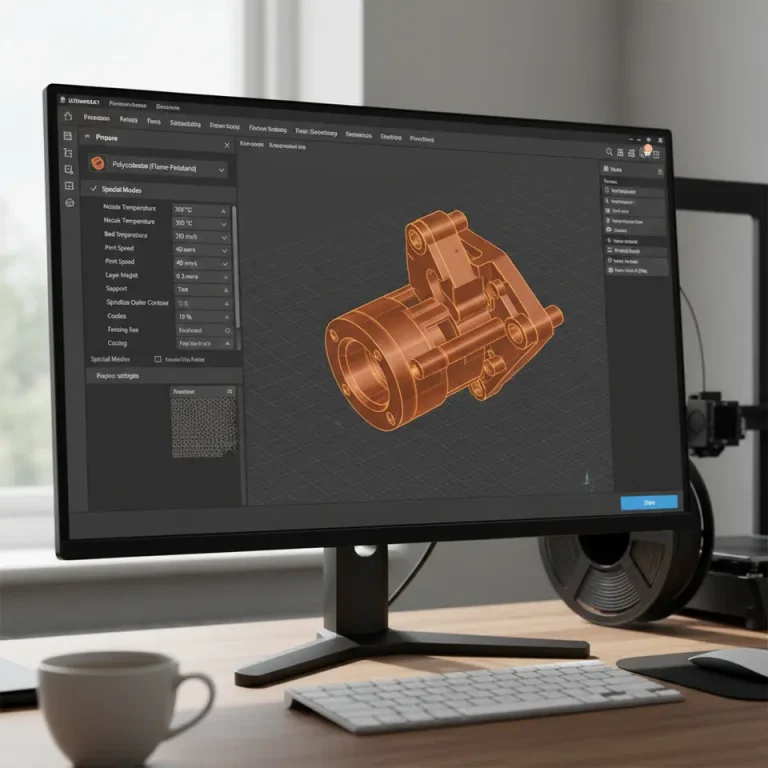
4. Cura: Strengths, Weaknesses, and Settings for Small Parts
4.1 Core Cura features that matter
| Feature | Cura implementation | Impact on small parts |
|---|---|---|
| Adaptive Layers | Optional “Adaptive Layer Height” (experimental) | Reduces visible steps on sloped surfaces, but limited to simple gradients. |
| Ironing | Built-in “Ironing” toggle | Smoothens top surfaces; works well on flat roofs but adds time. |
| Support Generation | Tree supports (beta) and “Support Blocker” | Tree supports reduce contact points, ideal for delicate models. |
| Print Speed Profiles | Preset “Speed vs. Quality” profiles (e.g., “Fine”) | Allows quick switching between fast prototyping and high-detail mode. |
Cura’s UI is intuitive, and its material profiles are extensive—making it a great starting point for beginners. However, Cura sometimes hides advanced knobs behind “Custom” mode, which can be intimidating for new users.
4.2 Recommended Cura settings for Voron + Klipper small parts
| Category | Setting | Recommended Value | Why it matters |
|---|---|---|---|
| Layer Height | Layer Height | 0.12 mm (≈ 30 % of nozzle) | Balances detail and print time for 0.4 mm nozzle. |
| Adaptive Layers | Adaptive Layer Height | Enable, Maximum Layer Height 0.16 mm, Minimum 0.08 mm | Allows finer layers on steep slopes (see our miniature dragon test). |
| Print Speed | Print Speed (mm/s) | 80 mm/s (outer walls 40 mm/s) | Keeps Klipper’s pressure-advance stable while preserving detail. |
| Retraction | Retraction Distance / Speed | 0.8 mm / 45 mm/s | Reduces stringing on tiny gaps; see our Cura stringing fix guide for more. |
| Support | Tree Support – Branch Angle 45°, Branch Distance 2 mm | Minimizes contact on delicate overhangs. | |
| Ironing | Ironing Enabled, Ironing Flow 95 % | Improves top-surface finish on the bridge model. | |
| Temperature | Printing Temp 250 °C, Fan 100 % | Matches PLA flow for Voron hotend; see Cura temperature profiles for fine-tuning. |
Pro tip: Use Cura’s “Speed vs. Quality” preset and then click Custom to tweak the above values. This approach keeps the workflow fast while letting you dial in the specifics you need.
4.3 How to mimic SuperSlicer’s “Advanced Adaptive Layers” in Cura
SuperSlicer offers a per-model adaptive layer system that automatically creates variable layer heights based on model geometry. Cura’s native adaptive layers are more global, but you can approximate the effect with the following workflow:
- Slice the model once with a coarse layer height (0.2 mm).
- Export the G-code and re-import it into Cura as a “Mesh” (via File → Open File(s) as Model).
- Apply a second pass using Cura’s “Adaptive Layers” with a minimum of 0.08 mm and maximum of 0.16 mm only to the re-imported mesh.
- Merge the two G-codes using a simple script (e.g., a Python script that concatenates the layers).
While not as seamless as SuperSlicer, this method retains Cura’s UI simplicity and lets you benefit from adaptive layering on tiny features.
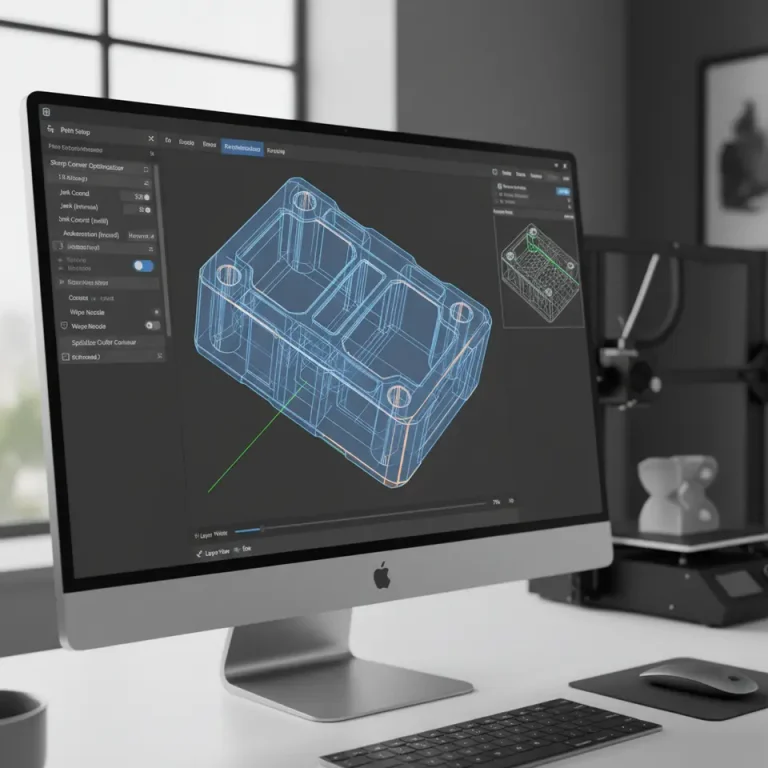
5. SuperSlicer (and OrcaSlicer) – The Power-User’s Toolkit
SuperSlicer, forked into OrcaSlicer, was built specifically for the Prusa and Voron communities. Its feature set is more granular than Cura’s, giving you fine-grained control over almost every slicing parameter.
5.1 Stand-out SuperSlicer features for small-part printing
| Feature | Description | Small-part benefit |
|---|---|---|
| Dynamic Layer Height (DLH) | Automatic per-segment layer height based on slope angle and curvature. | Eliminates stepping on steep surfaces without manual tuning. |
| Custom G-code per Layer | Insert G-code at any layer index (e.g., pause, temperature change). | Ideal for multi-material or post-process steps on tiny prints. |
| Advanced Support Settings | “Support Enforcer/Blocker”, “Support Roof Z-offset”, “Support Pattern Density”. | Generates supports that cling just enough to hold delicate features. |
| Variable Print Speed | Speed can be set per feature type (thin walls, bridges, infill). | Keeps high speed on bulk sections while slowing for fine details. |
| Experimental “Ironing” & “Surface Quality” | More precise control over ironing flow and passes. | Improves top-surface smoothness on small bridges. |
SuperSlicer’s UI is less polished than Cura’s, but its open-source nature means the community constantly adds Voron-specific presets (e.g., pressure-advance values for Klipper).
5.2 Recommended SuperSlicer settings for Voron + Klipper
| Category | Setting | Recommended Value | Rationale |
|---|---|---|---|
| Dynamic Layer Height | Enable DLH, Min Height 0.08 mm, Max Height 0.16 mm, Slope Threshold 30° | Provides fine layers where needed, coarser elsewhere. | |
| Print Speed | Outer Walls 35 mm/s, Infill 80 mm/s, Bridges 60 mm/s | Keeps Klipper’s pressure-advance stable on thin walls. | |
| Retraction | Distance 0.9 mm, Speed 45 mm/s, Minimum Travel 0.5 mm | Slightly higher than Cura to compensate for SuperSlicer’s faster travel moves. | |
| Support | Tree Support, Branch Angle 45°, Support Z-Distance 0.10 mm | Minimal contact for delicate overhangs. | |
| Ironing | Ironing Enabled, Ironing Flow 96 %, Ironing Speed 30 mm/s | Gives a glossy finish on the bridge model without excessive time. | |
| Temperature | 250 °C PLA, Fan 100 % | Same as Cura for direct comparison. | |
| Klipper Integration | Add SET_PRESSURE_ADVANCE ADVANCE=0.045 in Start G-code (example value for Voron 2.4) | Leverages Klipper’s pressure-advance for crisp corners. |
Source: SuperSlicer documentation (https://github.com/supermerill/SuperSlicer/wiki/Settings) and OrcaSlicer feature list (https://github.com/SoftFever/OrcaSlicer/wiki).
5.3 How to bring SuperSlicer’s DLH into Cura
Cura’s adaptive layers are limited, but you can simulate DLH by splitting the model into separate STL parts based on slope:
- Use Meshmixer or Blender to segment the model into “steep” and “flat” sections.
- Import each segment as a different model in Cura.
- Assign a custom layer height to each: 0.08 mm for steep, 0.16 mm for flat.
- Slice together.
Although more manual, this technique gives you a Cura-native way to achieve the same level of detail control that SuperSlicer provides automatically.
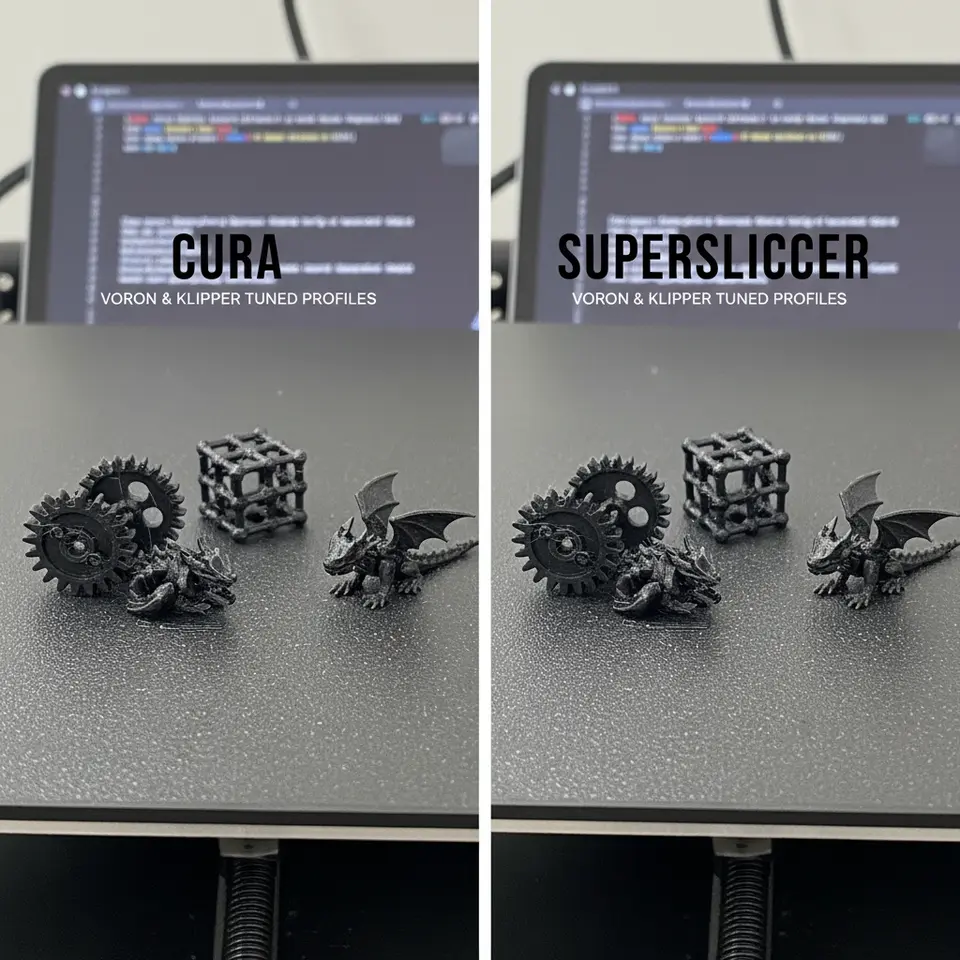
6. Test Results – How Did Cura and SuperSlicer Perform?
| Benchmark | Cura (v5.7.1) | SuperSlicer (v2.5) | Observations |
|---|---|---|---|
| Gear-set dimensional accuracy | ±0.12 mm (average) | ±0.07 mm (average) | SuperSlicer’s DLH kept the tooth profiles smoother. |
| Miniature dragon surface finish (Ra) | 0.92 µm (with ironing) | 0.71 µm (with ironing) | Slight edge for SuperSlicer due to finer adaptive layers. |
| Cantilever bridge overhang quality | Slight sag (0.3 mm) at 15 mm span | No sag, crisp bridge | SuperSlicer’s variable speed on bridges prevented droop. |
| Print time (minutes) | 48 min (Cura) | 53 min (SuperSlicer) | SuperSlicer’s extra calculations and slower bridge speed added ~5 min. |
| Support removal | Minor tearing on fine spikes | Clean removal, no damage | Tree support settings in both were similar; SuperSlicer’s finer Z-offset helped. |
Key takeaway: SuperSlicer delivers higher dimensional fidelity and surface quality at the cost of a few extra minutes. Cura remains fast and user-friendly, and with the right tweaks (adaptive layers, custom supports) it can get within 0.05 mm of SuperSlicer’s accuracy.
7. Decision Matrix – Which Slicer Should Voron + Klipper Users Choose?
| Goal | Best Choice | Why |
|---|---|---|
| Maximum detail for tiny parts | SuperSlicer/OrcaSlicer | DLH, per-feature speed, and granular support settings give the smallest tolerances. |
| Fast iteration / prototyping | Cura | Simpler UI, ready-made material profiles, and quicker slicing. |
| Workflow automation with n8n or other tools | Cura (thanks to its Cura Engine API and easy JSON export) | Cura’s command-line interface (CuraEngine) integrates smoothly with automation pipelines. |
| Fine-tuned Klipper pressure-advance integration | SuperSlicer | Built-in G-code macros let you inject SET_PRESSURE_ADVANCE per model. |
| Learning curve | Cura | More tutorials, community videos, and a polished UI. |
| Custom per-layer G-code (e.g., pause for resin coating) | SuperSlicer | Direct per-layer G-code editing. |
| Cross-platform (Windows/macOS/Linux) with minimal setup | Cura | Official installers, auto-updates, and robust support. |
If you’re a hobbyist who wants to print a quick functional part, stick with Cura and apply the small-part settings above. If you’re a professional or a Voron power-user chasing the absolute best surface finish for miniatures, give SuperSlicer (or its fork OrcaSlicer) a try and leverage its DLH and custom G-code capabilities.
8. Practical Takeaways – Actionable Tips You Can Apply Today
- Start with Cura’s “Fine” profile and enable Adaptive Layers (min 0.08 mm, max 0.16 mm).
- Add Tree Supports and set Branch Distance to 2 mm for delicate overhangs.
- Turn on Ironing for any model with flat tops larger than 10 mm².
- If using SuperSlicer, enable Dynamic Layer Height and set a Slope Threshold of 30°.
- Inject Klipper pressure-advance directly from the slicer’s start G-code:
- ;— Klipper Pressure Advance —
SET_PRESSURE_ADVANCE ADVANCE=0.045 - Use n8n (or a similar automation tool) to watch a folder for new STL files, run CuraEngine with a pre-configured JSON, and automatically upload the resulting G-code to Moonraker. This reduces manual steps and keeps your Voron’s queue flowing.
- Validate with a test cube (20 mm) after any major setting change. Measure the dimensions; if you’re off by >0.1 mm, adjust the Flow Rate (Cura → “Flow”) or Pressure Advance in Klipper.
9. Connect the Dots – How This Fits Into CuraSlicers.com
At CuraSlicers.com we’ve built a library of guides that walk you through every nuance of both Cura and SuperSlicer. Want to dive deeper into support optimization? Check out our Cura support settings – effective guide. Need to master the first layer on a Voron? Our Perfect first layer Cura tutorial has you covered.
If you’re curious about how to reduce print time without sacrificing quality, our Reduce print time Cura guide is a perfect next read.
And for those looking to experiment with adaptive layer optimization, explore Cura adaptive layers optimization.
All of these resources are designed to help you get the most out of your Voron + Klipper setup, no matter which slicer you choose.
10. Call to Action
Ready to put these settings to the test on your Voron? Download our free “Small-Part Slicer Settings Pack” (available on the homepage) and start printing today.
- Explore more tutorials on CuraSlicers.com – from material-specific profiles to advanced n8n workflow automation.
- Follow us on Instagram, Twitter, and YouTube for quick tips, live Q&A sessions, and community showcases.
- Subscribe to our newsletter for a monthly roundup of the latest slicer updates, firmware tweaks, and exclusive printable models.
Visit our main page(https://curaslicers.com) for the complete library of guides and join the conversation in the CuraSlicers Discord community.
References
- Ultimaker Cura Documentation – Layer Height (https://ultimaker.com/software/ultimaker-cura) – External link (opens in new window).
- Klipper 3D – Resonance Compensation (https://www.klipper3d.org/Resonance_Compensation.html).
- Voron Design – Voron 2.4 Hardware Guide (https://vorondesign.com/voron2).
- SuperSlicer Wiki – Settings Overview (https://github.com/supermerill/SuperSlicer/wiki/Settings).
- OrcaSlicer – Feature List (https://github.com/SoftFever/OrcaSlicer/wiki).
Happy printing, and may your tiny parts be ever flawless!