Validating Cura Profiles with ISO-Style Test Prints
Estimated Reading Time: 7 minutes
Key Takeaways:
- Cura profiles must be validated using structured ISO-style test prints.
- ISO-style test prints help in assessing dimensional accuracy, surface finish, and mechanical properties.
- Documenting findings from print tests is essential for iterative improvements.
- Establishing a consistent testing routine enhances print quality and reliability.
- Using data-driven methods aids in making informed modifications to Cura profiles.
Table of Contents:
Understanding ISO-Style Test Prints
ISO (International Organization for Standardization) test prints are designed to evaluate specific attributes of a 3D print, ensuring consistency, reliability, and quality. These test prints help you identify areas of improvement in your 3D printing workflow, surface quality, dimensional accuracy, and overall print performance.
Engaging in ISO-style testing allows you to benchmark your prints against established standards. This process is not only vital for professionals aiming to produce high-quality prints but also beneficial for hobbyists seeking to enhance their skills and results. You can use different test prints, focusing on various aspects like:
- Dimensional accuracy: Ensuring printed models match the intended dimensions.
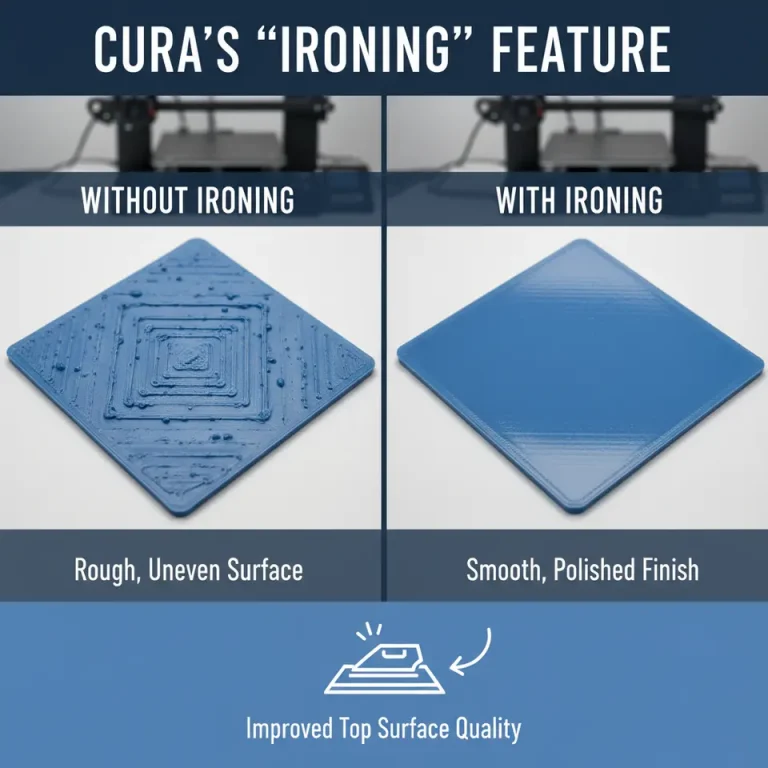
- Surface finish: Evaluating the aesthetic quality of your prints.
- Mechanical properties: Testing strength and durability.
Using these defined metrics enables you to create a thorough feedback loop regarding the performance of your Cura profiles.
Steps to Validate Cura Profiles Using ISO-Style Test Prints
1. Prepare Your Test Prints
To begin validating your Cura settings, first, you need a selection of ISO-style test prints. Popular options include models specifically designed to measure dimensional accuracy, overhang abilities, and surface roughness. Some commonly used test prints include:
- Calibration cubes: These allow for checking dimensional accuracy.
- Overhang test models: Essential to evaluate support settings.
- Bridge test prints: To assess bridging capabilities.
You can find various open-source models on platforms like Thingiverse or MyMiniFactory. Choose models tailored to specific aspects of your printing that you wish to evaluate.
2. Set Up Your Cura Profiles
Once you have your test prints selected, it’s time to set up your Cura profiles. If you’re not familiar with the settings involved, refer to our comprehensive guide on Cura Slicer Settings.
Here are some crucial settings to consider when creating your profiles:
- Layer Height: A common point of modification, smaller layer heights usually lead to finer detail.
- Printing Speed: Slower speeds can improve accuracy but increase print time.
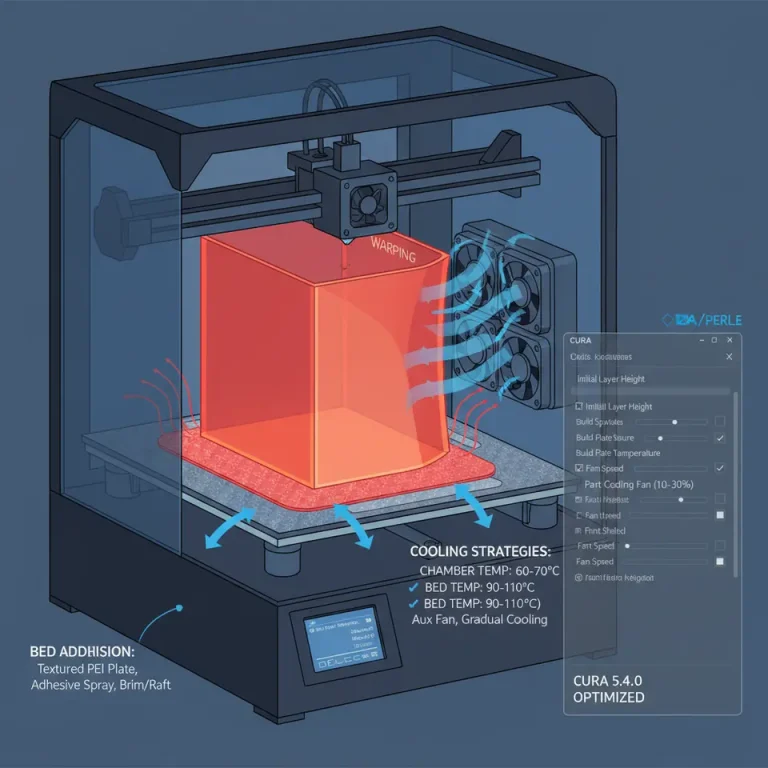
- Temperature Settings: Adjust based on the filament; for example, PLA generally prints well at 190-220°C.
- Support Structure: Choose between normal supports and tree supports based on the model.
3. Perform Print Tests
With your profiles established, it’s time to initiate your test prints. Print each model several times using different settings to attain a variety of results. This repetition helps establish consistency and allows you to compare performance across different profiles.
Make sure to document the settings you used and the outcomes of each print. This data will prove invaluable when determining which profiles yield the best performance.
Assessing Your Prints
After completing the prints, it’s time to analyze and evaluate the results. Here’s a structured approach to performing this assessment:
- Visual Inspection: Examine each print for visible defects, warping, or variations in surface quality.
- Measurement Verification: Use calipers or a ruler to measure the dimensions of your calibration cubes and other models to confirm accuracy.
- Strength Testing: For prints intended to bear weight, perform basic strength tests to assess their durability.
By establishing a grading or scoring system based on these criteria, you can more effectively compare the effectiveness of each profile and make data-driven decisions on improvements.
Documenting Findings and Iterating Profiles
After evaluating your test prints, it’s critical to document your findings. Keep a structured record detailing:
- Profiles used: Settings and modifications made.
- Visual and dimensional results: Insights gained from inspecting each print.
- Recommended changes: Adjustments for future prints based on the outcomes.
This habit promotes continuous improvement and refinements to your Cura profiles over time.
Benefits of Using ISO-Style Test Prints
Implementing ISO-style test prints in your workflow has numerous advantages:
- Enhanced Print Quality: You’ll develop a deeper understanding of how modifications affect print outcomes, leading to more reliable print quality.
- Data-Driven Decisions: Using structured tests provides concrete evidence that informs your adjustments to Cura profiles.
- Skill Development: By examining how different settings impact outcomes, you refine your 3D printing skills and knowledge base.
- Increased Consistency: Establishing a testing routine helps achieve repeatable results, vital for any serious printing endeavor.
Connecting to CuraSlicers.com Resources
At CuraSlicers.com, we are dedicated to improving your 3D printing experience. A great supplementary read can be found in our article on Cura Experimental Settings, which details advanced features that can enhance your profiles even further. Additionally, if you are looking to optimize small cosmetic prints, check out our guide on Optimizing Cura for Small Cosmetic Prints.
Conclusion
Validating Cura profiles using ISO-style test prints is a practical approach to establishing quality benchmarks in your 3D printing workflow. This structured QA method not only enhances the quality of your prints but also empowers you with knowledge and skills that can take your 3D printing projects to new heights.
If you want to learn more about mastering your 3D printing skills, visit our main page for a wealth of articles and resources. Don’t forget to follow CuraSlicers on social media for the latest updates and insights, and subscribe to our newsletter for future guides and tips!
This methodical approach to validation is especially important as the landscape of 3D printing evolves; incorporating structured testing into your workflow can set you apart from the competition.
Further Reading
To dive deeper into the world of 3D printing and access a wealth of resources, visit the official Ultimaker Cura documentation to explore their tips and tricks for getting the most out of your 3D printer.