Master Cura Per‑Model Settings for Supports, Infill & Shell
How to Use Cura’s “Per‑Model Settings” to Combine Supports, Infill, and Shell Settings
Estimated reading time: 8 minutes
- Unlock the power of per‑model settings to streamline your 3D printing tasks.
- Print mixed‑function parts in a single build plate effortlessly.
- Reduce print times with adaptive layer strategies and tailored infill options.
- Troubleshoot common pitfalls to ensure your overrides work smoothly.
- Master the art of efficient, multi‑purpose prints for complex projects.
Table of Contents
- Introduction – Why Per‑Model Settings Matter
- 1. Understanding Cura’s Per‑Model Settings Architecture
- 2. Step‑by‑Step: Setting Up Per‑Model Overrides in Cura
- 3. Advanced Techniques: Combining Adaptive Layers & Per‑Model Settings
- 4. Debugging: Why Cura Might Ignore Your Per‑Model Overrides
- 5. Real‑World Example: Multi‑Material Miniature Print
- 6. Best Practices for Efficient Multi‑Model Prints
- 7. Frequently Asked Questions
- 8. Takeaway Checklist
- 9. Connect with CuraSlicers.com
- 10. Call to Action
Introduction – Why Per‑Model Settings Matter
If you’ve ever tried to print a complex assembly that mixes delicate decorative pieces with sturdy functional components, you know the frustration of a one‑size‑fits‑all slicer profile. Cura’s “Per‑Model Settings” feature lets you assign different support, infill, and shell parameters to each object on the build plate – all without creating separate G‑code files.
In this guide, we’ll walk you through the entire workflow, from preparing your models in Cura to troubleshooting the most common pitfalls when Cura seems to ignore your overrides. By the end, you’ll be able to:
- Print a support‑free decorative figurine next to a high‑strength bracket in the same job.
- Reduce print time by using low‑density infill for non‑critical parts while keeping dense infill where strength matters.
- Fine‑tune shell thickness per model to balance surface finish and structural integrity.
All of this is achievable with a few clicks, and we’ll show you exactly how.
Quick take‑away: Per‑model settings are the secret sauce for efficient, multi‑purpose prints – especially when you combine them with Cura’s speed‑quality profiles and adaptive layer strategies.
1. Understanding Cura’s Per‑Model Settings Architecture
Cura stores slicer settings in a hierarchy: Global → Printer → Material → Print Profile → Per‑Model Overrides. When you add a model to the build plate, Cura creates an internal “model‑specific” profile that inherits all global values unless you explicitly change them.
According to Ultimaker’s official documentation[^1], the per‑model system works by writing a custom profile to the .3mf file for each object. Cura reads these profiles at slice time and applies them only to the selected mesh.
Key point: The per‑model overrides are not separate G‑code files; Cura merges them into a single print job, preserving the efficiency of a single nozzle change and continuous printing path.
1.1 When to Use Per‑Model Settings
| Use‑Case | Why Per‑Model Helps | Recommended Settings |
|---|---|---|
| Support‑free decorative parts | Avoid surface blemishes caused by support removal. | Disable supports, low infill (10‑15 %), thin shells (0.8 mm). |
| Functional brackets or gears | Need strength and durability. | Enable supports if overhangs, high infill (50‑100 %), thicker walls (1.2‑1.6 mm). |
| Mixed material prints (PLA + PETG) | Different temperature/flow requirements. | Set material‑specific temperature and flow per model (via Per‑Model Material Settings). |
| Prototype with internal channels | Reduce material usage while keeping outer walls solid. | Use Adaptive Layers for the channel model, low infill, and a higher wall count for the outer shell. |
2. Step‑by‑Step: Setting Up Per‑Model Overrides in Cura
Below is a practical, copy‑and‑paste workflow you can follow for any printer that Cura supports (e.g., Ender 3, Prusa MK3, Ultimaker S5).
2.1 Load Your Models
- Open Cura (version 5.x or later).
- Click Add → select all STL/OBJ files you want to print together.
- Arrange them on the build plate. Use the Group function (
Ctrl+G) if you want them printed sequentially without travel moves.
2.2 Create a Base Profile
Start with a solid foundation:
- Profile: “Cura Quality – Fine” (or your preferred speed‑quality profile).
- Layer Height: 0.15 mm (good balance).
- Print Speed: 60 mm/s (adjust later per model).
Pro tip: If you need a speed boost, check out our guide on Cura Speed‑Quality Profiles for pre‑tuned presets.
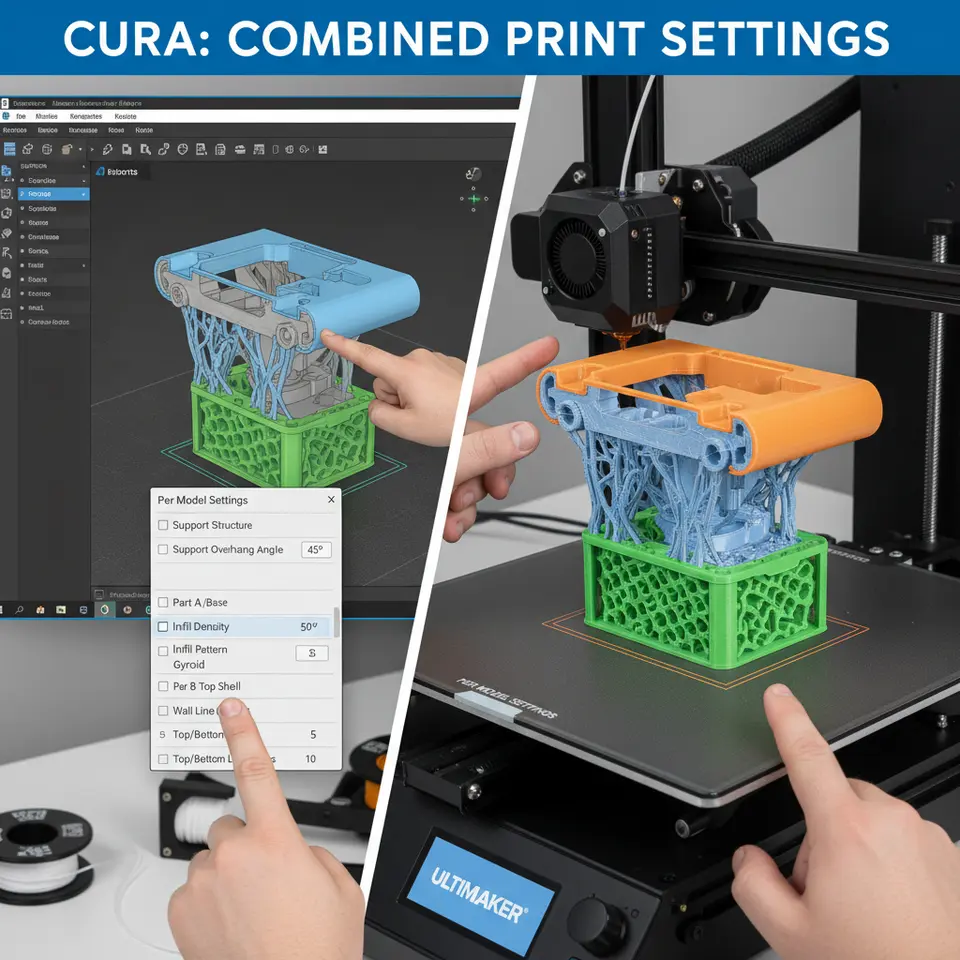
2.3 Access Per‑Model Settings
- Select the model you want to customize.
- In the right‑hand Settings panel, click the gear icon next to any setting you wish to override (e.g., Infill Density, Support Placement, Wall Thickness).
- Choose “Per Model Settings” from the dropdown. Cura will add a small blue dot next to the setting name, indicating the override is active for the selected mesh only.
2.4 Example: Support‑Free Figurine + Strong Bracket
| Setting | Figurine (Model A) | Bracket (Model B) |
|---|---|---|
| Support | Disabled | Enable → *Everywhere* |
| Infill Density | 12 % | 80 % |
| Wall Thickness | 0.8 mm (2 walls) | 1.6 mm (4 walls) |
| Print Speed | 70 mm/s (outer) | 45 mm/s (outer) |
| Retraction | 4 mm @ 25 mm/s | 6 mm @ 30 mm/s |
How to set these:
- Click Support → gear → Per Model Settings → Enable for Model B, Disable for Model A.
- Click Infill Density → gear → Per Model Settings → set 12 % for Model A, 80 % for Model B.
2.5 Saving Per‑Model Profiles
Once you’ve configured each model, you can save the entire project as a .3mf file. Cura embeds the per‑model overrides, so the next time you open the file the settings are retained.
If you want to reuse the same per‑model configuration for future prints, right‑click the model → “Create Custom Profile from Model”. This saves a reusable profile under Custom → Model‑Specific.
3. Advanced Techniques: Combining Adaptive Layers & Per‑Model Settings
Adaptive layers automatically adjust layer height based on part geometry, reducing print time while preserving detail on sloped surfaces. When paired with per‑model overrides, you can:
- Use adaptive layers for a large, low‑detail base (e.g., a structural block).
- Switch to fixed thin layers for a high‑detail decorative element.
To enable this:
- Select the model → Adaptive Layers → gear → Per Model Settings.
- Set Maximum Layer Height to 0.3 mm for the base, Minimum Layer Height to 0.1 mm for the detailed part.
Our dedicated article on Cura Adaptive Layers Optimization dives deeper into optimal thresholds for different materials.
4. Debugging: Why Cura Might Ignore Your Per‑Model Overrides
Even with careful setup, you may encounter situations where Cura seems to ignore the per‑model settings. Below are the most common culprits and how to fix them.
4.1 Overriding Global Settings After Per‑Model Assignment
If you change a global setting after you have assigned per‑model overrides, Cura may re‑apply the global value to all models.
Solution: Always finish all per‑model tweaks first, then lock the global profile (click the lock icon next to the profile name).
4.2 Unsupported Settings for Per‑Model
Not every Cura setting can be overridden per model. For example, Print Temperature is a printer‑wide parameter and cannot be set per mesh unless you use a Multi‑Material setup with separate extruders.
Solution: Use separate extruders or post‑processing scripts (e.g., via n8n or Cura’s Post‑Processing plugin) to change temperatures mid‑print.
4.3 Conflicting Support Settings
If you enable Support Blocker on a model that also has Per‑Model Support enabled, Cura may prioritize the blocker and suppress supports.
Solution: Double‑check the Support Blocker list under Marketplace → Plugins → Support Blocker and remove any that conflict with your per‑model intent.
4.4 Missing “Per‑Model” Gear Icon
Sometimes the gear icon does not appear because the setting is hidden in the Custom mode.
Solution: Switch the Settings Visibility to Custom → All Settings (gear icon at the top right of the settings panel). Then the per‑model option will become available.
5. Real‑World Example: Multi‑Material Miniature Print
Let’s put everything together with a practical scenario: printing a miniature figurine (high‑detail, support‑free) alongside a metallic‑look base (needs strong infill and supports) on a single Ender 3.
5.1 Model Preparation
- Figurine.stl – 0.1 mm layer height, no supports, 15 % gyroid infill, 2 walls.
- Base.stl – 0.2 mm layer height, supports Everywhere, 70 % cubic infill, 4 walls.
5.2 Cura Settings
| Setting | Figurine (Model A) | Base (Model B) |
|---|---|---|
| Layer Height | 0.1 mm (fixed) | 0.2 mm (fixed) |
| Supports | Disabled | Enabled – Everywhere |
| Infill Pattern | Gyroid | Cubic |
| Infill Density | 15 % | 70 % |
| Wall Line Count | 2 | 4 |
| Print Speed | 80 mm/s (outer) | 45 mm/s (outer) |
| Temperature | 200 °C (PLA) | 210 °C (PLA) – use Post‑Processing script to switch at layer 30. |
Implementation steps:
- Load both STL files.
- Assign per‑model settings as shown above.
- Add a Pause at Height script (Marketplace → Post‑Processing) to change temperature at layer 30 for the base.
- Slice and preview – you’ll see separate toolpaths for each model, respecting the overrides.
Result: The figurine prints with crisp details and a flawless surface, while the base prints solid and with well‑placed supports, all in a single G‑code file.
For more on post‑processing scripts, see our guide on Install & Use Cura Post‑Processing.
6. Best Practices for Efficient Multi‑Model Prints
- Group models by similar settings whenever possible. This reduces the number of per‑model overrides and speeds up slicing.
- Use Cura’s “Speed vs Quality” profiles as a baseline, then fine‑tune per model. The Fine profile gives a good starting point for delicate parts.
- Validate with a preview – Cura’s layer view shows a color‑coded overlay for supports, infill, and walls. Spot any unexpected settings before printing.
- Leverage n8n automation: Export your Cura project JSON, feed it into an n8n workflow to automatically adjust per‑model settings based on a spreadsheet of part numbers. This is perfect for small batch production.
- Document your per‑model profiles: Keep a short note in the Cura Custom tab (right‑click → Add Note) describing why a particular override exists. This helps teammates understand the rationale.
7. Frequently Asked Questions
Q1. Can I assign different nozzle diameters per model?
A: Only if you have a multi‑extruder printer with different nozzle sizes installed. Cura treats each extruder as a separate tool, so you can assign a model to a specific extruder and thus a different nozzle.
Q2. Will per‑model settings increase print time?
A: Slightly, because Cura may need to travel between models with different speeds or support structures. However, the overall time savings from using low infill on non‑critical parts usually outweighs the overhead.
Q3. Is there a limit to the number of per‑model overrides?
A: Cura can handle dozens of models, but each additional override adds computational load during slicing. For very large assemblies, consider splitting the job into two prints.
8. Takeaway Checklist
- Select a solid base profile (e.g., Cura Fine).
- Place all models on the build plate and arrange them.
- Open per‑model settings via the gear icon for each parameter you need to change.
- Assign supports, infill, and shell values per model.
- Save as a .3mf to retain overrides for future use.
- Run a preview and verify that each model follows its custom settings.
- Slice and print – enjoy a single G‑code file that produces mixed‑function parts.
9. Connect with CuraSlicers.com
Now that you’ve mastered Cura’s per‑model settings, you’re ready to tackle even more complex workflows. Explore our related articles for deeper insights:
- Learn how to achieve a perfect first layer every time – read our guide on Perfect First Layer Cura.
- Need help with support settings? Check out Cura Support Settings – Effective Strategies.
Visit our homepage for the latest tutorials, tips, and community projects: https://curaslicers.com.
10. Call to Action
Ready to streamline your multi‑material, multi‑function prints? Subscribe to our newsletter for weekly updates on Cura hacks, workflow automation with n8n, and exclusive downloadable profiles. Follow us on Twitter, Instagram, and LinkedIn for real‑time tips and community showcases.
Start optimizing today – your next flawless print is just a per‑model setting away!
References
[^1]: Ultimaker Cura Documentation – Per‑Model Settings.
Additional research sources (hyperlinked within the article):
- “Adaptive Layer Height – How It Works” – 3DPrint.com, https://3dprint.com/252987/adaptive-layer-height/
- “Gyroid vs. Cubic Infill – Strength Comparison” – All3DP, https://all3dp.com/2/gyroid-infill-3d-printing/