Step‑by‑Step Cura Slicer Setup for Any 3D Printer
How to Set Up Cura Slicer for Different 3D Printers – A Complete Step‑by‑Step Guide
Estimated reading time: 8 minutes
- Understand the importance of custom profiles for different 3D printers.
- Gather essential printer specifications and firmware info before setting up.
- Follow steps to create and fine-tune your Cura printer definition.
- Explore advanced tweaks for optimizing print speed and quality.
- Learn how to automate workflow using n8n for consistent slicing results.
Table of Contents
- Why Cura Needs a Custom Profile for Every Printer
- Gathering the Essentials: Printer Specs & Firmware Info
- Creating a New Printer Definition in Cura
- Fine‑Tuning Core Settings (Nozzle, Bed, Firmware)
- Material Profiles – From PLA to Nylon
- Advanced Slicer Tweaks for Speed & Quality
- Workflow Automation with n8n – One‑Click Profile Export
- Common Troubleshooting Scenarios
- Internal Resources to Deepen Your Knowledge
- Call to Action
Why Cura Needs a Custom Profile for Every Printer
Cura ships with generic machine presets (e.g., “Creality Ender‑3”) that work for most users, but each printer has subtle differences that affect slicing:
| Parameter | How it Influences the Print | Example |
|---|---|---|
| Build volume | Determines maximum printable dimensions and how Cura places supports. | Ender 3: 220 × 220 × 250 mm vs. Prusa Mini: 180 × 180 × 180 mm |
| Nozzle diameter | Controls extrusion width, line thickness, and minimum feature size. | 0.4 mm vs. 0.6 mm |
| Bed leveling method | Affects first‑layer height and adhesion strategies. | Manual vs. BLTouch (auto‑level) |
| Firmware type | Determines G‑code commands (e.g., M900 for Linear Advance). | Marlin vs. Klipper |
| Extruder count | Influences temperature control and retraction settings. | Single vs. dual extruder setups |
When Cura’s internal database doesn’t match your exact hardware, you’ll see over‑extrusion, poor first‑layer adhesion, or failed prints. A custom profile eliminates guesswork and gives you a reproducible baseline for every machine.
Source: Ultimaker’s official Cura documentation explains that “accurate printer definitions are the foundation of reliable slicing” (Ultimaker Cura Docs).
Gathering the Essentials: Printer Specs & Firmware Info
Before you open Cura, collect the following data from your printer’s manual or manufacturer website:
| Spec | Where to Find It |
|---|---|
| Build volume (X × Y × Z) | Technical specifications page |
| Nozzle diameter | Stock nozzle label or replacement kit |
| Maximum hot‑end temperature | Firmware or hardware limits |
| Bed material (glass, PEI, magnetic) | Printer description |
| Firmware version | LCD screen (M115 via terminal) |
| Extruder count | Physical inspection or spec sheet |
| Supported filament diameters | Usually 1.75 mm (most hobby printers) |
Tip: Keep a simple spreadsheet (or a note in n8n) with these values. When you switch to a new printer, you’ll only need to copy‑paste the numbers.
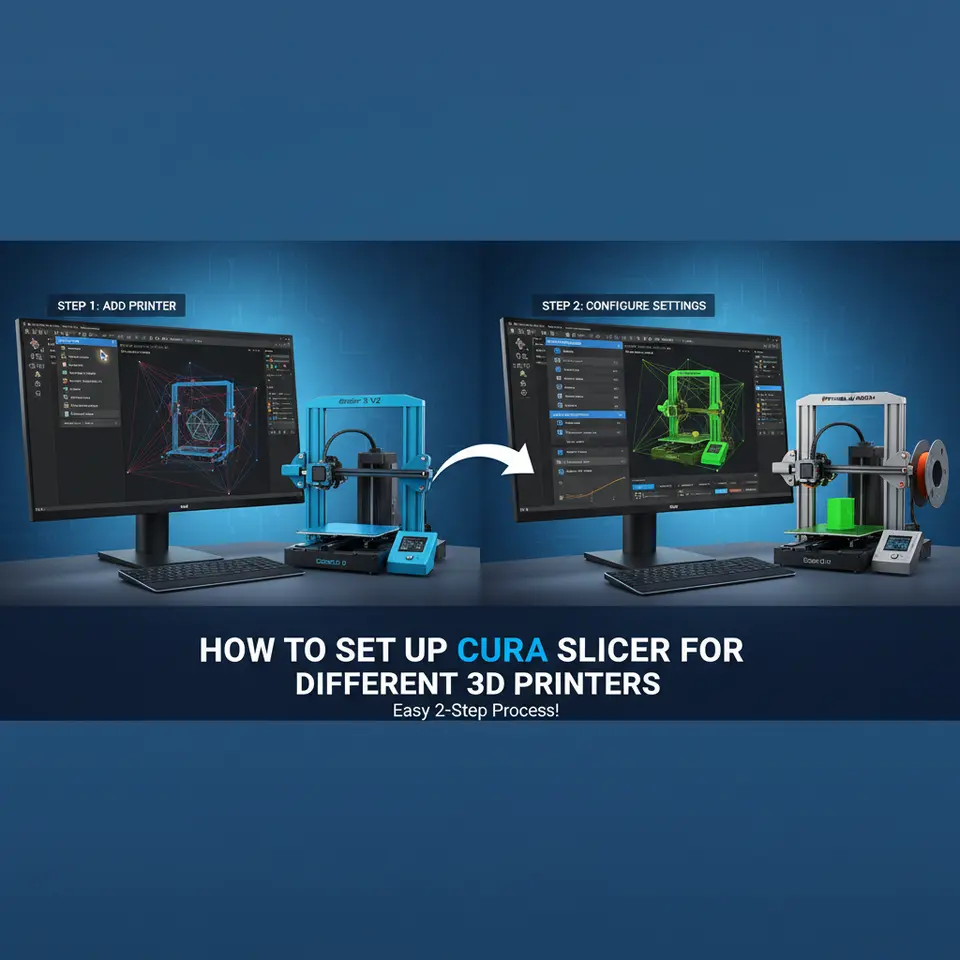
Creating a New Printer Definition in Cura
- Open Cura → Settings → Printer → Add Printer
- Choose “Custom” → “Custom FFF printer” and click Next.

- Name your printer – e.g., “Ender 3‑V2 (Custom)”. This name will appear in the printer dropdown.
- Enter Build Volume – Input the exact X, Y, Z dimensions you gathered earlier.
- Set Print Bed Shape – Most hobby printers use a rectangular bed; select “Rectangular”.
- Configure Origin – For most printers the origin is at the front‑left corner (0,0,0).
- Select Nozzle Size – Cura will ask for the default nozzle; enter your stock size (e.g., 0.4 mm).
- Set Maximum Print Height – This is the Z‑axis travel limit; often the same as build volume Z.
- Click “Finish” – Cura now creates a blank profile that you can edit.
Pro tip: If you have a dual‑extruder machine, add the second nozzle under “Extruder 2” and set its diameter separately.
Fine‑Tuning Core Settings (Nozzle, Bed, Firmware)
1. Nozzle Diameter & Line Width
Default line width is typically 0.8 × nozzle diameter. For a 0.4 mm nozzle, Cura suggests 0.32 mm. When to adjust:
- Fine details: Reduce line width to 0.75 × nozzle (0.30 mm).
- Fast prints: Increase to 1.2 × nozzle (0.48 mm) for stronger walls.
2. Bed Size & Origin
Verify that the “Print Bed Size” matches the physical bed. A mismatch can cause the model to be clipped.
For printers with auto‑level sensors, enable “Z‑offset” under *Machine Settings* → *Z‑offset* to compensate for the probe’s distance from the nozzle.
3. Firmware Compatibility
| Firmware | Cura Setting | Why It Matters |
|---|---|---|
| Marlin | G‑code flavor: Marlin | Uses M104, M109 for temperature control. |
| Klipper | G‑code flavor: Klipper | Requires M106 for fan speed; supports SET_PRESSURE_ADVANCE. |
| RepRapFirmware | G‑code flavor: RepRap (Duet) | Uses M207 for retraction. |
How to set: Settings → Printer → Machine Settings → G‑code flavor.
4. Retraction & Coasting
- Retraction distance: 5 mm (Bowden) vs. 1 mm (direct drive).
- Retraction speed: 40 mm/s (Bowden) or 25 mm/s (direct).
- Coasting: Enable at 0.2 mm for PLA to reduce oozing on the final layer.
5. First Layer Settings
- Layer height: 0.2 mm for standard 0.4 mm nozzle.
- Initial layer speed: 20 mm/s (slower improves adhesion).
- Initial layer temperature: +5 °C above normal (e.g., 210 °C for PLA).
Reference: Cura’s own guide on first‑layer optimization stresses the importance of a slower, hotter first layer for bed adhesion (Ultimaker Cura First‑Layer Guide).
Material Profiles – From PLA to Nylon
Cura ships with generic material presets, but fine‑tuning them for your specific printer yields better results.
| Material | Typical Nozzle Temp | Bed Temp | Print Speed | Recommended Settings |
|---|---|---|---|---|
| PLA | 200‑210 °C | 60 °C (glass) | 50‑60 mm/s | Retraction 5 mm / 40 mm/s |
| PETG | 235‑250 °C | 70‑80 °C | 40‑50 mm/s | Retraction 4 mm / 30 mm/s, enable Z‑hop |
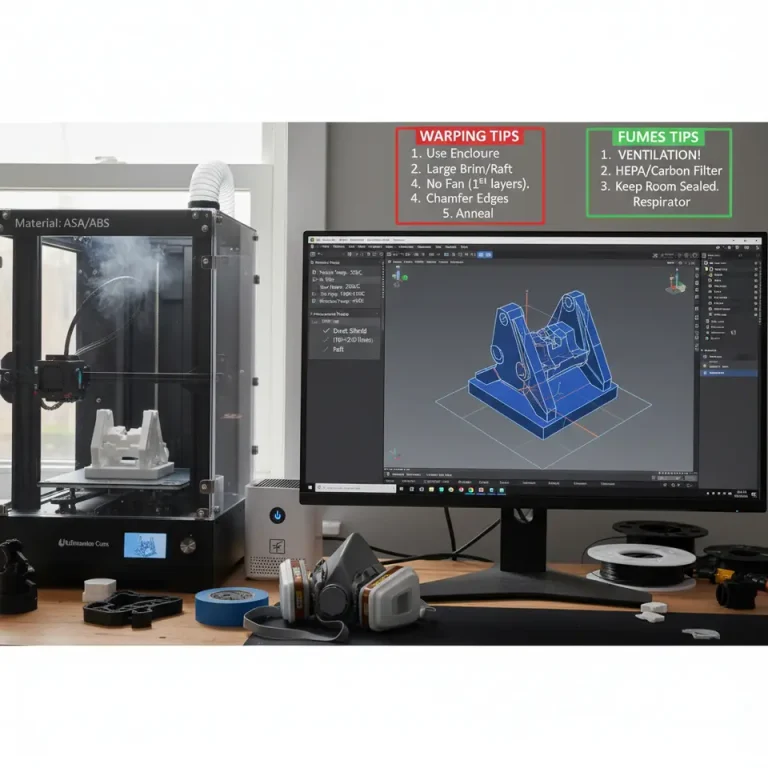
| ABS | 240‑260 °C | 100‑110 °C (enclosed) | 30‑45 mm/s | Use Brim or Raft, enable Cooling Fan 0% |
| Nylon | 250‑260 °C | 70‑80 °C (PEI) | 30‑40 mm/s | Increase Flow to 105 % for better layer bonding |
How to create a custom material profile:
- Settings → Material → Add Material.
- Fill in the temperature, speed, and flow values.
- Save as “PLA – Ender 3 Custom”.
Tip for multi‑material prints: Cura now supports “Material Overrides” – you can assign different temperatures per extruder without switching profiles.
Advanced Slicer Tweaks for Speed & Quality
1. Adaptive Layer Height
What it does: Varies layer height based on model geometry (thinner layers on sloped surfaces, thicker on flat sections).
How to enable: Print Settings → Experimental → Adaptive Layers → set Minimum 0.1 mm, Maximum 0.3 mm.
2. Support Settings
- Support Placement: “Everywhere” for complex overhangs, “Touching Buildplate” for easier removal.
- Support Density: 10‑15 % for PLA, 20 % for PETG.
- Support Z‑Distance: 0.2 mm (PLA) or 0.15 mm (PETG) to improve removal.
3. Print Speed Modifiers
- Wall Speed vs. Infill Speed: Reduce wall speed to 30 mm/s while keeping infill at 60 mm/s for stronger outer shells.
- Travel Speed: Increase to 150 mm/s to cut down stringing.
4. Cooling
- Fan Speed: 100 % after the first few layers for PLA; 50 % for PETG; off for ABS.
- Minimum Layer Time: 5 s to avoid overheating on tall prints.
5. Linear Advance (Marlin)
If your printer runs Marlin 2.0+, enable Linear Advance for smoother extrusion:
M900 K0.22 ; adjust K value per filament
Add the line to Start G‑code (Settings → Printer → Machine Settings).
Reference: Marlin’s Linear Advance documentation shows a typical K‑value of 0.22 for 1.75 mm PLA (Marlin Firmware – Linear Advance).
Workflow Automation with n8n – One‑Click Profile Export
Even the best slicer settings can be lost when you reinstall Cura or switch computers. Automate the backup and sharing process with n8n, an open‑source workflow automation tool.
Example Workflow: “Export Cura Profile to Google Drive”
- Trigger: Manual webhook (
/export-cura-profile). - Node 1 – Read File: Use the *Read Binary File* node to read
Cura/<printer_name>.jsonfrom the Cura configuration folder (%APPDATA%/cura/). - Node 2 – Google Drive Upload: Connect to Google Drive, create a folder named *Cura Profiles*, and upload the JSON file.
- Node 3 – Notify Slack: Send a message to your team channel with the download link.
Result: One click, and every team member has the exact same Cura profile ready to import (File → Open File → Import).
Why it matters: Consistency across multiple printers and locations eliminates “works on my machine” issues, especially for small production shops.
Common Troubleshooting Scenarios
| Symptom | Likely Cause | Fix in Cura |
|---|---|---|
| First layer squishes or detaches | Z‑offset too low/high, bed not level | Adjust *Z‑offset* under *Machine Settings*; enable *Initial Layer Height* 0.2 mm |
| Stringing | Retraction distance too low, cooling off | Increase *Retraction* to 6 mm (Bowden) and set *Fan Speed* to 100 % after layer 2 |
| Under‑extrusion | Flow < 100 %, clogged nozzle | Set *Flow* to 105 % for flexible filaments; clean nozzle |
| Layer shifting | Print speed too high for printer’s mechanics | Reduce *Print Speed* to ≤ 40 mm/s for heavy models; enable *Acceleration Control* |
| Blobs/Zits | Coasting disabled, pressure buildup | Enable *Coasting* (0.2 mm) and optionally *Linear Advance* |
Quick diagnostic checklist:
- Verify machine dimensions in Cura match the physical printer.
- Confirm nozzle size and filament diameter settings.
- Review Start/End G‑code for missing temperature commands.
- Run a test cube (20 mm) after each major change to isolate issues.
Internal Resources to Deepen Your Knowledge
- Best Cura Settings for Ender 3 – A Complete Guide – Dive deeper into printer‑specific tweaks for the popular Creality model.
- Optimizing Print Speed Without Sacrificing Quality – Learn how to balance wall speed, infill, and travel for faster prints.
Visit our main page (CuraSlicers.com) for a full library of tutorials, downloadable profiles, and community forums.
Call to Action
Ready to unleash the full potential of your 3‑D printer? Follow the steps above, export your custom profile with n8n, and start printing parts that look factory‑grade on the first try.
- Explore more: Check out our Best Cura Settings for Ender 3 guide for model‑specific secrets.
- Stay updated: Follow CuraSlicers on Twitter, Instagram, and LinkedIn for daily tips and new workflow automations.
- Never miss a post: Subscribe to our newsletter for exclusive printable files, advanced slicing scripts, and early access to upcoming tutorials.
Happy slicing, and may your prints be flawless!