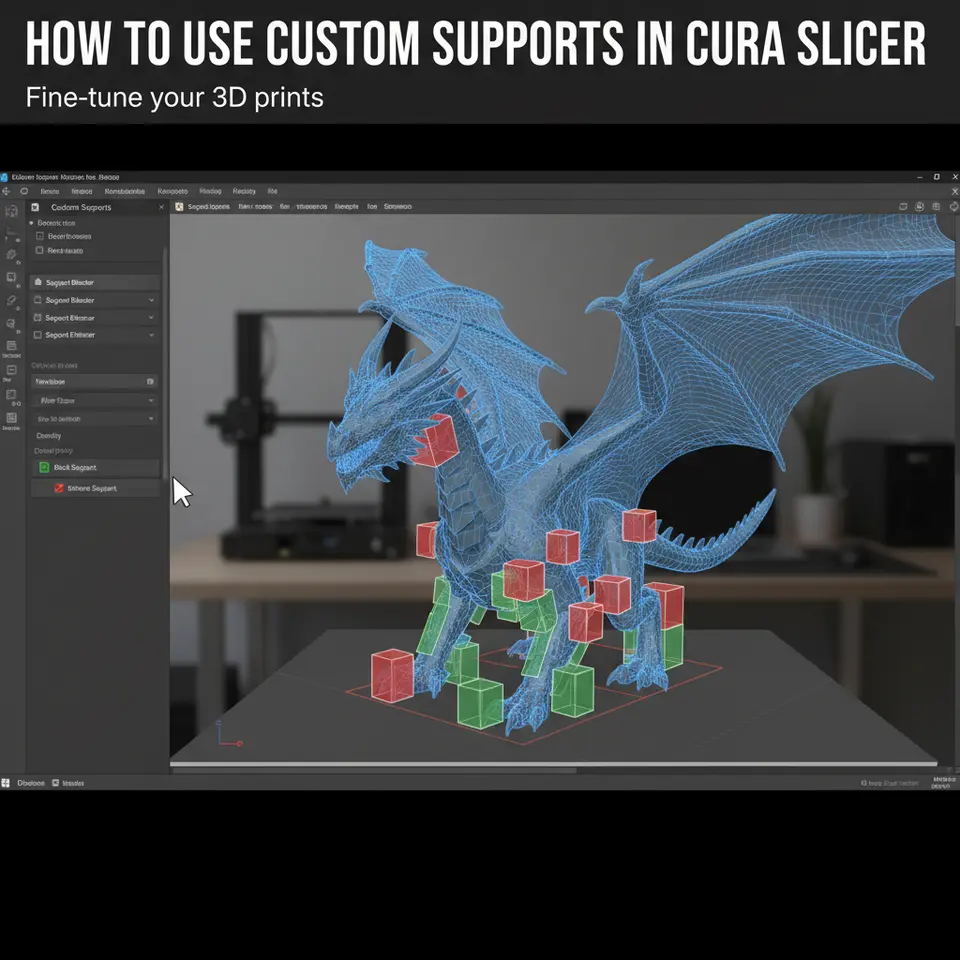
Master Custom Supports in Cura for Perfect Overhangs
How to Use Custom Supports in Cura Slicer – A Step‑by‑Step Guide for Perfect Overhangs
Estimated reading time: 10 minutes
- Master the use of custom supports for optimal print quality.
- Learn when to override automatic settings for complex models.
- Grasp advanced techniques like tree supports and adaptive layers.
- Explore automation options for enhancing workflow.
- Utilize troubleshooting tips to address common issues.
Table of Contents
- Understanding Cura’s Support Engine
- When to Choose Custom Supports Over Automatic Generation
- Preparing Your Model: Analyzing Overhangs & Fragile Areas
- Step‑by‑Step: Adding Custom Support Blockers & Enforcers in Cura
- Fine‑Tuning Support Settings for Optimal Print Quality
- Advanced Techniques: Adaptive Layers, Z‑Hop, and Support Interfaces
- Workflow Automation: Using n8n to Generate Support‑Ready G‑Codes
- Common Troubleshooting Scenarios & Quick Fixes
- Practical Takeaways – Your Custom‑Support Checklist
- Next Steps & Resources
1. Understanding Cura’s Support Engine
Cura creates supports based on three core parameters:
| Parameter | What It Controls | Typical Values |
|---|---|---|
| Support Placement | Determines if supports are generated everywhere (every overhang) or only where needed (based on angle). | “Everywhere” vs “Touching Buildplate” |
| Support Overhang Angle | The minimum angle (relative to vertical) that triggers a support. | 45° (default) – lower for more aggressive support |
| Support Density | Percentage of material used for the support lattice. | 10‑20% for easy removal, 30‑50% for heavy loads |
The engine works by slicing the model into layers, detecting faces that exceed the overhang angle, and then building a tree of pillars (or “grid” supports) underneath. While powerful, the algorithm can’t always differentiate between functional overhangs (like a decorative wing) and problematic ones (like a thin roof). That’s why manual overrides are essential.
Research note: Ultimaker’s official Cura documentation explains that “support placement can be refined using custom support blockers and enforcers, giving you granular control over the support generation process.”
2. When to Choose Custom Supports Over Automatic Generation
| Situation | Why Automatic May Fail | Custom Support Advantage |
|---|---|---|
| Complex Geometry (e.g., organic sculptures) | Generates dense, hard‑to‑remove scaffolding | Place supports only under critical overhangs |
| Delicate Features (thin walls, tiny bridges) | May print supports directly on fragile parts, causing breakage | Use blockers to protect those regions |
| Material‑Specific Needs (e.g., TPU, PETG) | Different materials require different cooling and adhesion strategies | Tailor support density and Z‑hop per material |
| Print Time Constraints | Over‑support adds unnecessary print time | Remove unnecessary supports, speed up the job |
| Aesthetic Post‑Processing (painted models) | Residual support marks can ruin finish | Clean removal with minimal surface blemish |
If any of these scenarios sound familiar, you’ll benefit from mastering custom supports.
3. Preparing Your Model: Analyzing Overhangs & Fragile Areas
Before you even open Cura, inspect the STL (or OBJ) file in a 3D viewer:
- Identify overhang angles – Most slicers display a color map; look for red/orange zones.
- Mark fragile zones – Thin walls (<0.8 mm), tiny bridges, or decorative fins.
- Decide on support style – Grid vs. Tree (Tree supports reduce material but can be slower to generate).
A quick tip: Export a “support preview” from Cura (View → Preview → Support) to see where the default engine would place scaffolding. Screenshot it, then use it as a reference while adding custom elements.
4. Step‑by‑Step: Adding Custom Support Blockers & Enforcers in Cura
4.1 Enable the Custom Support Tools
- Open Cura and load your model.
- Click the “Extensions” menu → “Post Processing” → “Modify G‑Code”.
- Choose “Add a script” → select “Support Blocker” or “Support Enforcer”.
- The tools will appear in the “Custom” tab of the right‑hand panel.
*(If you don’t see these options, make sure you’re running Cura 5.0 or later.)*
4.2 Placing a Support Blocker
A support blocker tells Cura not to generate supports in a defined region.
- Click “Add Support Blocker”.
- A cube appears on the build plate. Use the Scale, Rotate, and Move gizmos to fit it around the area you want to protect (e.g., a delicate lattice).
- In the Blocker Settings, you can choose “Blocker Type” – Block (completely disables supports) or “Only for Overhangs” (allows supports on other parts).
- Click “Apply”. The preview will instantly update, showing the removed supports.
Pro tip: For tiny features, shrink the blocker to the minimum size that still covers the geometry. Over‑blocking can inadvertently remove needed supports elsewhere.
4.3 Placing a Support Enforcer
A support enforcer forces Cura to generate supports exactly where you need them, regardless of the overhang angle.
- Click “Add Support Enforcer”.
- Position the enforcer under the overhang you want to protect (e.g., the underside of a bridge).
- Adjust the “Enforcer Height” to control how far up the support extends.
- Choose “Enforcer Type” – Grid (standard) or Tree for a more organic scaffold.
- Apply and watch the preview; Cura will now add supports anchored to the enforcer.
4.4 Combining Blockers & Enforcers
The true power lies in mixing both:
- Blockers protect delicate surfaces.
- Enforcers guarantee support where the automatic engine would miss it.
Experiment by adding a blocker around a thin fin and an enforcer directly beneath a steep roof. Use the “Hide Supports” toggle to compare before/after.
4.5 Saving Your Custom Setup
Once satisfied, save the model with the custom support configuration:
- File → Save Project – this stores the blocker/enforcer positions within the Cura project file (.3mf).
- For reuse across multiple prints, export a custom profile (Settings → Profiles → Save Profile) that includes your support settings.
5. Fine‑Tuning Support Settings for Optimal Print Quality
Custom placement is only half the battle; you still need to configure the support parameters to match your printer, filament, and geometry.
| Setting | Recommended Value for PLA | Recommended Value for PETG | Why It Matters |
|---|---|---|---|
| Support Pattern | Grid (default) | Lines (for easier removal) | Pattern influences removal difficulty and surface finish. |
| Support Density | 15 % | 20 % | Higher density gives stronger support but adds material and print time. |
| Support Z‑Distance | 0.15 mm (≈0.2 × layer height) | 0.20 mm | Controls the gap between support and model; prevents “fusing.” |
| Support Interface | Enabled (thin “roof”) | Enabled (optional) | Creates a smoother underside on the model. |
| Enable Z‑Hop When Retracting | Yes (0.5 mm) | Yes (0.6 mm) | Prevents nozzle dragging across the model when moving over supports. |
| Support Infill Line Width | 0.4 mm (same as nozzle) | 0.4 mm | Matching line width improves bonding between support and model. |
Source: Cura’s official support settings guide recommends a Z‑distance of 0.1‑0.2 mm for most filaments to avoid “support scarring.”
5.1 Using Adaptive Layers for Supports
Cura 5+ includes Adaptive Layer Height which can vary layer thickness based on geometry. Pairing this with custom supports yields smoother transitions:
- Enable “Adaptive Layers” in the Experimental settings.
- Set “Minimum Layer Height” to 0.06 mm and “Maximum Layer Height” to 0.2 mm.
- Cura will automatically use finer layers near overhangs and coarser layers elsewhere, reducing visible support lines.
5.2 Leveraging Z‑Hop for Fragile Prints
When the nozzle moves over a printed part (especially over a support enforcer), a Z‑Hop can lift the nozzle slightly, preventing scratches. In Cura:
- Settings → Travel → Z Hop When Retracted – enable and set to 0.4‑0.6 mm.
- Combine with “Avoid Printed Parts” (found under Travel) for the cleanest path.
6. Advanced Techniques: Adaptive Layers, Z‑Hop, and Support Interfaces
6.1 Tree Supports with Custom Enforcers
Tree supports grow organically from the build plate, using less material and often reducing removal effort. To use them with custom enforcers:
- In Support Settings, change Support Structure to Tree.
- Adjust Branch Diameter (0.4 mm) and Branch Distance (2 mm).
- Place enforcers under the most demanding overhangs—Cura will grow a tree from the enforcer point.
Research from 3DPrint.com shows tree supports can reduce material usage by up to 30 % compared with grid supports for complex models.
6.2 Using Support Interfaces for a Clean Bottom
Support interfaces (or “support roofs”) create a thin, dense layer between the support and the model, dramatically improving surface finish.
- Enable “Support Interface” and set “Interface Layers” to 2‑3.
- Choose “Interface Pattern” = Lines for smoother surfaces.
- Reduce Interface Z‑Distance to 0.10 mm for tighter contact.
6.3 Automating Custom Support Placement with n8n
For production environments, manually placing blockers can be time‑consuming. n8n (an open‑source workflow automation tool) can be used to:
- Parse STL files → detect overhangs via a Python script.
- Generate a JSON payload describing blocker/enforcer coordinates.
- Call Cura’s CLI (
CuraEngine slice -j …) with the custom support configuration.
A simple n8n workflow:
- Trigger – New file uploaded to a watched folder.
- Function Node – Run a Python script that outputs blocker coordinates.
- HTTP Request – Send the JSON to CuraEngine’s REST endpoint (if using CuraEngine Server).
- Save – Output G‑code to a network drive for the printer.
This pipeline can slice dozens of parts overnight with perfectly placed custom supports, freeing up design time for iteration.
7. Common Troubleshooting Scenarios & Quick Fixes
| Issue | Likely Cause | Fix |
|---|---|---|
| Support remnants cling to the model | Z‑distance too low (support fuses) | Increase Support Z‑Distance to 0.2 mm (or 0.2 × layer height). |
| Support removal leaves rough patches | No interface layer or too low density | Enable Support Interface and raise Support Density to 20‑25 %. |
| Over‑support on non‑critical areas | Blocker not covering enough region | Expand the blocker or add additional blockers around the area. |
| Print fails at overhang despite enforcer | Enforcer height too short or nozzle temperature too low | Raise the enforcer height to cover the full overhang and verify temperature settings (e.g., 210 °C for PLA). |
| Excessive print time | High support density + fine layer height | Reduce Support Density to 10‑15 % and enable Adaptive Layers to use thicker layers where possible. |
8. Practical Takeaways – Your Custom‑Support Checklist
- Analyze the model: Identify overhang angles >45° and fragile zones.
- Enable custom tools: Add Support Blockers for delicate features; add Support Enforcers where you need extra scaffolding.
- Set support parameters:
- Pattern: Grid (PLA) / Lines (PETG)
- Density: 15‑20 %
- Z‑Distance: 0.15‑0.20 mm
- Interface: Enabled (2‑3 layers)
- Activate advanced options: Adaptive Layer Height, Z‑Hop, and Tree Supports if appropriate.
- Preview and iterate: Use Cura’s Preview mode to verify support placement before slicing.
- Save the project: Store blockers/enforcers in a .3mf file for future reuse.
- Automate if needed: Consider n8n for batch processing of custom‑support‑rich prints.
9. Next Steps & Resources
Now that you’ve mastered custom supports, explore related topics to further refine your workflow:
- Enable Z‑Hop in Cura – A Complete Guide – Learn how to prevent nozzle dragging on delicate prints.
- Cura Support Settings – Effective Techniques – Deep dive into density, pattern, and interface options.
- Cura Adaptive Layers Optimization – Maximize quality while cutting print time.
For a broader view of Cura’s hidden capabilities, check out our Top 10 Hidden Cura Features.
Ready to put custom supports to the test? Load your next model, follow the steps above, and watch your prints achieve a new level of precision.
Call to Action
If you found this guide helpful, subscribe to our newsletter for weekly tutorials, join the conversation on CuraSlicers’ social channels, and explore more in‑depth articles on our site.
Visit our main page for a full library of Cura tips, printer profiles, and workflow automation guides: https://curaslicers.com
Happy printing, and may your supports always be where you need them—and nowhere else!