Install and Use Cura Post‑Processing Scripts Step‑by‑Step
How to Install and Use Post‑Processing Scripts in Cura – A Complete Step‑by‑Step Guide
Estimated reading time: 10 minutes
- Master Cura’s scripting system to enhance your 3D printing process.
- Integrate community scripts for dynamic fan control and optimized print workflows.
- Automate tasks with custom Python scripts tailored to your needs.
- Debug and troubleshoot your scripts with practical tips for common issues.
- Seamlessly integrate Cura scripts with workflow automation tools like n8n.
Table of Contents
- Introduction – Why Post‑Processing Scripts Matter for Modern 3D Printing
- What Is a Post‑Processing Script in Cura?
- Step 1 – Enable the Post‑Processing Plugin
- Step 2 – Adding a Built‑In Script
- Step 3 – Installing a Community Script
- Step 4 – Writing Your Own Python Script
- Real‑World Use Cases
- Debugging Tips – Getting Your Scripts to Work Every Time
- Integrating Scripts into Automated Workflows (n8n Example)
- Best Practices for Managing a Library of Scripts
- Frequently Asked Questions (FAQ)
- Actionable Takeaways – What You Should Do Today
- Connecting the Dots – More Cura Resources on CuraSlicers.com
- Call to Action
Introduction – Why Post‑Processing Scripts Matter for Modern 3D Printing
If you’ve ever wished you could automatically add a fan‑speed change, a pause for resin‑coat, or a custom nozzle‑wipe routine without editing the G‑code by hand, you’re not alone. How to Install and Use Post‑Processing Scripts in Cura is the fastest route to turning Cura from a simple slicer into a powerful automation hub.
Post‑processing scripts (sometimes called “post‑processing plugins”) run after Cura generates the raw G‑code but before the file is saved to your printer. This tiny window lets you inject, modify, or delete commands, giving you fine‑grained control over every layer, every move, and every peripheral (fans, lights, pumps). In the era of smart factories, batch printing farms, and hobbyist “one‑click prints,” mastering Cura’s scripting system is a game‑changer for both beginners and seasoned makers.
In this guide we’ll walk you through:
- Setting up Cura’s built‑in post‑processing manager.
- Installing community scripts and creating your own with Python.
- Real‑world examples – fan control, pause‑at‑layer, and custom filament change.
- Best‑practice tips for debugging and integrating scripts into automated workflows (think n8n, OctoPrint, or a CI/CD pipeline).
By the end, you’ll be able to automate repetitive tasks, reduce print failures, and boost throughput—exactly the kind of efficiency boost that CuraSlicers.com is known for.
What Is a Post‑Processing Script in Cura?
Cura’s post‑processing feature is a lightweight plug‑in architecture that executes Python scripts on the generated G‑code. The process works like this:
- Slice – Cura creates the raw G‑code based on your model, printer profile, and slicer settings.
- Post‑process – Each enabled script receives the G‑code as a list of strings, manipulates it, and returns the modified list.
- Export – Cura writes the final G‑code to your chosen location (SD card, network share, etc.).
Because the scripts run after slicing, they can reference layer numbers, extruder switches, and printer‑specific commands (M106 fan speed, M600 filament change, etc.) without affecting the slicer’s internal calculations.
Source: Ultimaker’s official Cura scripting documentation – https://ultimaker.com/software/ultimaker-cura/documentation (opens in new window).
Step 1 – Enable the Post‑Processing Plugin
Cura ships with the Post‑Processing plug‑in already installed, but it may be hidden in older builds. Here’s how to make sure it’s active:
| Action | Screenshot (optional) |
|---|---|
| Open Cura → Settings → Configure Cura → Plugins | |
| Find Post‑Processing in the list. If the toggle is gray, click Install. | |
| Restart Cura to load the plug‑in. |
Once active, you’ll see a “Post‑Processing” button on the right‑hand toolbar of the main window.
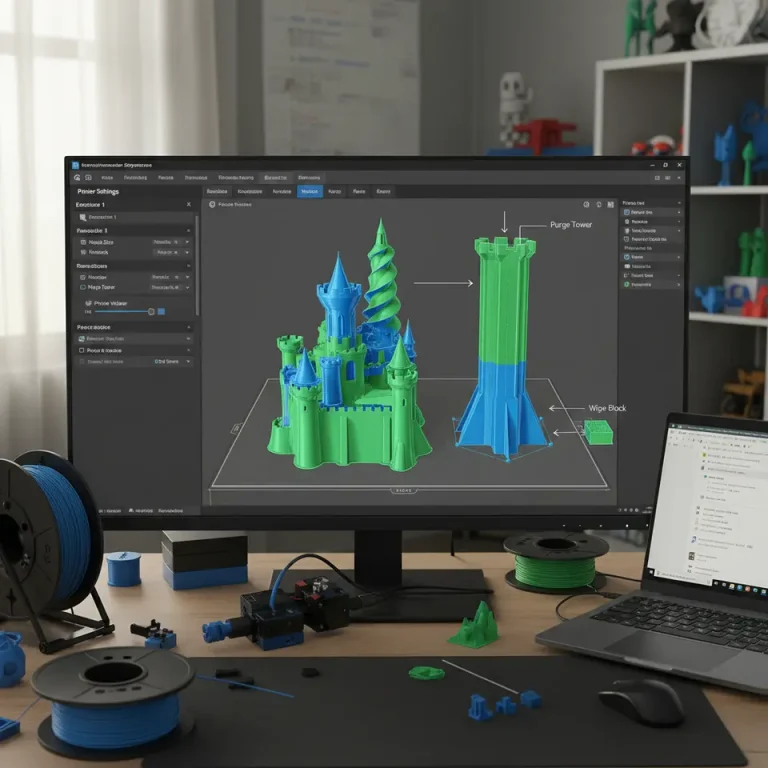
Step 2 – Adding a Built‑In Script
Cura includes several ready‑made scripts that cover common use‑cases. Let’s add a “Pause at Height” script to pause the print at a specific layer for resin coating.
- Click Post‑Processing → Add a script.
- From the dropdown, select “Pause at Height”.
- Configure the parameters:
- Height (mm):
10(or the layer height you need) - Pause G‑code:
M0 ; pause for resin(you can replace with any custom G‑code) - Resume G‑code:
M108(or your printer’s resume command)
Click Close and slice your model.
Cura will now insert the pause command at the exact height you specified.
Pro tip: Use the “Layer Change G‑code” field in Printer Settings → Custom G‑code to define a universal pause command, then reference it in the script for consistency across all projects.
Step 3 – Installing a Community Script
The Cura community shares dozens of useful scripts on GitHub and the Cura Marketplace. One popular script is “Fan Speed Scheduler”, which ramps the fan speed based on layer number.
3.1 Download the Script
wget https://raw.githubusercontent.com/Ultimaker/Cura/master/plugins/PostProcessingPlugin/scripts/fan_speed_scheduler.pySave the file to Cura’s script folder:
- Windows:
C:\Program Files\Ultimaker Cura <version>\plugins\PostProcessingPlugin\scripts\ - macOS:
/Applications/Ultimaker Cura.app/Contents/Resources/plugins/PostProcessingPlugin/scripts/ - Linux:
/usr/lib/Ultimaker-Cura/plugins/PostProcessingPlugin/scripts/
3.2 Register the Script in Cura
- Open Cura → Post‑Processing → Add a script.
- Click “Import script…” and browse to
fan_speed_scheduler.py. - The script appears in the list; select it and configure:
- Start Layer:
5 - End Layer:
30 - Start Fan Speed (%):
0 - End Fan Speed (%):
100
Slice and watch the fan ramp up gradually.
Step 4 – Writing Your Own Python Script
If the built‑in or community scripts don’t cover your workflow, writing a custom script is straightforward. Below is a template that adds a custom “Filament Change” at a user‑defined layer.
# filament_change_at_layer.py
# Cura post‑processing script – inserts M600 at a specific layer

from ..Script import Script

class FilamentChangeAtLayer(Script):
    def getSettingDataString(self):
        return """{
            "name": "Filament Change at Layer",
            "key": "FilamentChangeAtLayer",
            "metadata": {},
            "version": 2,
            "settings":
            {
                "layer_number":
                {
                    "label": "Layer number",
                    "description": "Insert M600 at this layer",
                    "type": "int",
                    "default_value": 20
                }
            }
        }"""

    def execute(self, data):
        layer = self.getSettingValueByKey("layer_number")
        new_gcode = []
        current_layer = 0

        for line in data:
            if line.startswith(";LAYER:"):
                current_layer = int(line.split(":")[1].strip())
            if current_layer == layer and not line.startswith(";TYPE:"):
                new_gcode.append("M600 ; Filament change")
            new_gcode.append(line)

        return new_gcode
How to Deploy
- Save the file as
filament_change_at_layer.pyin the scripts folder (see Step 3.1). - Restart Cura.
- Add the script via Post‑Processing → Add a script → Import script.
- Set Layer number to the desired value (e.g.,
25).
Now every time you slice, Cura injects an M600 command at that exact layer, prompting the printer to pause for a filament swap.
Real‑World Use Cases
1. Dynamic Fan Control for PETG
PETG often benefits from a low fan speed at the base and full speed after the first few layers. Combine Cura’s “Fan Speed Scheduler” with a custom script that disables the fan entirely for the first 0.6 mm (≈ 2 layers at 0.3 mm). This reduces warping while preserving overhang support later.
2. Automated Resin Coating for Multi‑Material Prints
When printing with a dual‑extruder setup (e.g., PLA + resin‑coated support), pause at the exact height where the support emerges, trigger a M0 command, and let a robotic arm apply a thin resin layer. The script can also send a G‑code comment (; RESIN COAT START) that external automation tools (n8n, OctoPrint plugins) listen for.
3. Batch Printing Farm Integration
In a print farm, you may want each job to self‑report its start and end times. A post‑processing script can prepend:
M117 Starting job: {job_name}
M73 P0 ; set progress to 0%
and append:
M117 Print complete!
M73 P100 ; set progress to 100%
Your farm’s monitoring software can parse these messages for real‑time dashboards.
Debugging Tips – Getting Your Scripts to Work Every Time
| Symptom | Likely Cause | Fix |
|---|---|---|
| Script adds commands at the wrong layer | Layer counting starts at 0 vs. 1 | Verify `;LAYER:` comment format; adjust `if current_layer == layer:` to `>=` if needed. |
| No changes appear in the final G‑code | Script not loaded or disabled | Check Post‑Processing panel for a green checkmark; restart Cura after adding a new script. |
| Printer throws “unknown command” error | Incorrect G‑code syntax for your firmware | Use the firmware’s command reference (e.g., Marlin’s M600 vs. RepRap’s M25). |
| Script slows slicing dramatically | Inefficient loops (e.g., nested for inside for) | Use list comprehensions or break early when possible; avoid regex on every line if simple string checks suffice. |
Testing workflow: Slice a small calibration cube, open the exported .gcode in a text editor, and search for your injected commands. If they appear where expected, run a short test print.
Integrating Scripts into Automated Workflows (n8n Example)
n8n is a powerful, open‑source workflow automation tool that can trigger actions based on file changes, API calls, or even G‑code comments. Here’s a quick example of how to use a post‑processing script to notify Slack when a print reaches a “pause for resin” point.
- Cura script – Add a comment before the pause:
; RESIN_PAUSE_START
M0- n8n workflow:
- Trigger: “File Created” node watches the printer’s incoming G‑code folder.
- Read File: “Read Text File” node parses the G‑code.
- IF: “If/Else” node checks for
RESIN_PAUSE_START. - Action: “Slack” node posts a message to your channel: “Print paused for resin coating – please intervene.”
- Resume: After the operator finishes the coating, they click a button in Slack that triggers an OctoPrint API call to resume the print.
This pattern scales: any custom comment inserted by a Cura script can become a hook for downstream automation, turning a single‑printer hobby setup into a semi‑autonomous production line.
Best Practices for Managing a Library of Scripts
- Version Control – Store all custom scripts in a Git repository. Tag releases (e.g.,
v1.2-fan-scheduler) so you can roll back if a new Cura update breaks compatibility. - Naming Convention – Prefix scripts with their purpose:
fan_speed_scheduler.py,pause_at_layer_resin.py. - Documentation Header – Include a docstring at the top of each script with usage notes, Cura version compatibility, and author contact.
- Testing Matrix – Run a quick “smoke test” on at least two printer profiles (e.g., Ender 3 V2 and Prusa MK3) after any Cura upgrade.
- Community Sharing – Publish useful scripts on the Cura Marketplace or GitHub and link back to CuraSlicers.com for attribution.
Frequently Asked Questions (FAQ)
Q1: Do post‑processing scripts work with Cura 5.x and 6.x?
A: Yes. Cura’s scripting API has remained stable since version 4.0, but some internal variable names changed in 5.2. Always test on the exact Cura version you plan to deploy.
Q2: Can I use JavaScript instead of Python?
A: Cura only supports Python for post‑processing. However, you can call external programs (e.g., a Node.js script) via os.system() if needed.
Q3: Will using many scripts increase slicing time?
A: Slightly. Each script loops through the entire G‑code list. For large prints ( > 200 MB) you may notice a few extra seconds. Optimize by limiting the number of active scripts.
Q4: How do I share a script with a teammate?
A: Export the .py file and place it in the same scripts folder on their machine, or host it on a shared network drive and use Cura’s “Import script” feature.
Q5: Is there a risk of corrupting the G‑code?
A: Only if the script inserts malformed commands. Always validate the final G‑code in a viewer (e.g., PrusaSlicer’s G‑code preview) before printing.
Actionable Takeaways – What You Should Do Today
| Action | How‑to | Expected Benefit |
|---|---|---|
| Enable the Post‑Processing plug‑in | Settings → Configure Cura → Plugins → Post‑Processing | Unlocks script UI. |
| Add a “Pause at Height” script | Post‑Processing → Add script → Pause at Height → set 10 mm | Quick resin‑coat or tool‑change workflow. |
| Install a community “Fan Speed Scheduler” | Download script → place in Cura scripts folder → Import in Cura | Dynamic cooling without manual G‑code edits. |
| Create a custom filament‑change script | Use the template above → set layer 25 → test on a cube | Seamless multi‑color prints. |
| Integrate with n8n for automated alerts | Add a comment in script → build n8n workflow → test Slack notification | Reduce human monitoring overhead. |
| Version‑control your scripts | Initialize a Git repo → commit each script → tag releases | Safe collaboration and rollback. |
Implement at least one of these steps this week, and you’ll already see a measurable reduction in manual G‑code edits and print‑failure rates.
Connecting the Dots – More Cura Resources on CuraSlicers.com
If you enjoyed this deep dive, you’ll love our related guides:
- What Is Cura Slicer? Beginner’s Guide – Perfect for newcomers who want to understand Cura’s core concepts before diving into scripts.
- Ultimate Cura Profile Settings – Learn how to fine‑tune print speed, flow rate, and temperature profiles to complement your custom scripts.
Visit our homepage for a full library of tutorials, cheat sheets, and community forums.
Call to Action
Ready to turn Cura into your personal automation engine? Subscribe to our newsletter for weekly updates on new scripts, workflow hacks, and exclusive printable models. Follow us on Twitter and Instagram for quick tips, and don’t forget to share this guide with fellow makers who could benefit from smarter G‑code.
Happy slicing, and may your prints always finish on the first try!