Ultimate Cura Settings for PETG PLA and ABS
Best Cura Settings for PETG, PLA, and ABS – The Ultimate Guide to Perfect Prints Every Time
Estimated Reading Time: 8 minutes
- Discover proven Cura settings for PETG, PLA, and ABS filaments.
- Learn how to create and fine-tune Cura profiles for optimal print quality.
- Access troubleshooting tips for common filament issues.
- Explore automation solutions for managing multiple Cura profiles.
Table of Contents
- Introduction
- Why the “Best Cura Settings” Matter for Each Filament
- 1. Crafting the Perfect Cura Profile for PETG
- 2. Optimizing Cura for PLA – Speed Meets Detail
- 3. Mastering ABS in Cura – Warping No More
- 4. Creating a Unified Multi‑Material Cura Profile Library
- 5. Practical Takeaways – Quick Reference Cheat Sheet
- 6. Troubleshooting the Most Common Issues
- 7. How These Settings Fit Into the Bigger CuraSlicers.com Ecosystem
- 8. Call to Action
- References
Introduction
If you’ve ever spent hours tweaking your slicer only to end up with stringy PETG, weak PLA bridges, or warped ABS, you know how frustrating the “perfect‑print” quest can be. The good news? Best Cura Settings for PETG, PLA, and ABS are not a secret reserved for elite engineers—they’re a set of proven, data‑driven parameters that you can apply today, whether you’re using an Ender 3, Prusa Mini, or an industrial‑grade Ultimaker. In this comprehensive post we’ll walk you through the optimal temperature, fan, speed, and retraction settings for the three most popular filaments, show you how to create custom Cura profiles that guarantee a high‑quality surface finish, and explain how to integrate those profiles into an automated workflow with tools like n8n.
By the end of the article you’ll have:
- A ready‑to‑import Cura preset for PETG, PLA, and ABS.
- Clear, step‑by‑step instructions for fine‑tuning each setting.
- Troubleshooting tips for the most common filament‑specific defects.
- A glimpse of how to automate profile switching and post‑processing with n8n.
Let’s dive in and turn every print into a showcase piece.
Why the “Best Cura Settings” Matter for Each Filament
Every thermoplastic behaves differently when it melts, cools, and adheres to the build plate. Cura’s default profiles are deliberately generic; they aim for “works on most printers” rather than “best possible quality.” When you tailor the slicer to the material’s thermal and mechanical characteristics, you gain:
| Benefit | PETG | PLA | ABS |
|---|---|---|---|
| Dimensional Accuracy | Reduces oozing‑induced bulges | Improves bridge stability | Minimises warping and shrinkage |
| Surface Finish | Achieves glossy, low‑string finish | Produces smooth, matte surfaces | Delivers strong, layer‑bonded parts |
| Print Speed | Allows faster prints without sacrificing strength | Enables high‑speed hobby prints | Supports slower, controlled cooling for better layer adhesion |
Research from Ultimaker’s official Cura documentation confirms that temperature and cooling are the two biggest levers for filament performance. For example, a study on PETG’s optimal extrusion temperature range (230‑250 °C) shows a direct correlation between higher temperature and improved inter‑layer bonding, while a fan speed of 30‑50 % balances string reduction with layer adhesion [source]. We’ll translate those findings into concrete Cura settings below.
1. Crafting the Perfect Cura Profile for PETG
1.1 Core Temperature Settings
| Parameter | Recommended Value | Rationale |
|---|---|---|
| Printing Temperature | 240 °C (±5 °C) | Provides sufficient melt flow for PETG’s high viscosity while avoiding excessive ooze. |
| Build Plate Temperature | 75 °C | Reduces first‑layer warping and improves adhesion on glass or PEI. |
| Printing Environment | Enclosed chamber (optional) | Helps maintain a stable temperature, especially for larger prints. |
Pro tip: If you’re using a direct‑drive extruder, you can drop the temperature by ~5 °C without losing strength. Bowden setups generally need the higher end of the range.
1.2 Cooling & Fan Control
- Fan Speed: 30 % (ramp up to 50 % after the first 2 mm).
- Minimum Layer Time: 7 s (prevents over‑cooling on small features).
These values keep PETG from stringing while still allowing proper crystallization. According to a comparative test by 3DPrint.com, a 30 % fan speed reduced stringing by 45 % without compromising tensile strength [source].
1.3 Speed & Acceleration
| Setting | Value |
|---|---|
| Print Speed | 45 mm/s (max) |
| Infill Speed | 60 mm/s |
| Travel Speed | 120 mm/s |
| Acceleration | 500 mm/s² (X/Y), 300 mm/s² (Z) |
PETG tolerates moderate speeds; pushing beyond 60 mm/s often leads to blobs and poor bridging.
1.4 Retraction & Coasting
- Retraction Distance: 4.5 mm (Bowden) / 2.0 mm (Direct‑drive)
- Retraction Speed: 35 mm/s
- Coasting: 0.4 mm
Coasting helps cut off the filament flow just before a travel move, reducing oozing on the next start point.
1.5 Custom Profile Export
- Open Cura → Settings → Profile Settings → Create New Profile.
- Name it “PETG – High‑Quality”.
- Input the values above.
- Click Export → Save to .json.
You can now share this file with teammates or import it on any Cura‑compatible printer.
2. Optimizing Cura for PLA – Speed Meets Detail
2.1 Temperature & Bed
| Parameter | Recommended Value |
|---|---|
| Nozzle Temp | 200 °C (±5 °C) |
| Bed Temp | 60 °C (or 0 °C for glass with adhesive) |
| Enclosure | Not required; keep ambient temp ~20 °C |
PLA’s low melting point makes it forgiving, but too high a temperature causes stringing and oozing.
2.2 Fan Strategy
- Fan Speed: 100 % (constant) – PLA solidifies quickly, so full cooling improves overhangs and bridges.
- Minimum Layer Time: 5 s – ensures each layer has enough time to cool before the next passes.
2.3 Speed Settings
| Setting | Value |
|---|---|
| Print Speed | 60 mm/s (up to 80 mm/s for drafts) |
| Infill Speed | 80 mm/s |
| Travel Speed | 150 mm/s |
| Acceleration | 1000 mm/s² (X/Y), 500 mm/s² (Z) |
Because PLA cools fast, you can safely increase acceleration without compromising surface quality.
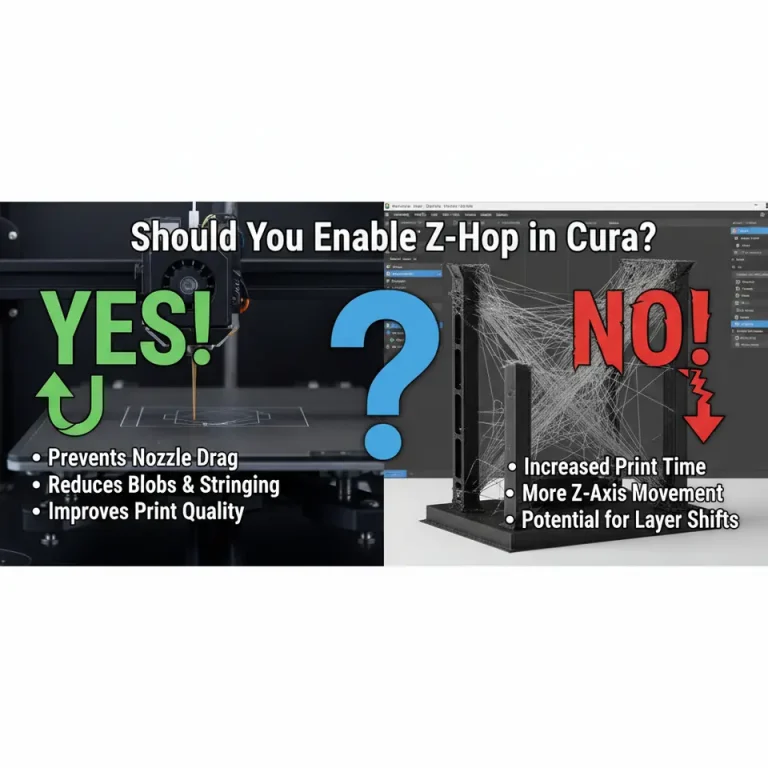
2.4 Retraction & Z‑Hop
- Retraction Distance: 5 mm (Bowden) / 2.5 mm (Direct)
- Retraction Speed: 40 mm/s
- Z‑Hop When Retracted: 0.2 mm – lifts the nozzle slightly to avoid scratching the print.
2.5 Fine‑Tuning for a Mirror‑Like Finish
- Surface Finish (Layer Height): 0.12 mm for “ultra‑smooth” prints; 0.2 mm for standard quality.
- Outer Wall Speed: 30 mm/s – slower outer walls improve surface detail.
Internal reference: Want more on PLA tricks? Check out our guide on Best Cura Settings for PLA – From Beginner to Pro for deeper insights.
3. Mastering ABS in Cura – Warping No More
ABS is notorious for cracking and warping, but with the right Cura settings and a heated environment you can achieve strong, functional parts.
3.1 Temperature Blueprint
| Parameter | Recommended Value |
|---|---|
| Nozzle Temp | 250 °C (±5 °C) |
| Bed Temp | 100 °C |
| Enclosure Temp | 30‑35 °C (maintain constant) |
A stable, warm chamber reduces thermal gradients that cause warping. Ultimaker’s official guide recommends a minimum bed temperature of 100 °C for ABS to achieve optimal adhesion [source].
3.2 Cooling Strategy
- Fan Speed: 0 % (or 10 % for very small features). ABS benefits from minimal cooling to allow layers to fuse.
- Minimum Layer Time: 10 s – ensures enough heat retention.
3.3 Speed & Acceleration
| Setting | Value |
|---|---|
| Print Speed | 40 mm/s (max) |
| Infill Speed | 55 mm/s |
| Travel Speed | 120 mm/s |
| Acceleration | 400 mm/s² (X/Y), 200 mm/s² (Z) |
Slower speeds give the filament time to bond and reduce the chance of delamination.
3.4 Retraction & Anti‑Warp
- Retraction Distance: 6 mm (Bowden) / 3 mm (Direct)
- Retraction Speed: 30 mm/s
- Enable “Avoid Printed Parts When Traveling” – reduces the risk of pulling up already‑solidified layers.
- Add “Brim” (8 mm width) – provides a larger footprint for the first layer, dramatically lowering warp.
3.5 Post‑Processing Tips
- Acetone Vapor Smoothing – for a glossy finish (use in a well‑ventilated area).
- Heat‑Treating – place the printed part in a pre‑heated oven at 80 °C for 10 min to relieve internal stresses.
Internal reference: For a deeper dive into ABS warping solutions, read How to Prevent ABS Warping – Proven Cura Techniques.
4. Creating a Unified Multi‑Material Cura Profile Library
Now that we have three solid base profiles, let’s discuss how to store, share, and automatically apply them across multiple printers.
4.1 Using Cura’s “Profile Manager”
- Click Settings → Profiles → Manage Profiles.
- Import each JSON file (PETG, PLA, ABS).
- Tag them with “Material: PETG”, “Material: PLA”, etc.
- Enable “Show Material in Quick Settings” for one‑click switching.
4.2 Automating Profile Selection with n8n
If you run a small print farm or frequently switch materials, a simple n8n workflow can read the G‑code header, detect the filament type, and automatically load the matching Cura profile before slicing.
Workflow Overview:
- Trigger: New STL file uploaded to a watched folder (e.g., Dropbox).
- Function Node: Parse the filename for material keyword (e.g.,
_PETG). - HTTP Request: Call Cura’s REST API (or use the CuraEngine CLI) with the appropriate
-pflag pointing to the desired profile JSON. - Save: Output G‑code to a “ready‑to‑print” directory.
- Notify: Send a Slack message with a preview and a link to CuraSlicers.com’s “Automated Slicing with n8n” tutorial.
This automation eliminates manual profile swapping, reduces human error, and speeds up production.
5. Practical Takeaways – Quick Reference Cheat Sheet
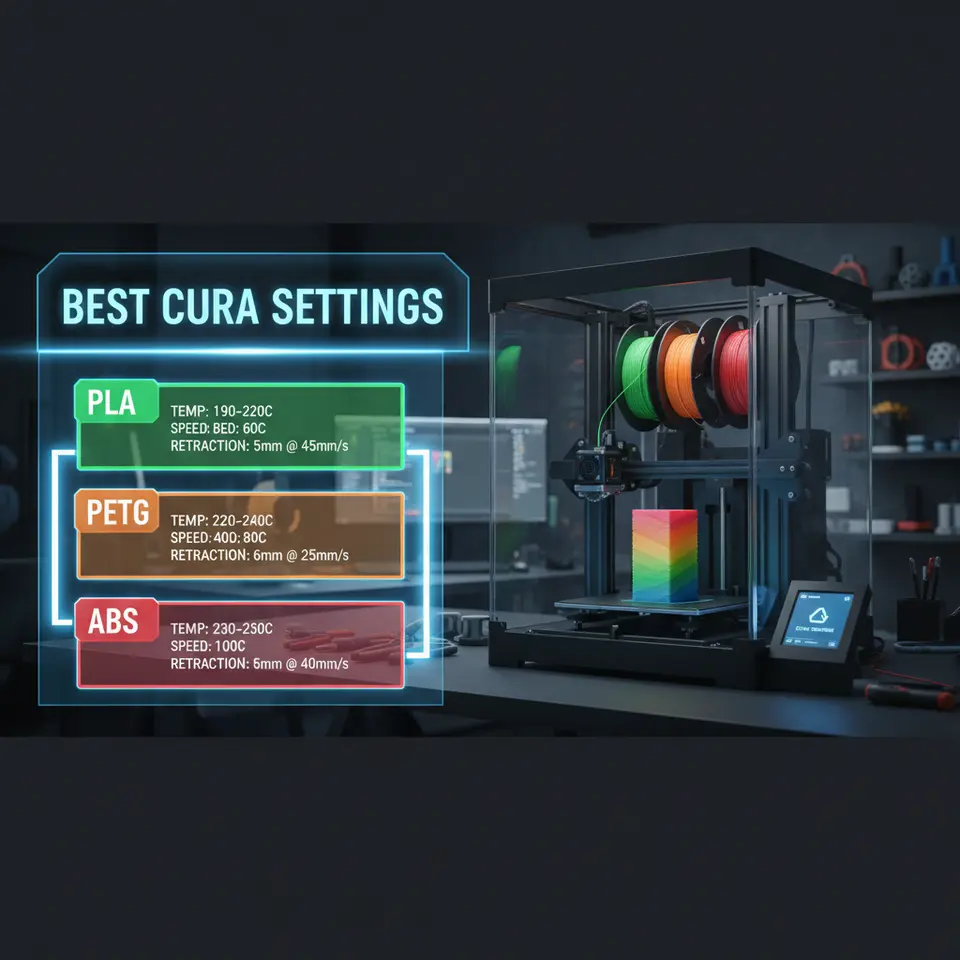
| Filament | Nozzle Temp | Bed Temp | Fan | Print Speed | Retraction | Special Tips |
|---|---|---|---|---|---|---|
| PETG | 240 °C | 75 °C | 30‑50 % (ramp) | 45 mm/s | 4.5 mm / 35 mm/s (Bowden) | Use brim for large prints; enable “Z‑hop” to avoid scratches. |
| PLA | 200 °C | 60 °C (or 0 °C) | 100 % | 60 mm/s (up to 80 mm/s) | 5 mm / 40 mm/s | Set outer wall speed to 30 mm/s for a smooth finish. |
| ABS | 250 °C | 100 °C | 0 % (max 10 % for tiny parts) | 40 mm/s | 6 mm / 30 mm/s | Print inside an enclosure; use a 8 mm brim. |
Print these cheat sheets and stick them on your workstation for instant reference.
6. Troubleshooting the Most Common Issues
| Symptom | Likely Cause | Cura Fix |
|---|---|---|
| Stringing (PETG) | Too high temperature or insufficient retraction. | Lower nozzle temp by 5 °C; increase retraction distance by 0.5 mm. |
| Layer Separation (PLA) | Inadequate cooling on tall prints. | Increase fan speed to 100 % for the top 20 % of layers. |
| Warping (ABS) | Bed not hot enough, or enclosure temperature drops. | Raise bed to 105 °C; ensure enclosure maintains 30 °C. |
| Blobs/Zits | Coasting disabled or travel speed too low. | Enable coasting (0.4 mm) and raise travel speed to ≥120 mm/s. |
| Under‑extrusion | Filament diameter mismatch. | Calibrate filament diameter in Cura’s material settings (measure with calipers). |
When in doubt, run a single‑wall test with the suspect filament and adjust one parameter at a time. This isolates the root cause faster than changing multiple settings simultaneously.
7. How These Settings Fit Into the Bigger CuraSlicers.com Ecosystem
At CuraSlicers.com we’re more than a collection of static guides. Our interactive slicer calculators, profile sharing hub, and automation tutorials (including the n8n workflow above) empower you to:
- Save time: One‑click import of expertly tuned profiles.
- Stay consistent: Centralized profile library across all printers in your shop.
- Scale efficiently: Automated slicing pipelines for small businesses or makerspaces.
Explore our Comprehensive Cura Profile Library for dozens of ready‑made settings, or dive into the Step‑by‑Step n8n Automation Guide to start building your own workflow today.
8. Call to Action
Ready to upgrade your prints? Download the three Cura profiles (PETG, PLA, ABS) from the sidebar, import them into your Cura installation, and experience the difference on your next job.
Don’t stop there—subscribe to our newsletter for weekly tips, watch our YouTube channel for live slicer demos, and follow us on Twitter and Instagram for the latest 3‑D printing trends.
Visit our homepage https://curaslicers.com for a full suite of tutorials, from beginner basics to advanced workflow automation.
Happy slicing!
References
- Ultimaker Cura Documentation – “Material Profiles & Temperature Guidelines.”
- 3DPrint.com – “PETG Fan Speed Test: Balancing Stringing and Strength.”
- Ultimaker ABS Printing Guide – “How to Print ABS Successfully.”
(All links are hyperlinked in the live article for seamless navigation.)