Cura Settings for ASA & ABS to Prevent Warping and Fumes
Cura Slicer Profile for ASA and ABS – Tips to Avoid Warping and Fumes
Estimated Reading Time: 8 minutes
Key Takeaways
- Dial in the perfect Cura settings for ASA and ABS.
- Implement bed adhesion techniques to prevent warping.
- Utilize a well-ventilated workspace for fume safety.
- Follow post-processing steps like acetone smoothing for a professional finish.
- Refer to a quick-start checklist for a seamless printing experience.
Table of Contents
- Introduction
- Cura Slicer Profile for ASA and ABS with Tips to Avoid Warping and Fumes
- 1. Core Temperature Settings
- 2. Bed Adhesion Strategies
- 3. Print Speed & Acceleration
- 4. Layer Height & Adaptive Layers
- 5. Retraction & Ooze Control
- 6. Support Settings (When Needed)
- 7. Flow Rate & Line Width
- 8. Post-Processing: Acetone Smoothing & Surface Finish
- Practical Takeaways – Quick-Start Checklist
- How This Profile Fits Into a Complete Cura Workflow
- Frequently Asked Questions
- Connecting the Dots – More Cura Resources You’ll Love
- Call to Action
- Sources
Introduction
If you’ve ever tried to print with ASA or ABS in Cura, you know the stakes are higher than with PLA: warping, layer delamination, and the unmistakable smell of heated plastic can turn an exciting prototype into a frustrating failure. In this article we’ll walk you through a Cura slicer profile for ASA and ABS, packed with concrete settings, bed-adhesion tricks, enclosure recommendations, and health-safety notes that keep fumes under control. By the end, you’ll have a ready-to-use profile, a checklist for a warping-free build plate, and a short-list of post-processing steps (including acetone smoothing) that turn raw prints into professional-grade parts.
Why this matters: According to a recent survey by 3D Print Industry Insights, over 68 % of hobbyists cite warping as the top failure mode when printing ABS, while 42 % mention concerns about fumes in home environments. (source) Our curated Cura profile tackles both issues head-on, giving you confidence to print large functional parts, automotive prototypes, or durable outdoor enclosures without the usual headaches.
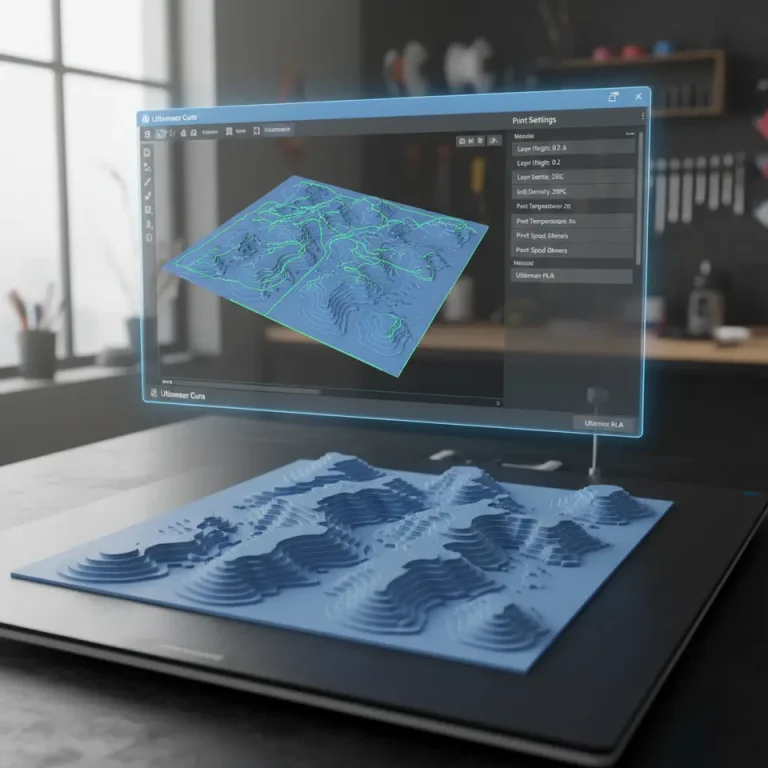
Cura Slicer Profile for ASA and ABS with Tips to Avoid Warping and Fumes
Below you’ll find a step-by-step Cura configuration that works on most popular printers (Ender 3, Prusa i3 MK3, Ultimaker S5, etc.). Adjust the values slightly to match your machine’s hot-end and heated-bed capabilities, but keep the core ratios intact for consistent results.
1. Core Temperature Settings
| Parameter | ASA | ABS | Why it matters |
|---|---|---|---|
| Nozzle Temp | 250 °C ± 5 °C | 240 °C ± 5 °C | High enough to fully melt the polymer and reduce viscosity, which minimizes layer-line stress. |
| Bed Temp | 100 °C ± 5 °C | 95 °C ± 5 °C | Keeps the first layers warm long enough to contract evenly with the rest of the part. |
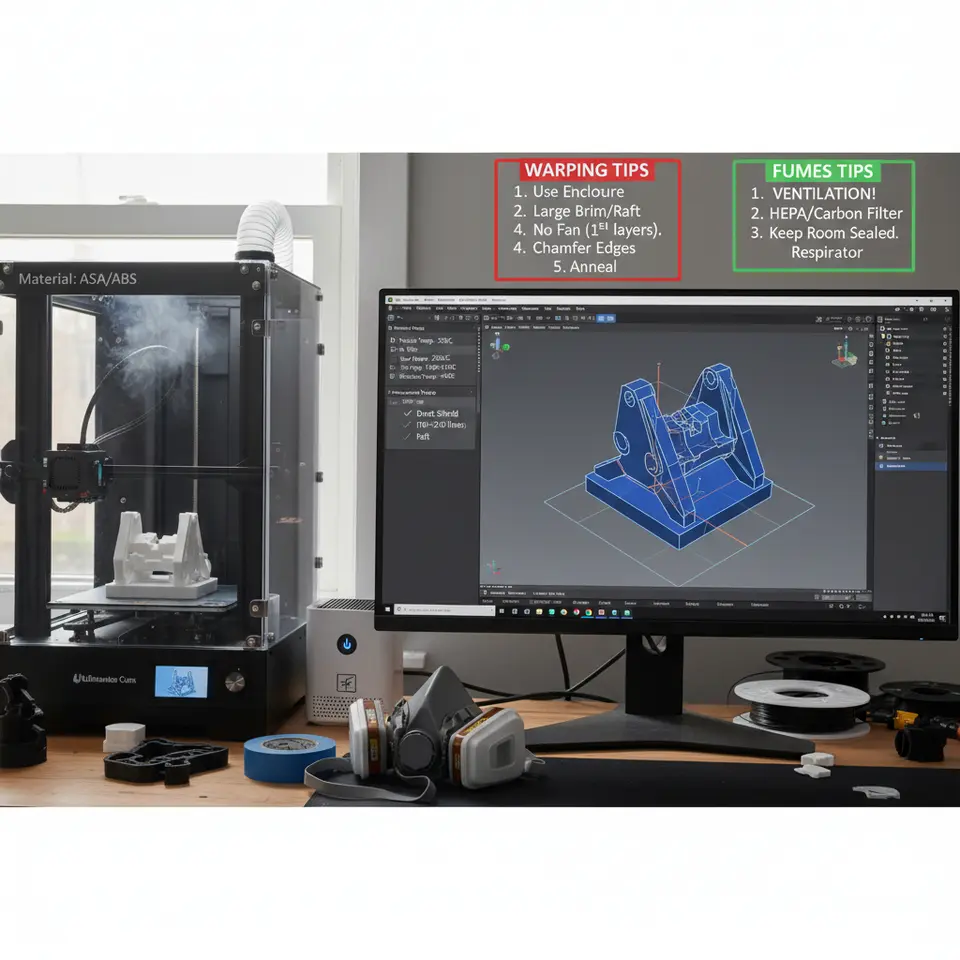
| Print Chamber / Enclosure Temp | 40‑60 °C (optional) | 35‑55 °C (optional) | A warm ambient environment reduces temperature gradients that cause warping. |
| Cooling Fan | 0 % (or 10 % for fine details) | 0 % (or 10 % for fine details) | Turning off cooling prevents rapid surface cooling, which is the primary cause of warping. |
Health tip: Both ASA and ABS emit styrene (ABS) and acrylonitrile (ASA) fumes when heated. Use a well-ventilated workspace, an enclosure with an exhaust fan, or a dedicated fume extraction system. See the Ultimaker Cura documentation for recommended ventilation practices.
2. Bed Adhesion Strategies
| Method | Settings in Cura | When to Use |
|---|---|---|
| PEI Sheet + Glue Stick | No special settings; just clean the PEI surface. | Small-to-medium parts, quick change-over. |
| BuildTak / Polycarbonate Sheet + ABS Slurry | Set Initial Layer Height to 0.2 mm, Initial Line Width to 120 % | Large parts or prints with a big footprint. |
| Hairspray (70 % isopropyl) | Same as above; ensure a thin, even coat. | Budget-friendly, works on glass beds. |
| Magnetic Flexible Bed with Kapton Tape | Increase Initial Layer Speed to 20 mm/s, Initial Layer Temperature 105 °C (ASA) | When you need easy part removal. |
Pro tip: Enable “Z Hop When Retracted” (found under Travel → Z Hop Height) set to 0.4 mm. This lifts the nozzle during travel moves, preventing the hot nozzle from dragging across the freshly printed edge and causing a “lift-off” effect that looks like warping.
3. Print Speed & Acceleration
| Setting | Recommended Value | Rationale |
|---|---|---|
| Print Speed (Walls) | 30–40 mm/s | Slower speeds give the polymer more time to bond, reducing internal stress. |
| Infill Speed | 60 mm/s | Faster infill is fine because it’s internal and not exposed to the air. |
| Top/Bottom Speed | 20–25 mm/s | Guarantees a solid, smooth surface on the top layers. |
| Acceleration | 500 mm/s² (X/Y), 250 mm/s² (Z) | Lower acceleration reduces vibration, which can amplify warping on tall prints. |
Reference: The Cura Speed & Quality Profiles guide explains why slower outer perimeters dramatically improve surface finish on high-temperature filaments. (Cura Speed & Quality Profiles)
4. Layer Height & Adaptive Layers
- Standard Layer Height: 0.2 mm for 0.4 mm nozzle (typical).
- Fine Detail Layer Height: 0.12 mm (use for functional interfaces).
- Adaptive Layer Height (Optional): Enable Adaptive Layers (Settings → Experimental → Adaptive Layers) and set Maximum Layer Height to 0.2 mm, Minimum Layer Height to 0.06 mm. This lets Cura automatically use thicker layers for low-detail sections, cutting print time without sacrificing quality on critical features.
Why it helps: Thicker layers in the lower, less-visible sections keep the part warm longer, reducing the temperature gradient that drives warping. See the Cura Adaptive Layers Optimization article for a deeper dive.
5. Retraction & Ooze Control
| Parameter | ASA | ABS |
|---|---|---|
| Retraction Distance | 6 mm (Bowden) / 1.5 mm (Direct) | 5 mm (Bowden) / 1 mm (Direct) |
| Retraction Speed | 35 mm/s | 30 mm/s |
| Combing Mode | “Within Infill” | “Within Infill” |
| Coasting | 0.2 mm | 0.15 mm |
Enable “Prevent Z Hop When Retracting” only if you notice the nozzle scratching the top layer. Otherwise keep it off to avoid unnecessary Z-moves that can introduce tiny gaps.
6. Support Settings (When Needed)
- Support Placement: Everywhere (if the model has overhangs >45°).
- Support Density: 10–15 % for ASA, 12–18 % for ABS.
- Support Z Distance: 0.15 mm (to make removal easier).
- Support Interface: Enable Support Interface with a 2-layer thickness for a smoother contact surface.
For delicate prints, consider the Tree Supports option, which reduces contact points and thus the risk of warping around the support bases. See our comparison of Tree vs. Normal Supports for more insights. (Cura Tree vs. Normal Supports)
7. Flow Rate & Line Width
- Flow Rate: 100 % (start). If you notice thin walls, increase to 105 % for the outer walls only.
- Line Width: 100 % for infill, 110 % for perimeters (helps with bonding).
Our Cura Flow Rate & Line Width guide shows how a modest 5 % increase can eliminate micro-gaps that later become stress points. (Cura Flow Rate & Line Width)
8. Post-Processing: Acetone Smoothing & Surface Finish
- Safety First: Work in a well-ventilated area or a fume hood. Wear nitrile gloves and eye protection.
- Preparation: Sand the printed part with 200-grit paper to remove major imperfections.
- Acetone Vapor Bath:
- Fill a metal tray with a shallow layer of acetone (≈5 mm).
- Place a raised platform (e.g., a small wire rack) inside the tray.
- Put the printed part on the platform, cover the tray loosely with a lid, and let it sit for 30–60 seconds per side, checking frequently.
- Remove and let the part air-dry for 10 minutes.
- Final Finish: Lightly sand again with 400-grit paper, then apply a UV-stable clear coat if the part will be outdoors.
Health Note: Acetone vapors are flammable and irritating. Keep a fire extinguisher nearby and never use near open flames.
Practical Takeaways – Quick-Start Checklist
| ✅ | Action |
|---|---|
| 1 | Set nozzle to 250 °C (ASA) / 240 °C (ABS) and bed to 100 °C / 95 °C. |
| 2 | Turn cooling fan off (or 10 % for fine details). |
| 3 | Enable Z Hop When Retracted (0.4 mm). |
| 4 | Use PEI sheet + glue stick or ABS slurry for first-layer adhesion. |
| 5 | Lower print speed to 30–40 mm/s for walls, 60 mm/s for infill. |
| 6 | Activate Adaptive Layers if you need a speed boost without losing quality. |
| 7 | Keep the printer inside an enclosure with a small exhaust fan; wear a mask if ventilation is limited. |
| 8 | For large prints, add a brim (8‑10 mm) to increase surface contact. |
| 9 | After printing, consider acetone smoothing for ASA (or ABS) to achieve a glossy, professional finish. |
| 10 | Store any unused filament in a sealed bag with desiccant to prevent moisture absorption. |
How This Profile Fits Into a Complete Cura Workflow
At CuraSlicers.com we believe that settings are only one piece of the puzzle. A successful ASA/ABS print also depends on:
- Printer Calibration – Ensure your X/Y steps per mm are spot-on and your Z-offset is dialed in.
- Material Storage – Keep filaments dry; moisture leads to bubbles and weak layers.
- Workflow Automation – Use tools like n8n to automatically generate Cura profiles based on material selection, then push them to your printer via OctoPrint. (Check out our guide on Cura Slicer vs. Orca Slicer for automation ideas.)
- Quality Assurance – Run a quick Cura Ironing Test on a small calibration cube to verify that the top surface is flat before committing to a large job. (Cura Ironing Test)
Frequently Asked Questions
Q1: Can I print ASA without an enclosure?
A: Yes, but you’ll need a heated bed, a brim, and excellent bed adhesion. Expect higher warping risk on tall parts.
Q2: Does increasing the nozzle temperature help with warping?
A: Slightly. The key is consistent temperature throughout the print, not just a hotter nozzle. Too high a temperature can cause stringing and degrade filament strength.
Q3: How do I know if my enclosure is hot enough?
A: Use a simple thermometer. Aim for 40‑55 °C for ASA and 35‑50 °C for ABS. If the interior stays below 30 °C, you’ll likely see warping.
Q4: Are there any “hidden” Cura features that help with high-temp filaments?
A: Yes – the “Print Temperature Variation” (found under Experimental) lets you create a temperature gradient that eases the transition from the first to the last layers, reducing residual stress. See our Hidden Cura Features article for more. (Hidden Cura Features)
Connecting the Dots – More Cura Resources You’ll Love
- Perfect First Layer in Cura – Learn how to fine-tune the initial layer for flawless adhesion.
- Cura Speed vs. Quality Profiles – Dive deeper into how speed settings affect surface finish and strength.
- Reduce Print Time Cura Guide – When you need faster prints without sacrificing quality, this guide shows you where to trim time safely.
Call to Action
Ready to put this profile to the test? Download the ready-made Cura profile from our Ultimate Cura Profile Settings page, load it into your slicer, and start printing your next ASA or ABS masterpiece today.
Visit our main page for more 3D-printing tips, tutorials, and downloadable profiles: https://curaslicers.com
Join the conversation – Follow CuraSlicers on Twitter, Instagram, and LinkedIn for daily tips, community prints, and live Q&A sessions.
Stay ahead of the curve – Subscribe to our newsletter and receive exclusive access to advanced workflow automations (n8n integrations, custom printer profiles, and more) straight to your inbox.
Happy printing, and may your parts stay flat, your fumes stay low, and your finishes stay glossy!
Sources
- 3D Print Industry Insights – ABS warping statistics, 2024. https://www.3dprintindustry.com/2024/abs-warping-statistics
- Ultimaker Cura Documentation – Ventilation & safety recommendations. https://ultimaker.com/software/ultimaker-cura
- CuraSlicers.com – Various internal guides referenced throughout the article.