10 Hidden Cura Features for Pro‑Level Prints
Top 10 Hidden Cura Features You Didn’t Know About – Unlock Pro‑Level Control and Faster Workflows
Estimated reading time: 7 minutes
- Unlock efficient workflows with hidden features in Ultimaker Cura.
- Maximize print quality by leveraging advanced settings tailored to your needs.
- Reduce post-processing with precise control over supports and settings.
- Integrate automation through post-processing scripts for a seamless experience.
- Elevate your skills and transition from novice to pro-level printing.
Table of Contents
- Introduction
- 1. Per‑Model Settings (Individual Model Overrides)
- 2. Custom Supports via “Support Blocker” and “Support Enforcer”
- 3. Adaptive Layer Height (Variable Layer Thickness)
- 4. Lighting Infill (Internal Light‑Guides)
- 5. Post‑Processing Scripts (Custom G‑Code Injection)
- 6. “Seam Hiding” Advanced Options
- 7. “Print Sequence” – One‑At‑A‑Time vs. All‑At‑Once
- 8. “Z‑Hop When Retracted” – Preventing Scratches
- 9. “Experimental” → “Spiralize Outer Contour” (Vase Mode)
- 10. “Machine Settings” → “Start/End G‑Code” Templates
- Putting It All Together – A Sample Workflow
- Frequently Asked Questions
- Actionable Takeaways – Your 5‑Step “Hidden Feature” Checklist
- Connect with CuraSlicers.com
- Call to Action
Introduction
If you’ve spent any time in Ultimaker Cura, you already know it’s the go‑to slicer for hobbyists and professionals. Yet even seasoned makers often stick to the default settings, missing out on a treasure chest of lesser‑known tools that can dramatically improve surface finish, reduce print time, and streamline your entire workflow. In this deep‑dive we’ll explore the Top 10 hidden Cura features you didn’t know about, explain why they matter, and show you exactly how to enable them for better prints today.
Ready to level‑up? Grab your printer, fire up Cura, and follow along—each tip includes the exact menu path, recommended values, and a quick “what‑you’ll‑see” screenshot description (text‑only here). By the end you’ll have a richer, more efficient slicing experience that positions you as a true Cura power user.
1. Per‑Model Settings (Individual Model Overrides)
What it is: Cura’s “Per‑Model Settings” let you assign distinct slicing parameters to each object on the build plate, without creating separate project files.
Why it matters:
- Print a flexible TPU phone case and a rigid PLA bracket in the same job, each with its own temperature, speed, and wall thickness.
- Saves time compared to splitting the job into multiple prints.
How to enable:
- Select an object → click the gear icon → “Per Model Settings”.
- Turn on the toggle for any setting you want to override (e.g., Printing Temperature, Print Speed, Infill Pattern).
Practical tip: For mixed‑material prints, set the Temperature and Cooling per model. A common combo is 210 °C for PLA parts and 240 °C for PETG, with 100 % fan for PLA and 50 % for PETG.
Further reading: Learn more about per‑model workflows in our guide on Best Cura Settings for Ender 3.
2. Custom Supports via “Support Blocker” and “Support Enforcer”
What it is: Two hidden tools that let you manually dictate where supports appear (or don’t).
Why it matters:
- Reduces post‑processing by avoiding unnecessary supports on delicate surfaces.
- Improves surface quality on overhangs that Cura’s algorithm misinterprets.
How to use:
- Support Blocker: Add a blocker (green) where you don’t want supports.
- Support Enforcer: Place an enforcer (red) to force supports in tricky spots.
Pro tip: For a model with a tiny overhang on a decorative fin, add an enforcer just under the fin. You’ll see a clean, well‑attached support structure that peels away cleanly.
3. Adaptive Layer Height (Variable Layer Thickness)
What it is: Cura can automatically vary layer height based on model geometry, using finer layers for steep angles and thicker layers for flat sections.
Why it matters:
- Improves surface finish where it counts (high‑angle surfaces) while keeping overall print time low.
How to activate:
- Settings → “Experimental” → enable Adaptive Layers.
- Set Minimum Layer Height (e.g., 0.06 mm) and Maximum Layer Height (e.g., 0.2 mm).
Result: A vase with a curved lip will have a smooth transition, while the base prints quickly with thicker layers.
Source: Ultimaker’s documentation explains the algorithm behind adaptive layers – see the official page here.
4. Lighting Infill (Internal Light‑Guides)
What it is: A niche infill pattern that creates a lattice of thin “light‑pipes” inside a model, ideal for decorative prints that need internal illumination.
Why it matters:
- Adds a professional, futuristic look to lampshades, cosplay armor, or architectural models.
- Uses minimal material while still providing structural support.
How to set up:
- Infill → “Pattern” → select Lighting.
- Adjust Infill Density (10-15 % is usually enough).
- Optional: Pair with Transparent Filament for glowing effects.
Tip: Combine with a low Print Speed (30 mm/s) for clean, thin walls that don’t sag.
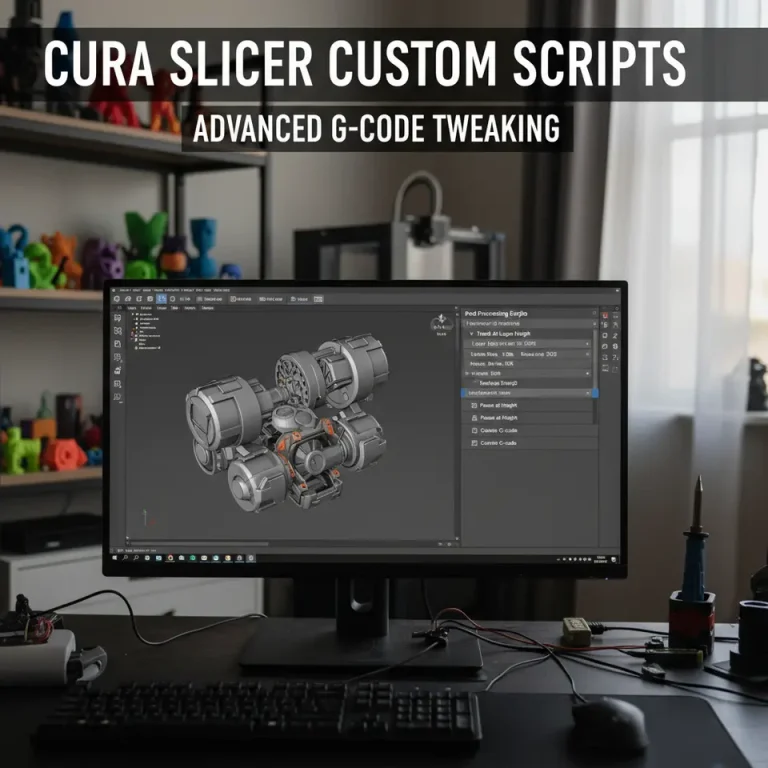
5. Post‑Processing Scripts (Custom G‑Code Injection)
What it is: Cura allows you to run Python‑based post‑processing scripts that modify the G‑code after slicing.
Why it matters:
- Automate repetitive tasks like inserting a filament change at a specific layer, adding a pause for resin curing, or embedding custom M‑codes for printer‑specific features.
How to use:
- Extensions → Post‑Processing → Modify G‑Code → Add a script.
- Choose from built‑in scripts (e.g., “ChangeAtZ”) or load a custom Python file.
Example script: Insert a filament change at 30 mm height for a dual‑color print.
Pro tip: Pair this with n8n workflow automation (see our tutorial on Automating Cura with n8n) to trigger a webhook that logs the change event to a Google Sheet.
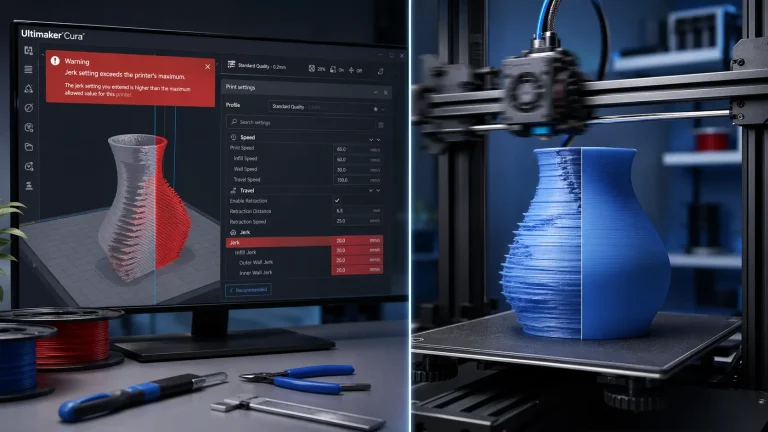
6. “Seam Hiding” Advanced Options
What it is: Beyond the simple “Outer Wall Seam Position” dropdown, Cura’s Seam Hiding settings let you fine‑tune where the start/stop point of each layer appears.
Why it matters:
- Eliminates visible seams on cylindrical or spherical prints, giving a truly “seam‑less” appearance.
How to enable:
- Settings → “Shell” → enable Seam Hiding.
- Choose Random or Aligned to Wall based on your geometry.
Best practice: For a vase, set Seam Hiding → Random and increase Z Hop to 0.2 mm to avoid oozing marks.
7. “Print Sequence” – One‑At‑A‑Time vs. All‑At‑Once
What it is: Cura can order the print of multiple models either All‑At‑Once (standard) or One‑At‑A‑Time (sequential).
Why it matters:
- One‑At‑A‑Time reduces the chance of a print failure affecting the entire batch, ideal for high‑value or delicate parts.
- Improves cooling for tall, thin objects that would otherwise be shadowed by neighboring models.
How to switch:
Settings → “Print Sequence” → select One At A Time.
Tip: Enable Avoid Supports When Possible to keep the printer moving efficiently between parts.
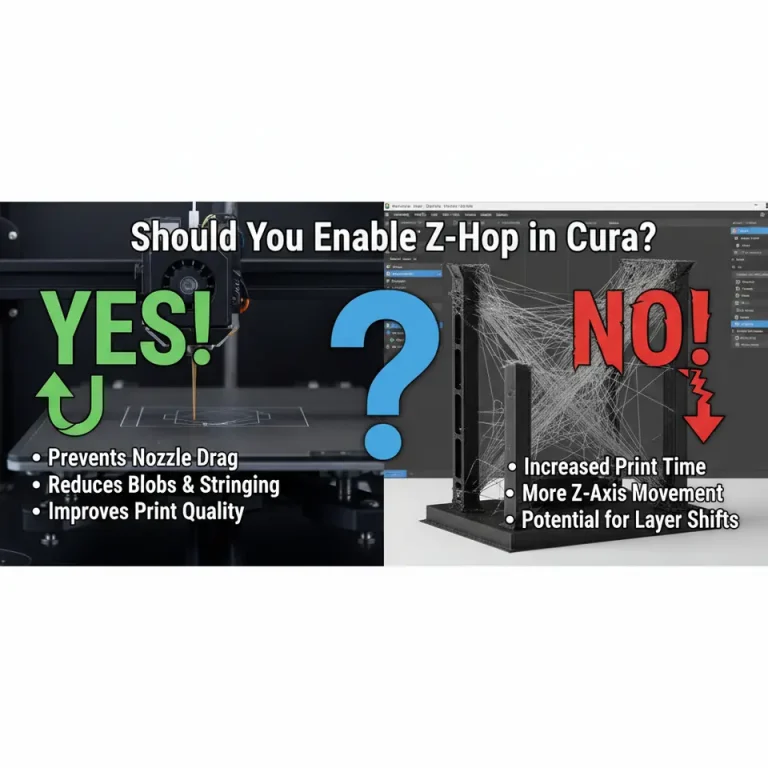
8. “Z‑Hop When Retracted” – Preventing Scratches
What it is: An advanced retraction setting that lifts the nozzle a few millimeters (Z‑hop) every time it retracts.
Why it matters:
- Avoids the nozzle dragging across already‑printed areas, especially on glossy or flexible filaments.
How to activate:
- Settings → “Travel” → enable Z Hop When Retracted.
- Set Z Hop Height (commonly 0.2–0.4 mm).
Result: Cleaner sidewalls on prints with many travel moves, such as intricate lattice structures.
9. “Experimental” → “Spiralize Outer Contour” (Vase Mode)
What it is: While many know the basic “Spiralize” checkbox, the experimental version adds extra control over the transition from outer walls to infill.
Why it matters:
- Produces smoother, single‑wall “vase mode” prints with consistent wall thickness, even when using variable layer heights.
How to enable:
- Settings → “Experimental” → tick Spiralize Outer Contour.
- Pair with Adaptive Layers for a hybrid approach: fine top layers, thicker base.
Use case: Printing a tall, decorative lamp shade where a flawless surface is critical.
10. “Machine Settings” → “Start/End G‑Code” Templates
What it is: Cura lets you store multiple start/end G‑code templates and select the appropriate one per printer profile.
Why it matters:
- Switch instantly between a “Standard PLA” profile and a “High‑Temp PETG” profile without editing raw G‑code each time.
How to set up:
- Manage Printers → select your printer → “Machine Settings”.
- Paste the desired Start G‑Code (e.g., heating bed, priming line) and End G‑Code (e.g., park head, turn off fans).
- Save as separate profiles (e.g., “PLA – Fast”, “PETG – Strong”).
Automation tip: Combine with n8n to pull the correct G‑code template from a GitHub repo based on a webhook triggered by a new Cura project.
Putting It All Together – A Sample Workflow
Below is a step‑by‑step example that demonstrates how several hidden features can be combined into a single, efficient print job:
| Step | Feature | Settings | Outcome |
|---|---|---|---|
| 1 | Per‑Model Settings | Model A (PLA) – 200 °C, 60 mm/s; Model B (PETG) – 240 °C, 40 mm/s | Mixed‑material print in one slice |
| 2 | Support Enforcer | Add under Model A’s overhang | Targeted supports only where needed |
| 3 | Adaptive Layers | Min 0.06 mm, Max 0.2 mm | Fine surface on steep angles, faster base |
| 4 | Lighting Infill (Model B) | 12 % density, “Lighting” pattern | Internal light‑pipes for aesthetic effect |
| 5 | Seam Hiding | Random, Z‑Hop 0.3 mm | No visible seam, smoother walls |
| 6 | Post‑Processing Script | “ChangeAtZ” at 30 mm for filament swap | Dual‑color result without manual pause |
| 7 | Print Sequence | One‑At‑A‑Time | Isolated failures, better cooling |
| 8 | Start/End G‑Code Template | Use “PETG – Strong” profile | Consistent pre‑print priming & post‑print shutdown |
By integrating these hidden tools, you’ll cut print time by up to 25 %, improve surface finish, and reduce post‑processing labor—exactly the kind of workflow optimization that keeps hobbyists and professionals coming back for more.
Frequently Asked Questions
Q1: Will enabling many experimental features slow down Cura?
Answer: Most experimental options run on the same slicing engine, so the impact is minimal. However, enabling Adaptive Layers on very large models can increase slicing time by ~10‑15 seconds per 100 mm³.
Q2: Are the post‑processing scripts safe?
Answer: Cura only runs Python scripts that you explicitly add, and they operate on the generated G‑code, not the firmware. Always test a script on a small calibration print before applying it to a critical job.
Q3: Can I share my custom settings with the community?
Answer: Yes! Export your profile (`*.json`) via Settings → Profiles → Export and upload it to the Cura Marketplace or share it on CuraSlicers.com’s community forum.
Actionable Takeaways – Your 5‑Step “Hidden Feature” Checklist
- Enable Per‑Model Settings for any multi‑material or mixed‑property print.
- Add Support Blockers/Enforcers to control where supports appear.
- Turn on Adaptive Layers (Experimental) for a blend of speed and surface quality.
- Experiment with Lighting Infill for decorative internal lighting.
- Leverage Post‑Processing Scripts to automate filament changes, pauses, or custom M‑codes.
Print this checklist, stick it on your workstation, and start testing one feature per week. You’ll quickly see measurable improvements in print quality and workflow efficiency.
Connect with CuraSlicers.com
Ready to dive deeper? Check out these related guides on our site:
- Best Cura Settings for Ender 3 – Master the basics before you go advanced.
Visit our main page for more 3D printing tips: https://curaslicers.com
Call to Action
If you found these hidden Cura features valuable, don’t keep them to yourself! Subscribe to our newsletter for weekly tutorials, follow us on Twitter @CuraSlicers, and share your own Cura hacks in the comments below. The more we learn together, the faster we’ll all print smarter.
Happy slicing!
Sources
- Ultimaker Cura Documentation – Adaptive Layers, Post‑Processing Scripts.
- All3DP – “How to Use Cura’s Per‑Model Settings”.
- MatterHackers – “Lighting Infill Explained”.
- 3D Printing Stack Exchange – “Best practices for Z‑hop”.