Creating Tree Supports for Hollow 3D Prints
How to Create Printable Supports Inside Hollow Parts Using Cura’s Tree Support Strategies
Estimated reading time: 8 minutes
- Choose wisely when to employ tree supports, particularly for hollow models and fragile structures.
- Adjust tree support settings like branch density and Z distance to optimize performance.
- Remove tree supports with care, leveraging tools and techniques to preserve the integrity of your model.
- Utilize post-processing methods for achieving a refined finish on your prints.
Table of Contents
- Understanding Tree Supports
- Setting Up Tree Supports in Ultimaker Cura
- Tips for Printing Hollow Parts with Tree Supports
- Removing Tree Supports
- Post-Support Finishing
- Practical Takeaways
- FAQ
Understanding Tree Supports
Tree supports are unique compared to traditional support structures. They consist of a trunk and branches that extend to support overhangs and can be an excellent choice for printing hollow parts with fragile overhangs. The benefits of using tree supports include reduced material usage, easier removal, and improved surface finish on the supported areas.
When to Use Tree Supports
Tree supports are particularly advantageous in several situations:
- Hollow Models: When printing hollow sculptures or objects with internal cavities, tree supports can provide stability without filling the entire interior space.
- Fragile Overhangs: For delicate designs, tree supports minimize contact with the model, reducing the chance of damage during support removal.
- Complex Geometries: Tree supports are ideal for intricate shapes with varying overhang angles, ensuring that every aspect of your design is adequately supported.
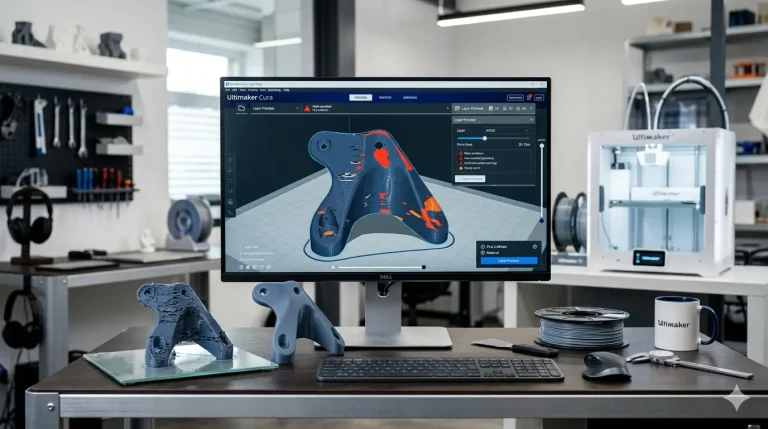
Setting Up Tree Supports in Ultimaker Cura
To begin using tree supports in Cura, follow these steps:
- Add Your Model: Import your 3D model into Ultimaker Cura and position it correctly on the build plate.
- Select Support Options: In the ‘Support’ section of the Cura interface, choose ‘Tree’ as the support structure.
- Adjust Support Settings:
- Branch Density: This setting controls how dense the branches will be—higher density provides better support but uses more material. A branch density between 15-30% is commonly recommended for most hollow parts.
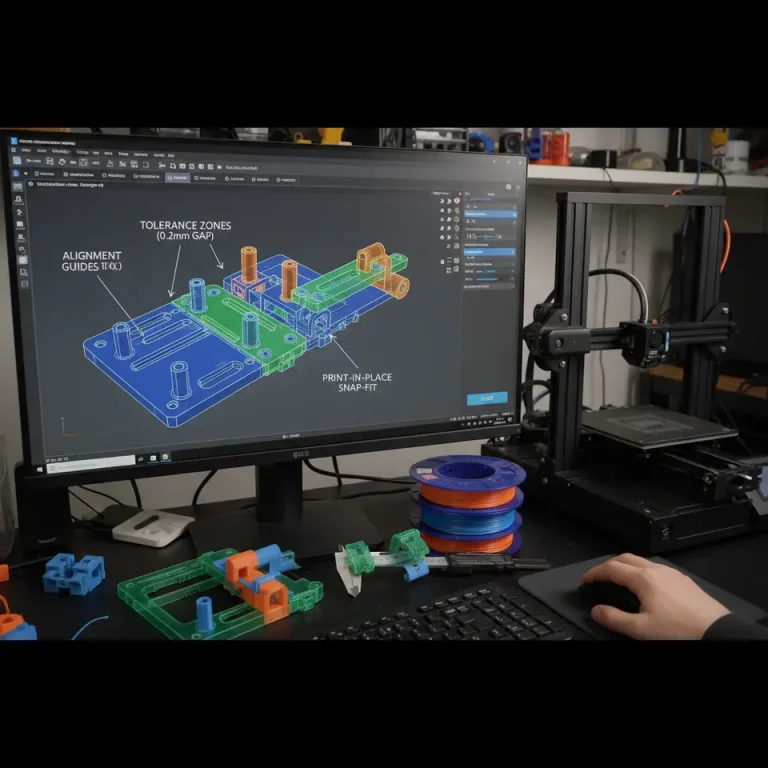
- Support Z Distance: This defines the gap between the support structure and the model, which can help in easier support removal. A distance of approximately 0.2 mm is usually effective, balancing support and model adhesion.
- Support Overhang Angle: You can adjust the angle to determine where supports will be generated. The default angle is typically set to 60 degrees, but you can experiment based on your model’s geometry.
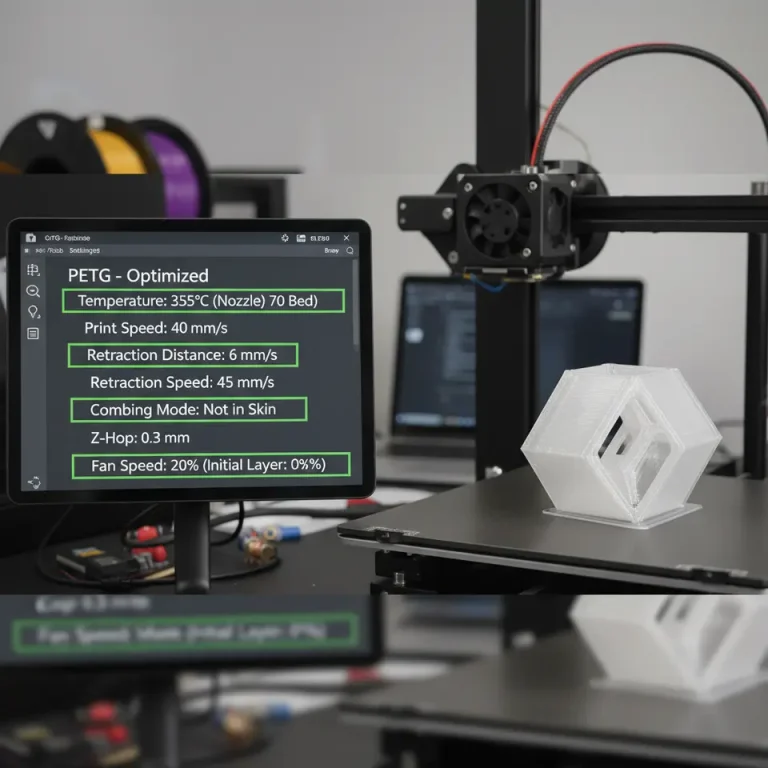
- Optimize Other Settings: For hollow parts, consider adjusting parameters such as layer height and print speed to improve the overall finish and support performance.
Tips for Printing Hollow Parts with Tree Supports
- Use a Lower Print Speed: For models with delicate features and complicated overhangs, a slower print speed can enhance the quality of your supports and the final print.
- Enable Support for the “Bottom” Only: This ensures branches only grow from strategic points instead of filling the entire hollow area, conserving material and simplifying support removal.
Removing Tree Supports
Removing tree supports can be challenging due to their design. Here are some practical tips:
- Twist and Snap: Tree branches are designed to break away from the main trunk easily. Gently twist to snap them off without damaging your model.
- Use Tools: For those stubborn spots, employing a pair of pliers or needle-nose tweezers can help grip and remove smaller branches.
- Post-Processing: After removal, sanding any rough edges where the supports were can greatly improve the aesthetics of your print. For finer finishes, consider techniques like vapor smoothing or applying a finishing compound.
Post-Support Finishing
Once you’ve removed the supports, post-processing is the next critical step to give your model a polished look:
- Sanding: Begin with a coarse grid and progress to finer grids to smooth out the areas where supports were attached.
- Painting: Use appropriate paints to enhance the color and finish of your model. Ensure your primer is compatible with the type of filament used.
- Assembly: If your hollow part consists of multiple components, ensure proper fitting and alignment post-finish before final assembly.
Practical Takeaways
To summarize, here are key takeaways on using Cura’s tree support strategies effectively:
- Choose wisely when to employ tree supports, particularly for hollow models and fragile structures.
- Adjust tree support settings like branch density and Z distance to optimize performance.
- Remove tree supports with care, leveraging tools and techniques to preserve the integrity of your model.
- Utilize post-processing methods for achieving a refined finish on your prints.
FAQ
Q: What are tree supports?
Tree supports are a type of support structure in 3D printing that consists of a trunk and branches, providing support primarily for overhangs while minimizing contact with the model.
Q: How do I remove tree supports?
Tree supports can be removed by twisting and snapping the branches off, and for stubborn areas, using tools like pliers or tweezers can help.
Q: When should I use tree supports?
Use tree supports when printing hollow models, fragile overhangs, or complex geometries that require minimal contact with the model.
Q: How can I enhance the finish after removing supports?
Post-processing techniques such as sanding, painting, and careful assembly can greatly improve the final appearance of your print.
For more insights into enhancing your 3D printing experiences, check out our guides on Cura Layer Height and Speed Optimization and Perfect First Layer Settings in Cura.
As you navigate through your 3D printing journey, don’t hesitate to visit CuraSlicers.com for a wealth of resources, tips, and tutorials to elevate your skills.
To stay updated on the latest in 3D printing, follow us on our social platforms or consider subscribing to our newsletter for future guides!
For comprehensive guidance and further reading, consult the Ultimaker Cura Documentation which provides in-depth details about optimizing your 3D printing workflow.
Happy printing!