Bridging and Cantilevering with Cura Slicer
Cura Slicer Bridging and Cantilever Strategies for Architectural Model Printing
Estimated Reading Time: 7 minutes
- Master bridging and cantilevering: Essential for complex architectural designs.
- Optimize Cura settings: Tweak configurations for better print integrity.
- Employ effective finishing techniques: Enhance realism post-printing.
- Test with sample structures: Validating designs can save material and time.
Why Bridging and Cantilevering Matter in Architectural Model Printing
Architectural models often feature complex architectures, including balconies, canopies, and intricate roof designs. These elements may extend without direct material support beneath, leading to challenges during the printing process. Without the right strategies, overhangs can lead to print failures, poor surface quality, and compromised aesthetics. Additionally, inadequate support structures can spoil the geometrical fidelity of a design.
To ensure that your architectural models are both structurally sound and visually appealing, employing effective bridging and cantilever strategies is key. Let’s explore how Cura Slicer settings can be fine-tuned to achieve optimal results in these scenarios.
Understanding Bridging in 3D Printing
Bridging refers to the ability of 3D printers to span gaps without support. Typically, this is more challenging with larger spans due to gravity’s effect on the filament. In architectural model printing, effective bridging can significantly reduce the reliance on support structures and thus maintain the integrity of the model’s geometry.
According to Ultimaker’s official documentation, tuning the printer’s speed, cooling, and extrusion settings can specifically optimize bridging performance (source).
Key Bridging Settings in Cura
- Bridge Flow Ratio: Adjusting this setting ensures that the right amount of filament is extruded during bridging. Increasing the ratio may help in better filament adhesion.
- Print Speed for Bridges: Lowering the print speed for bridged areas can help to achieve better results. A common practice is to decrease the speed to around 30-50% of the normal speed during these segments.
- Cooling: Enhancing cooling during bridging by using fans and optimizing fan speed ensures the filament solidifies quickly, preventing sagging.
- Bridge Density: Use a higher bridge density to provide more material and ensure stability.
Practical Takeaways on Bridging
- Test Spans: Conduct bridge tests with varying distances (up to 50mm) to find the optimal settings for your specific printer and filament type.
- Initial Settings: Use standard defaults for settings, then modify gradually while observing print quality.
Cantilever Strategies for Architectural Models
Cantilevering is the technique of creating unsupported overhang structures, which is prevalent in modern architectural designs, such as balconies or ledges that jut out. Proper cantilever designs are crucial to ensuring your models retain their intended shapes post-printing.
Cura Settings for Improved Cantilevering
- Adaptive Layers: Enable Adaptive Layers in Cura to customize layer heights based on the model’s geometry. Wider gaps in cantilevers may require thicker layers to allow for additional material strength.
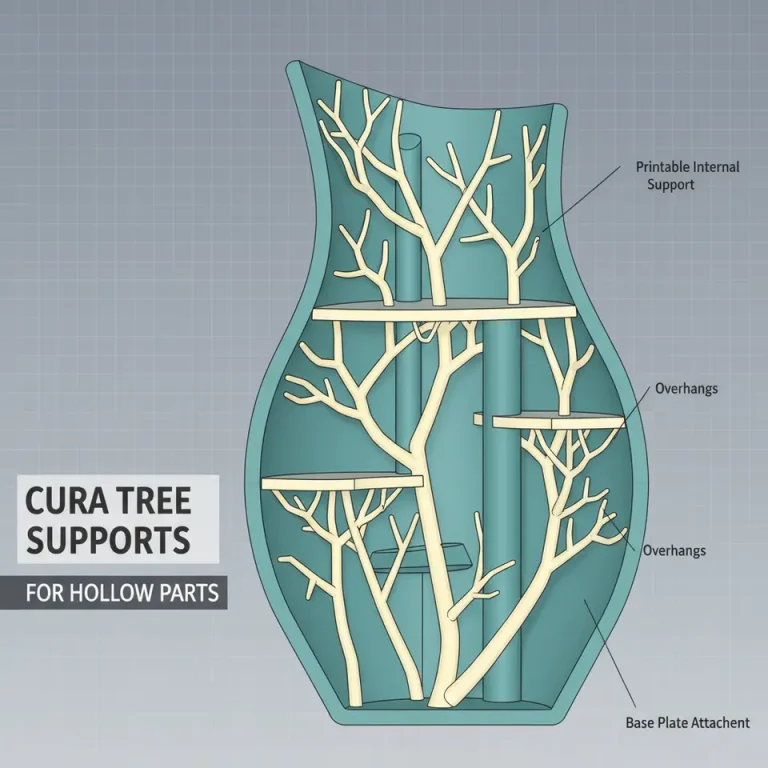
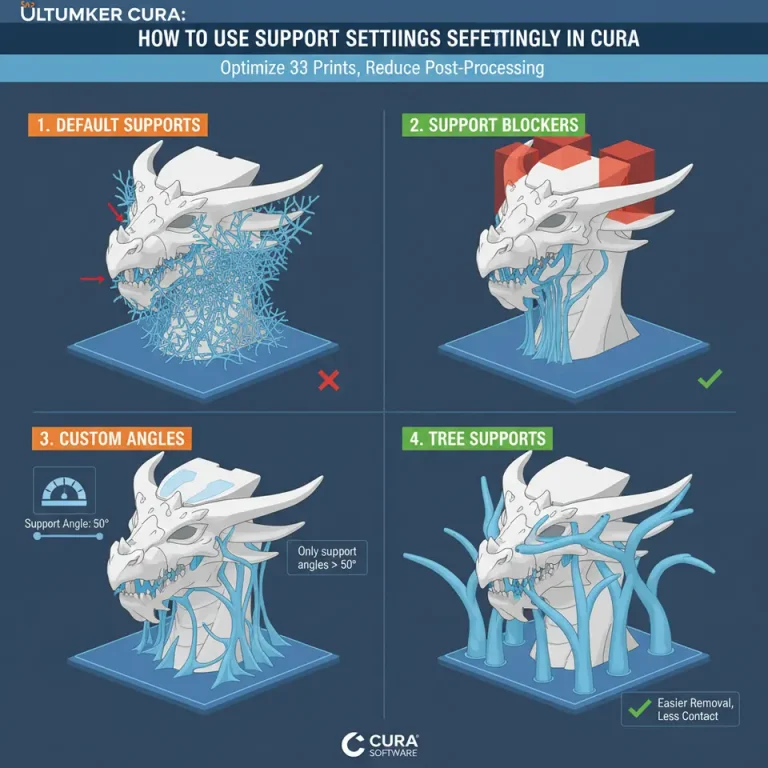
- Support Settings: Adjusting support types can help maintain model integrity. Use tree supports for minimal footprint during printing, allowing for easier removal without damaging the cantilevered sections.
- Z-Hop When Retracted: Enabling Z-hop can help avoid dragging the nozzle over the cantilevered portions, reducing the likelihood of damaging delicate features.
Implementing Cantilever Strategies
- Orientation: Consider your model’s orientation on the print bed; positioning it at an angle may alleviate issues with cantilevered structures. Utilize Cura’s model positioning tools for optimal layout.
- Use of Lightweight Filament: If possible, utilize advanced lightweight filaments to reduce the overall weight on the cantilevered sections, thereby minimizing strain on the model during printing.
The Importance of Finishing Techniques
After successful printing, the next step is to provide your architectural models with visual realism. Finishing techniques can greatly enhance the perceived quality and detail of your prints.
Recommendations for Finishing
- Sanding: Lightly sand down any imperfections, especially around the edges of cantilevered sections.
- Painting: Use spray paints for larger surfaces, and consider airbrushing for detailed areas to add depth and realism.
- Additional Texturing: Apply details like textures or stickers to mimic real-world materials, further increasing the authenticity of your model.
Use Case: Printable Building Test Set and Orientation Checklist
For those keen on validating their designs, creating a printable building test set can be invaluable. This should include simple test structures that incorporate bridging and cantilevering.
Building Test Set Components
- Bridging Test: Include a simple bridge model that spans 50mm, with variations in layer height.
- Cantilever Test: Create a sample structure with several cantilevers up to 25mm long with different support configurations.
Orientation Checklist
- Stable Base: Ensure the model has a stable base for initial print stability.
- Minimized Overhangs: Look for areas where material can be reduced without compromising design.
Conclusion and Call to Action
Incorporating effective bridging and cantilever strategies into your architectural model printing process can significantly enhance your results. By tweaking Cura Slicer settings and applying thoughtful design approaches, you ensure that your prints are of the highest quality.
For more in-depth guides on optimizing your 3D printing experience, be sure to check out our articles on Cura Speed/Quality Profiles and Cura Ironing Techniques.
We invite you to explore more of our resources and tutorials on CuraSlicers.com and follow us on social media for the latest tips and trends in 3D printing. Subscribe now to stay updated on all our upcoming posts!
Remember, the future of architectural modeling in 3D printing starts with mastering these techniques. Happy printing!
FAQ
What is bridging in 3D printing?
Bridging is the process by which a 3D printer creates spans of material between two points without any direct support underneath.
Why is cantilevering important?
Cantilevering allows for the creation of overhanging structures, an essential feature for accurately modeling complex architectural designs.
How can I improve my bridging results?
Adjust the Bridge Flow Ratio, lower print speeds during bridging, enhance cooling, and increase bridge density in Cura settings to improve results.
What finishing techniques can enhance my prints?
Techniques like sanding, painting, and texturing can significantly enhance the visual appeal and realism of your architectural models.