Predicting Print Failures Using Cura
- Cura’s Layer View helps identify potential issues before printing.
- Speed Maps inform necessary adjustments to print speed for better quality.
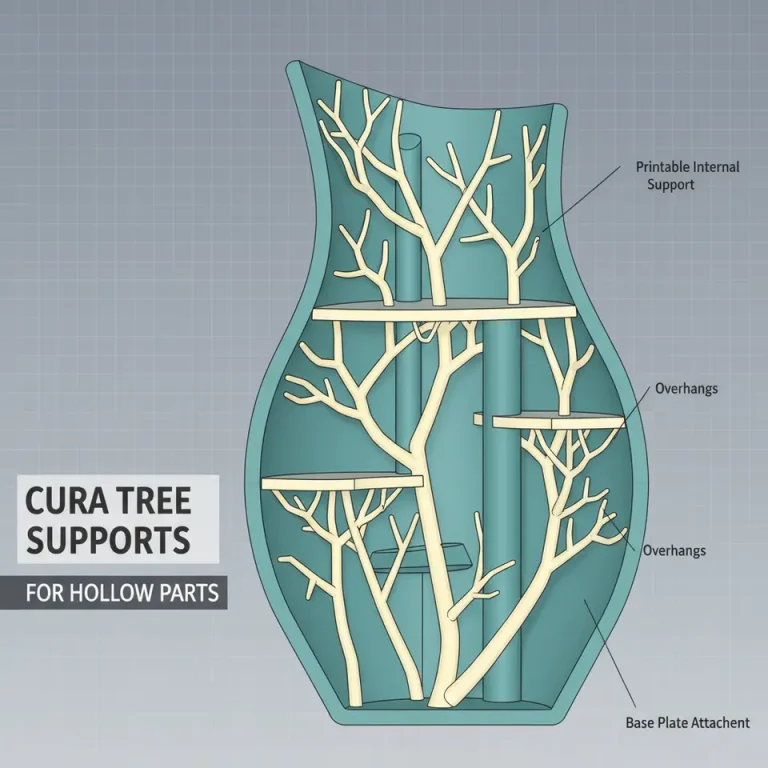
- Utilizing the Overhang Analysis tool is crucial for models with significant overhangs.
- Adjustments in settings can greatly reduce common printing failures.
- Utilize resources on CuraSlicers.com for further guidance.
Understanding Cura’s Preview Features
Layer View
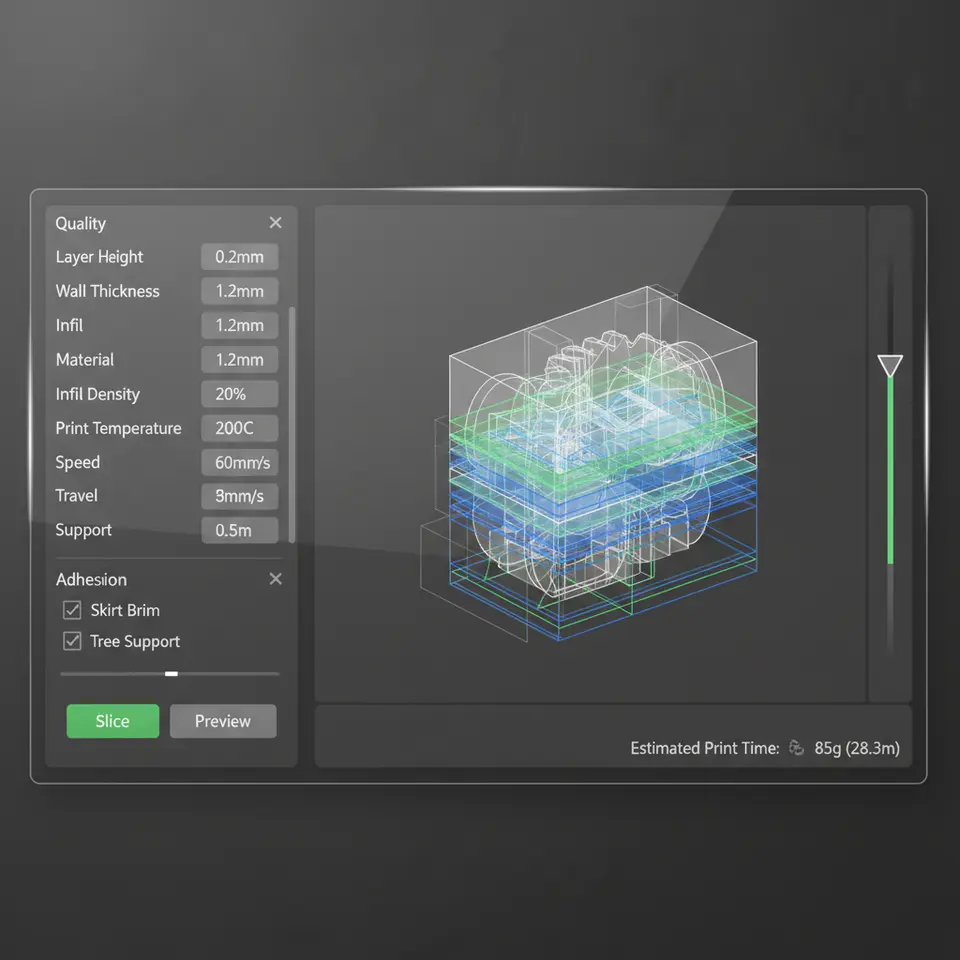
- Load your model and configure your slicer settings.
- Click on the “Preview” button at the top right corner of the Cura interface.
- Rotate through the layers using the slider to visualize the structure at incremental heights.
Speed Maps
- Colors indicate printing speeds—blue being slow for precision, red indicating faster movement.
- High-speed areas can lead to issues if filament doesn’t have adequate time to solidify.
Overhang Analysis
- Activate the Overhang Analysis tool in the preview panel.
- Identify critical overhang areas (colored in yellow/orange/red) and consider adding supports or adjusting your print angle.
Practical Takeaways for Predicting Failures
2. Adjust Print Speed: After analyzing speed maps, you might discover certain parts are too fast for your current filament. Slow down the print speed in those segments through Cura’s Print Settings.
3. Utilizing Supports Wisely: No matter what the Overhang Analysis reveals, sometimes adding additional supports can save a print. Expand support density or use tree supports effectively. Our guide on Cura Support Settings for Overhangs can help you navigate this.
4. First Layer Calibration: Always ensure your first layer settings are tailored based on the Layer View inspection. This can significantly reduce delamination issues commonly associated with initial prints.
Troubleshooting Common Issues
- Clogged Nozzle: If you see intermittent layering or poor extrusion patterns, it may be due to a clogged nozzle. Regular cleaning and maintenance can prevent this.
- Warping: If you observe warping (common with materials like ABS), consider adjusting your bed temperature or experimenting with different adhesion techniques. Our post on Best Practices for First Layer Adhesion offers insights to improve your adhesion strategies.
- Layer Separation: Invest in proper cooling settings as lower temperatures may help with layer bonding. Adjust your cooling fan speed in sections needing extra stability.
How It Connects to CuraSlicers.com Resources
Conclusion
FAQ
Yes, finer layer heights can improve detail and adhesion, especially in complex areas where issues are likely to occur.
2. How can I determine if my print speed is too fast?
Using speed maps in Cura can help visualize where areas may be printing too quickly, signaling a need for adjustment in those sections.
3. What should I do if I see warping in my prints?
Consider lowering bed temperature or trying different adhesion methods to minimize warping, which is common with specific materials like ABS.
4. Is it necessary to use supports on all overhangs?
Not always, but the Overhang Analysis tool can help determine where supports are critical to ensure successful print quality.