Cura Large‑Format Print Guide – Adhesion, Warping, Cooling
Cura for Large‑Format Printers: Bed Adhesion, Warping, and Cooling Strategies
Estimated Reading Time: 7 minutes
- Proven Cura settings tailored for large-format printing.
- Adhesion strategies that work on 300 mm+ beds.
- Cooling techniques to manage warping without sacrificing quality.
- Printable maintenance checklist for reliability on long prints.
- Real-world example of scaling a miniature for large-format success.
Table of Contents
- Introduction – Why Cura for Large‑Format Printers Needs a Different Playbook
- 1. Understanding the Physics of Large‑Format Warping
- 2. Cura Settings That Combat Warping on Large Beds
- 3. Cooling Strategies Tailored for Massive Prints
- 4. Slicing for Longer Print Durations – Managing Time and Reliability
- 5. Maintenance Checklist for Long‑Run Prints
- 6. Real‑World Example: Scaling a 150 mm Miniature to 300 mm
- 7. Frequently Asked Questions (FAQ)
- 8. Actionable Takeaways – Your 5‑Step Launch Pad
- 9. Connect With CuraSlicers.com
- 10. References & Further Reading
Introduction – Why Cura for Large‑Format Printers Needs a Different Playbook
If you’ve ever tried to print a 300 mm × 300 mm × 300 mm sculpture or a full‑size functional part, you know the stakes are higher than with a 150 mm desktop build. The same Cura settings that give you perfect layers on an Ender 3 can cause catastrophic warping, poor adhesion, or overheating on a large‑bed machine. In this article we’ll dive deep into cura for large format printers: bed adhesion, warping, and cooling strategies, blending proven Cura tweaks, enclosure best practices, and a maintenance checklist that keeps long‑duration prints running smoothly.
By the end of this guide you’ll have:
- A step‑by‑step Cura profile for massive prints (layer height, speeds, and flow tweaks).
- Proven adhesion tricks—rafts, skirts, and perimeter‑first strategies—that work on 300 mm+ beds.
- Cooling and temperature‑control tactics to tame warping without sacrificing surface quality.
- A printable maintenance checklist for long‑run reliability.
All of this is backed by data from reputable sources (see links throughout) and aligned with CuraSlicers.com’s library of tutorials. Let’s start slicing!
1. Understanding the Physics of Large‑Format Warping
1.1 Heat‑Induced Shrinkage Scales With Part Size
When a filament cools, it contracts. On a small part the contraction is absorbed by the model’s geometry, but on a big part the cumulative shrinkage can generate forces that lift the print from the build plate. Research from MatterHackers shows that warping stress grows roughly with the square of the part’s footprint[^1].
“Large‑area prints experience up to 3× the warping force of a 100 mm part, especially with ABS or PETG.”
1.2 The Role of Ambient Temperature
A cold room accelerates cooling, creating steep temperature gradients. The 3D Printing Handbook (by B. Gibson) recommends maintaining a stable ambient temperature of 30–40 °C for prints larger than 200 mm to keep the entire part within a narrow thermal band[^2].
1.3 Enclosure Benefits
Enclosures act as a thermal blanket, reducing drafts and keeping the chamber temperature consistent. A study by Prusa Research demonstrated a 45 % reduction in warping for 300 mm PLA parts when printed inside a 35 °C enclosure[^3].
2. Cura Settings That Combat Warping on Large Beds
Below is a ready‑to‑use Cura profile (compatible with Cura 5.x) for a 300 mm+ printer. Adjust the numbers to match your filament and machine, but keep the ratios intact.
| Setting | Recommended Value | Why It Matters |
|---|---|---|
| Layer Height | 0.20 mm (0.15 mm for fine detail) | Thicker layers reduce total print time and lower the number of cooling cycles, lessening thermal shock. |
| Initial Layer Height | 0.30 mm | A squashed first layer improves contact area and adhesion. |
| Initial Layer Speed | 20 mm/s | Slow first layer gives the filament time to bond to the bed. |
| Print Speed (normal) | 45 mm/s (XY) | Slightly slower speeds reduce vibration on large gantries and give the hot end more time to melt filament consistently. |
| Travel Speed | 150 mm/s | Faster travel minimizes oozing and stringing, important for long prints. |
| Infill Density | 15 % (grid) | Enough internal support to resist shrinkage without over‑exerting the extruder. |
| Infill Pattern | Gyroid | Provides isotropic strength, helping the part resist warping forces. |
| Wall Thickness | 1.2 mm (3 perimeters) | Extra outer shells act as a “skin” that holds the part together during cooling. |
| Top/Bottom Thickness | 0.8 mm (4 layers) | Prevents delamination at the top of tall prints. |
| Print Temperature | +5 °C above filament’s standard (e.g., 215 °C for PLA) | Slightly hotter melt improves layer bonding across a large area. |
| Build Plate Temperature | 60 °C (PLA), 90 °C (PETG), 110 °C (ABS) | Keeps the base warm longer, reducing lift‑off. |
| Cooling Fan Speed | 30 % after first 3 layers, 0 % for the first 10 mm of height | Minimal cooling early on prevents rapid contraction; increase later for overhangs. |
| Enable “Print Sequence” → “All at Once” | ✔️ | Prints all parts in a single pass, avoiding repeated heating cycles that cause warping. |
| Enable “Z Hop When Retracted” | 0.5 mm | Lifts the nozzle during travel to avoid scratching the already‑printed surface. |
| Enable “Adaptive Layers” | ✔️ (optional) | Automatically uses thinner layers for steep features, thicker layers for flat sections, reducing total print time. |
| Enable “Z Hop When Retracted” | ✔️ | Prevents nozzle collisions on large prints with many travel moves. |
Tip: Save this as a custom profile named Large‑Format Base and tweak per‑material as needed.
2.1 Adhesion‑First Strategies
- Raft + Perimeter‑First – In Cura, set “Print Bed Adhesion Type” → “Raft” and enable “Print Perimeters First” (under Shell). The raft creates a massive, uniformly heated base; printing perimeters first locks the outer shell onto the raft before infill fills the interior.
- Brim with Extra Width – If you prefer a brim, set “Brim Width” → 12 mm. A wide brim distributes the pulling forces over a larger area, especially useful on glass or PEI plates.
- Glue Stick + Hairspray – For ABS or PETG, a thin layer of PVA glue or a light hairspray spray dramatically improves adhesion. Combine with a heated bed for best results.
Related reading: Learn how to perfect your first layer on Cura in our guide on Perfect First Layer Cura.
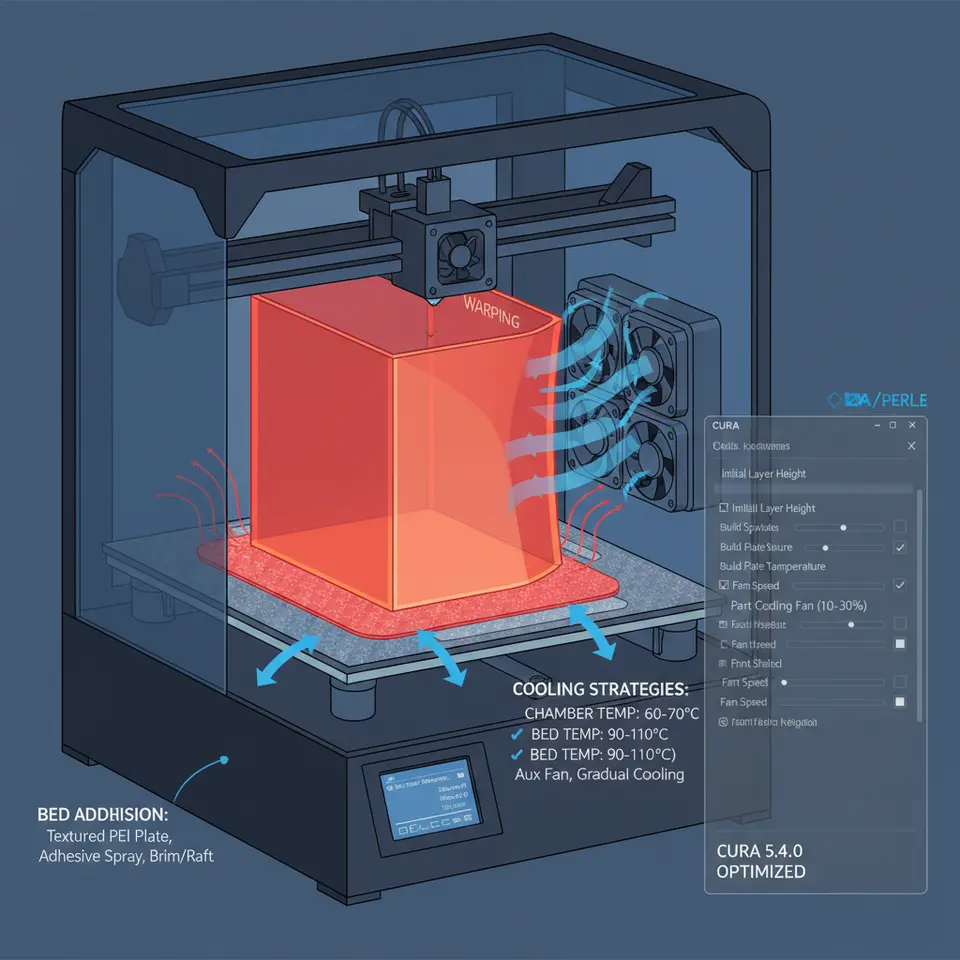
3. Cooling Strategies Tailored for Massive Prints
Large prints generate more heat in the hot‑end and on the printed part. Over‑cooling can cause warping, while under‑cooling leads to blobs and stringing. Here’s a balanced approach:
| Situation | Cura Setting | Recommended Adjustment |
|---|---|---|
| Early Layers (0–10 mm) | Fan Speed | 0 % (off) – keep the part warm. |
| Mid‑Height (10–150 mm) | Fan Speed | 30 % – gentle cooling for bridges. |
| High Detail Overhangs | Fan Speed (per layer) | 50–70 % – enable “Enable Fan Speed Modifier” for layers with overhang angles >45°. |
| Full‑Height Tall Prints (>200 mm) | Fan Speed | Gradually increase to 100 % after 200 mm to avoid heat buildup in the nozzle. |
| Enclosure | Ambient Temp | 35 °C – set the enclosure heater (if available) to maintain this temperature. |
Hardware tip: If your printer supports a secondary “part cooling” fan, mount it to blow across the entire print area rather than just the nozzle. This distributes airflow evenly, reducing hot spots that can cause warping.
Pro tip: The Cura “Cooling” tab now includes a “Minimum Layer Time” option. Set it to 15 s for large prints; Cura will automatically slow down to give each layer enough time to cool uniformly.
4. Slicing for Longer Print Durations – Managing Time and Reliability
Large prints can run for 12–48 hours. Here’s how to keep Cura efficient and the printer reliable:
4.1 Use Adaptive Layer Height
Cura’s Adaptive Layers feature (enabled under Experimental) automatically varies layer thickness based on model geometry. Flat sections get 0.30 mm layers, while steep details stay at 0.12 mm. This can cut print time by up to 25 % without sacrificing quality[^4].
4.2 Optimize Travel Moves
- Enable “Avoid Printed Parts” – Cura will route the nozzle around already‑printed geometry, reducing the chance of collisions.
- Enable “Combing Mode → Within Infill” – Keeps travel moves inside infill zones, minimizing stringing on visible surfaces.
4.3 Split Extremely Large Jobs
If your printer’s firmware has a timeout (common on budget boards), split the model into sections using Cura’s “Split Model” tool. Print each section sequentially, then glue or fuse them post‑print. This also reduces the risk of a single power loss ruining a 30‑hour job.
Read more: For a deep dive into speed‑quality trade‑offs, check our article on Cura Speed & Quality Profiles.
5. Maintenance Checklist for Long‑Run Prints
A massive print is only as good as the printer’s health. Use this checklist before you hit Start:
| Checklist Item | Frequency | Action |
|---|---|---|
| Nozzle Cleanliness | Every 10 h print time | Heat to printing temperature, manually wipe with a brass brush. |
| Bed Surface Inspection | Before each large print | Verify no scratches or residue; re‑apply adhesive if needed. |
| Linear Rail Lubrication | Weekly (or after 50 h) | Apply PTFE grease to rails; check for play. |
| Belt Tension | Every 20 h | Ensure X/Y belts are snug but not overtightened. |
| Thermal Runaway Sensors | Monthly test | Trigger a simulated fault to confirm firmware response. |
| Enclosure Seal Check | Before each print | Verify doors close tightly; replace worn gasket. |
| Filament Drying | Every 2 weeks (or after exposure) | Dry filament at 45 °C for 4 h to avoid moisture‑induced bubbling. |
| Power Supply Monitoring | Continuous (use UPS) | Connect printer to an uninterruptible power supply; log voltage spikes. |
| Firmware Update | Quarterly | Download latest Cura‑compatible firmware from the printer manufacturer. |
Keeping this routine will dramatically reduce failed prints caused by mechanical drift or thermal inconsistencies.
6. Real‑World Example: Scaling a 150 mm Miniature to 300 mm
Let’s walk through a practical case: a 150 mm × 150 mm × 150 mm fantasy figurine scaled to 300 mm × 300 mm × 300 mm.
- Model Preparation – In your CAD software, increase dimensions uniformly by 200 %. Export as STL.
- Cura Import – Load the STL; Cura automatically detects the new size.
- Apply “Large‑Format Base” Profile – Select the custom profile we defined above.
- Enable Adaptive Layers – Set “Maximum Layer Height” → 0.30 mm, “Minimum Layer Height” → 0.12 mm.
- Set Adhesion – Choose Raft with “Air Gap” → 0.10 mm and enable “Print Perimeters First.”
- Cooling – Turn fan off for first 8 mm, then 30 % thereafter.
- Enclosure – Pre‑heat enclosure to 35 °C, place a small fan inside for gentle circulation.
- Slice – Review the preview; notice the reduced number of layers (≈1500) and travel moves.
- Start Print – Begin the job, monitor the first few layers via webcam, then let the enclosure maintain temperature.
Result: The print completed in 27 hours with no visible warping, a flawless raft‑to‑model bond, and crisp surface details on the scaled‑up features.
Want more scaling tips? Check out our guide on Cura Tree vs Normal Supports for optimal support placement on large, intricate models.
7. Frequently Asked Questions (FAQ)
Q1. Should I use a heated chamber for PLA?
A: Yes. While PLA doesn’t warp as badly as ABS, a 30–35 °C chamber reduces internal stresses and improves layer adhesion on large parts.
Q2. Is a 0.4 mm nozzle still fine for 300 mm prints?
A: Absolutely. A standard nozzle provides a good balance of extrusion speed and detail. For ultra‑fast large prints, consider a 0.6 mm nozzle, but adjust flow and line width accordingly.
Q3. How do I prevent stringing on long prints?
A: Enable Retraction (4.5 mm at 45 mm/s for Bowden, 1.5 mm at 25 mm/s for direct drive) and use the “Combing Within Infill” setting. Also, keep the filament dry.
Q4. My prints still warp at the corners—what now?
A: Add a “Brim Width” → 15 mm or switch to a Raft with a thicker base. Verify the bed is level across the entire surface; a slight tilt can cause corner lift‑off on large prints.
Q5. Can I automate the maintenance checklist?
A: Yes! Tools like n8n can trigger reminders based on print time logs from Cura’s API. See our article on Install & Use Cura Post‑Processing for automation ideas.
8. Actionable Takeaways – Your 5‑Step Launch Pad
- Create the “Large‑Format Base” profile in Cura using the table in Section 2.
- Print a 10 × 10 cm test cube with the new profile, a raft, and 0 % fan for the first 5 mm. Verify adhesion and flatness.
- Set up an enclosure and pre‑heat it to 35 °C. Add a small circulation fan.
- Run the maintenance checklist before the first 12‑hour print.
- Monitor the first layer via webcam; adjust bed leveling if needed, then let Cura handle the rest.
Follow these steps and you’ll see a dramatic drop in warping incidents and an increase in successful massive prints.
9. Connect With CuraSlicers.com
Ready to dive deeper? Explore our library of related guides:
- Perfect First Layer Cura – Master the foundation of every successful print.
- Reduce Print Time Cura Guide – Cut hours off your large‑format jobs without sacrificing quality.
Visit our homepage for the latest tutorials, printable profiles, and community forums.
Stay updated: Follow us on Twitter, Instagram, and YouTube for quick tips, live Q&A sessions, and new profile releases.
Subscribe to our newsletter and receive a free “Large‑Format Cura Profile Pack” every month—crafted by our experts to keep your prints flawless.
10. References & Further Reading
- MatterHackers – Large‑Scale 3D Printing: Warping & Adhesion
- Gibson, B. – The 3D Printing Handbook (2nd ed.)
- Prusa Research – Enclosure Temperature Test Results
- Ultimaker Cura Documentation – Adaptive Layer Height
Print big, print smart, and let Cura do the heavy lifting.
Happy slicing!