Create and Analyze a Cura Temperature Tower for PLA PETG ABS
How to Create a Temperature Tower in Cura and Interpret Results
Estimated reading time: 10 minutes
- What you’ll learn: Step-by-step slicing of a temperature tower in Ultimaker Cura, how to record data with a ready-made Google Sheets template, and how to turn those observations into optimized Cura material profiles for PLA, PETG and ABS.
- Why it matters: A well-tuned temperature profile eliminates stringing, improves layer adhesion, and boosts surface finish—saving you hours of failed prints and post-processing.
- Who it’s for: Hobbyists, makers, and professionals who want reproducible, high-quality prints without endless trial-and-error.
Table of Contents
- 1. Why a Temperature Tower Is a Must-Have Calibration Tool
- 2. Choosing the Right STL – Our Recommended Temperature Tower
- 3. Preparing the Model in Cura
- 4. Printing the Tower – Best Practices
- 5. Recording Results – Use Our Google Sheets Template
- 6. Interpreting the Results – Material-Specific Insights
- 7. Translating Findings Into Cura Material Profiles
- 8. Advanced Tweaks – Getting the Most Out of Your Tower
- 9. Automating the Workflow with n8n (Optional)
- 10. Common Pitfalls & How to Fix Them
- 11. Bringing It All Together – Your Next Steps
- 12. Further Reading on Cura & 3D Printing
1. Why a Temperature Tower Is a Must-Have Calibration Tool
A temperature tower visualizes the effect of temperature on:
| Parameter | Low Temp (°C) | Mid Temp (°C) | High Temp (°C) |
|---|---|---|---|
| Layer adhesion | Weak, delamination | Strong, solid | Possible over-melting |
| Surface finish | Rough, under-extruded | Smooth, balanced | Glossy but may ooze |
| Stringing / oozing | Minimal | Moderate | Excessive |
| Dimensional accuracy | Shrinkage | Stable | Slight expansion |
By printing a single object that steps the temperature every few layers, you can instantly see where the sweet spot lies for a given filament. This eliminates the need to print multiple test cubes, saving filament, time, and energy.
Research note: All3DP’s comprehensive temperature-tower guide confirms that temperature is the single most influential variable for surface quality on FDM printers [All3DP – Temperature Tower Guide].
2. Choosing the Right STL – Our Recommended Temperature Tower
For a hassle-free experience, we recommend the “Standard 3-Stage Temperature Tower” (available for free on Thingiverse). It features:
- Four temperature zones (each 10 mm tall) – ideal for most filaments.
- Integrated test features – overhangs, bridges, and tiny text to evaluate surface detail.
- Compact footprint – fits on most build plates (200 mm × 200 mm or larger).
Download link: https://www.thingiverse.com/thing:4832740
If you prefer a taller tower (e.g., 150 mm) for finer granularity, the “Extended 5-Stage Tower” is also excellent. Both models are fully compatible with Cura 5.x and later.
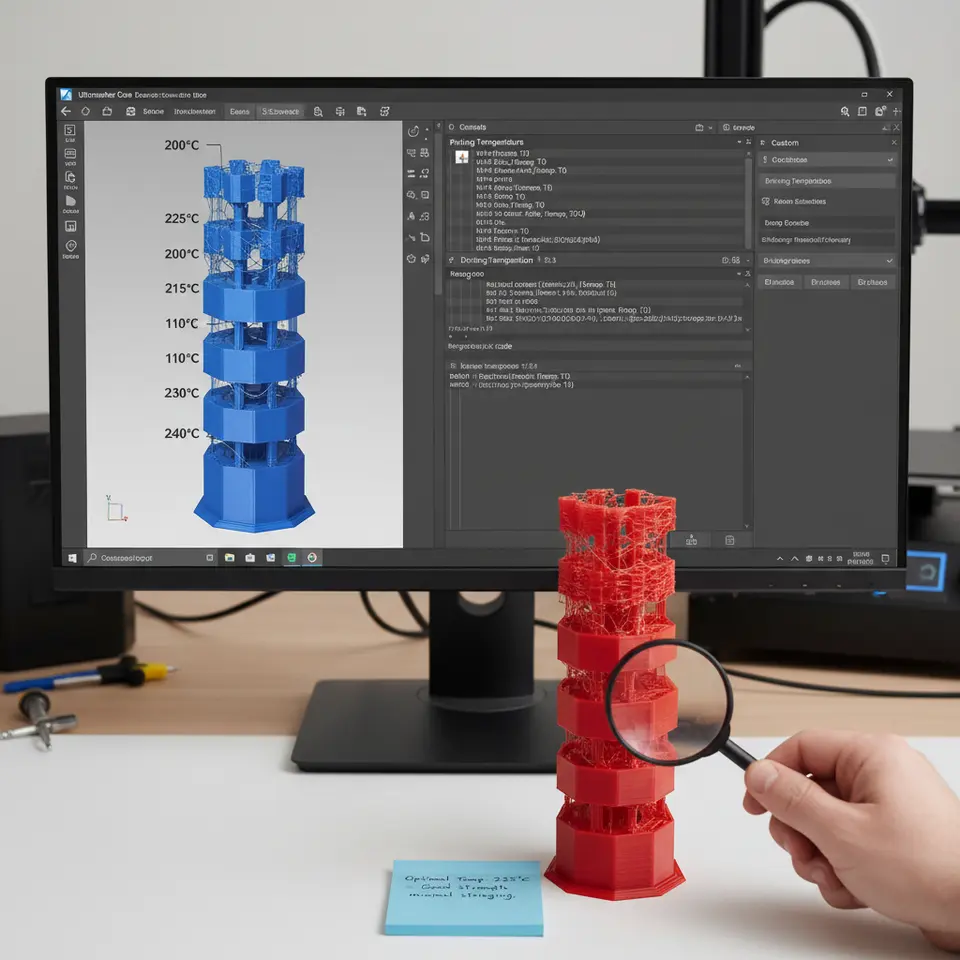
3. Preparing the Model in Cura
3.1 Import and Orient
- Open Cura and drag the STL onto the build plate.
- Rotate the model so the temperature-step axis aligns with the Z-axis (default orientation works for most towers).
- Center the model to avoid any clipping on the edges.
3.2 Set Up a Custom Temperature Profile
Cura allows you to assign a different temperature per layer using the “Temperature Change at Height” feature. Follow these steps:
- Click “Custom” → “Material” → “Printing Temperature”.
- Set the starting temperature (e.g., 190 °C for PLA).
- Click the gear icon next to the temperature field and select “Add Temperature Change”.
- Input the height where the temperature should shift (e.g., 10 mm) and the new temperature (e.g., 200 °C).
- Repeat for each zone (e.g., 10 mm → 210 °C, 20 mm → 220 °C, 30 mm → 230 °C).
Tip: Use the same temperature increments for all filaments (10 °C steps) to keep comparisons consistent.
3.3 Essential Cura Settings for a Reliable Tower
| Setting | Recommended Value | Why It Matters |
|---|---|---|
| Layer Height | 0.2 mm (0.12 mm for fine detail) | Balances speed & resolution. |
| Wall Thickness | 1.2 mm (3 perimeters) | Ensures structural integrity across temperature changes. |
| Infill | 20 % Grid | Provides support without excessive material waste. |
| Print Speed | 50 mm/s (adjust per filament) | Consistent speed reduces variable heat buildup. |
| Cooling Fan | 100 % after first layer (PLA), 50 % for PETG/ABS | Prevents overheating on lower temps, aids layer bonding on higher temps. |
| Retraction | 6 mm @ 40 mm/s (Bowden) or 2 mm @ 25 mm/s (Direct) | Minimizes stringing on the tower’s vertical walls. |
| Z Hop | 0.2 mm (enable) | Prevents nozzle scratching when moving across printed sections. |
For a deeper dive into these settings, see our guide on Cura Speed & Quality Profiles.
4. Printing the Tower – Best Practices
- Pre-heat the hot-end to the starting temperature before the print begins.
- Level the bed meticulously—temperature towers are unforgiving of a poor first layer. Check our Perfect First Layer in Cura guide for step-by-step leveling tips.
- Start the print and monitor the first two zones. If you notice excessive oozing or under-extrusion, pause and adjust the flow rate (see Cura Flow Rate & Line Width guide).
- Allow the print to cool gradually after completion. A rapid cool-down can cause warping, especially for ABS.
5. Recording Results – Use Our Google Sheets Template
A systematic approach to data collection turns a visual test into actionable numbers. Download our “Temperature Tower Results Tracker” (Google Sheets) here: [Download Template]. The sheet includes columns for:
| Column | Description |
|---|---|
| Layer Range | Height range for each temperature step (e.g., 0-10 mm). |
| Set Temp (°C) | Temperature you programmed in Cura. |
| Observed Issues | Stringing, blobs, under-extrusion, layer separation, etc. |
| Surface Rating (1-5) | Subjective visual score. |
| Dimensional Check (mm) | Measure a reference feature (e.g., tower diameter). |
| Notes | Any printer-specific observations (e.g., nozzle clog). |
How to use it:
- Print the tower.
- After each temperature zone finishes, pause the printer (or wait until the whole tower is done) and evaluate the listed criteria.
- Input the data directly into the sheet.
- At the end, use the built-in average formulas to identify the temperature with the highest surface rating and acceptable dimensional accuracy.
6. Interpreting the Results – Material-Specific Insights
Below are typical patterns you’ll see for three of the most common filaments. Use these as a baseline; your printer’s thermal dynamics may shift the exact numbers.
6.1 PLA
| Temp (°C) | Surface Rating | Common Issues | Recommended Profile Temp |
|---|---|---|---|
| 190 | 2 | Layer gaps, weak adhesion | ❌ |
| 200 | 4 | Slight stringing, good detail | ✅ |
| 210 | 5 | Smooth, crisp edges | ✅ |
| 220 | 3 | Oozing, loss of detail | ❌ |
| 230 | 1 | Severe stringing, blobs | ❌ |
Interpretation: For PLA, the sweet spot usually lands between 200 °C and 210 °C on most printers. If you see stringing at 220 °C, lower the temperature or increase retraction distance.
6.2 PETG
| Temp (°C) | Surface Rating | Common Issues | Recommended Profile Temp |
|---|---|---|---|
| 230 | 3 | Slight warping | ❌ |
| 240 | 4 | Good strength, minor stringing | ✅ |
| 250 | 5 | Excellent layer bonding, smooth finish | ✅ |
| 260 | 4 | Oozing on overhangs | ❌ |
| 270 | 2 | Excessive blobs, poor bridges | ❌ |
Interpretation: PETG thrives around 250 °C. Keep the cooling fan at 50 % to avoid stringing while preserving layer adhesion.
6.3 ABS
| Temp (°C) | Surface Rating | Common Issues | Recommended Profile Temp |
|---|---|---|---|
| 230 | 2 | Poor adhesion, warping | ❌ |
| 240 | 3 | Slight cracking | ❌ |
| 250 | 4 | Stable, good strength | ✅ |
| 260 | 5 | Optimal surface, strong layers | ✅ |
| 270 | 3 | Over-softening, sagging | ❌ |
Interpretation: ABS generally requires 260 °C on a well-enclosed printer. Pair this with a heated chamber (or at least a 100 °C bed) to curb warping.
External reference: Ultimaker’s official Cura documentation recommends a ±5 °C tolerance for temperature profiling and provides a built-in temperature tower script for quick setup (opens in new window) [Ultimaker Cura Docs].
7. Translating Findings Into Cura Material Profiles
Now that you’ve identified the optimal temperature, embed it into a reusable Cura material profile:
- Open Cura → Settings → Material → Add Material.
- Fill in the Name (e.g., “PLA – 205 °C Optimized”).
- Set Printing Temperature to the chosen value.
- Adjust Printing Speed (e.g., 50 mm/s for PLA, 40 mm/s for PETG, 45 mm/s for ABS) based on the tower’s visual speed performance.
- Cooling: 100 % for PLA, 50 % for PETG, 0 % for ABS (or use a low fan for first few layers).
- Flow Rate: Start at 100 %, but if you observed slight under-extrusion at the optimal temperature, increase to 103 % (see our Cura Flow Rate & Line Width guide).
- Save the profile and select it for future prints.
Tip: Duplicate the profile for each filament brand you own. Small variations in pigment and manufacturer tolerances can shift the ideal temperature by ±5 °C.
8. Advanced Tweaks – Getting the Most Out of Your Tower
| Advanced Setting | When to Use | How to Adjust |
|---|---|---|
| Z Hop | Frequent travel over printed sections | Enable, set 0.2 mm – reduces scratches. |
| Linear Advance / Pressure Advance | Visible oozing on high-temp zones | Calibrate via a separate “Pressure Advance Tower”. |
| Adaptive Layers | Want finer resolution only where detail matters | Enable [Cura Adaptive Layers Optimization] and set a 0.1 mm layer height for the top 20 mm. |
| Support Settings | Testing overhangs on the tower | Use Tree Supports for minimal material (see Cura Tree vs Normal Supports). |
| Print Time Reduction | Tower takes too long | Reduce infill to 10 % and increase travel speed (refer to Reduce Print Time Cura Guide). |
gets a calibrated temperature profile without manual intervention.
9. Common Pitfalls & How to Fix Them
| Symptom | Likely Cause | Fix |
|---|---|---|
| Stringing only in the highest temperature zone | Insufficient retraction or too high temperature | Increase retraction distance by 0.5 mm, lower temperature by 5 °C, or enable “Combing” (No Skin). |
| Layer separation at low temps | Under-extrusion or insufficient bed adhesion | Increase flow rate to 103 %, raise bed temperature by 5 °C, or improve first-layer squish. |
| Blobs on the top of each zone | Temperature change causing “ooze” before move | Enable “Wipe while retracting” and add a short “Prime Tower” to purge excess filament. |
| Warping on ABS tower | Inadequate enclosure temperature | Use a heated enclosure (≥ 45 °C) or apply a brim/raft. |
| Inconsistent dimensions | Thermal expansion differences across zones | Keep the temperature steps small (≤ 10 °C) and use a stable ambient environment. |
10. Bringing It All Together – Your Next Steps
- Download the STL and Google Sheets template.
- Slice the tower using the temperature-change workflow described above.
- Print and record observations.
- Create a new Cura material profile based on the optimal temperature and any ancillary tweaks (flow, speed, cooling).
- Save the profile and share it with your team or community.
By repeating this process whenever you switch filament brands or upgrade your hot-end, you’ll maintain a library of proven profiles that dramatically reduce failed prints.
11. Further Reading on Cura & 3D Printing
- Cura Temperature Profiles – The Complete Guide – Learn how to build multi-temperature material libraries.
- Cura Support Settings – Effective Strategies – Optimize support generation for complex models.
- Ultimate Cura Profile Settings – A Deep Dive – Advanced configuration for professional workflows.
Call to Action
Ready to level up your prints? Explore our full library of Cura tutorials, follow us on Twitter and LinkedIn for daily tips, and subscribe to our newsletter to receive the latest temperature-tower templates, material profiles, and workflow automations straight to your inbox.
Visit our main page for more 3D printing tips and resources: https://curaslicers.com
Happy slicing, and may every tower stand tall!