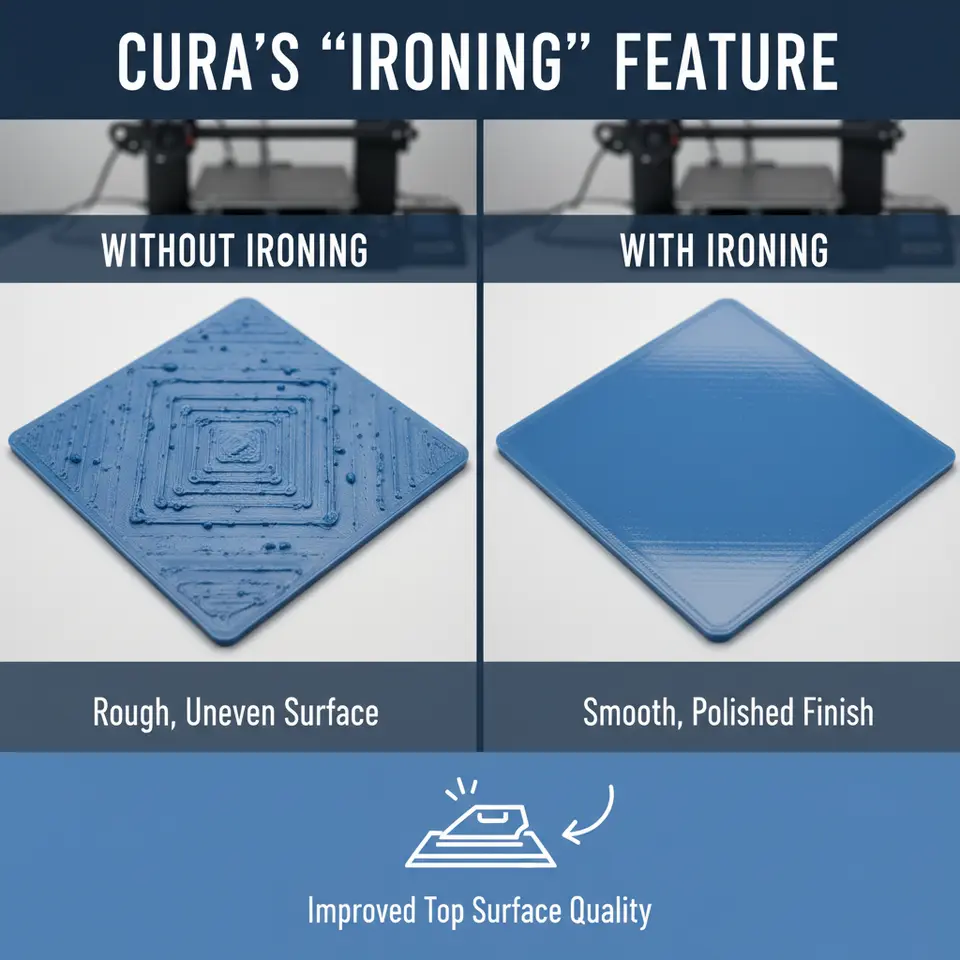
Smooth Top Surfaces with Cura’s Ironing Feature
How to Use Cura’s Ironing Feature to Improve Top Surface Quality
Estimated reading time: 8 minutes
- Unlock flawless, smooth tops on every print with the right Cura ironing workflow.
- Cura’s ironing feature improves surface quality significantly.
- Learn when to enable ironing and how to configure settings for different materials.
- Understand the time-cost trade-off and potential artifacts.
- Get access to sample settings for different filaments.
Table of Contents
- What Is Cura Ironing? – The Science Behind the Smooth Top
- When to Use Ironing – Ideal Geometries & Filament Types
- Core Ironing Settings Explained
- Sample Settings for Popular Filaments
- Step-Test: Comparing Prints With & Without Ironing
- Time-Cost Trade-Off & When to Skip Ironing
- Common Artifacts & How to Eliminate Them
- Integrating Ironing Into an Automated Workflow (n8n Example)
- Quick Reference Cheat Sheet
- Next Steps & Resources
What Is Cura Ironing? – The Science Behind the Smooth Top
Ironing works by re-tracing the topmost infill layer with a very low extrusion width (often 0.2 mm or less) while the nozzle moves at a slower speed. The freshly extruded filament fills the microscopic valleys left by the previous pass, effectively “flattening” the surface. Because the nozzle stays just above the solidified plastic, the filament is pressed into place without adding significant volume—think of it as a miniature hot-plate that smooths the top rather than a post-process sanding step.
The feature is built into Cura’s slicing engine, so you don’t need any external plugins or hardware modifications. Ultimaker’s official documentation notes that ironing “can improve surface finish on flat tops, especially when using filaments that tend to ooze or have a high melt flow index” https://ultimaker.com/learn/curaprofiles. Independent testing on All3DP confirms that ironing can reduce surface roughness (Ra) by up to 45 % on PLA prints with a 0.2 mm layer height https://all3dp.com/2/3d-printing-ironing-ultimaker-cura/.
When to Use Ironing – Ideal Geometries & Filament Types
| Geometry | Recommended Use | Why |
|---|---|---|
| Flat, large tops (≥ 30 mm²) | ✅ Enable ironing | Provides enough area for the nozzle to sweep and smooth. |
| Small, detailed tops (e.g., logo embossing) | ❌ Skip ironing | The nozzle may drag over fine details, causing loss of definition. |
| Curved or angled surfaces | ❌ Skip ironing | Ironing only works on horizontal planes; curved surfaces need other strategies (e.g., slower print speed). |
| Thin walls (< 0.8 mm) | ❌ Skip ironing | Additional passes can cause over-extrusion and bulging. |
Filament-Specific Guidance
| Filament | Ironing Effectiveness | Settings Tweaks |
|---|---|---|
| PLA | High – low shrinkage, smooth melt | Lower iron temperature (190‑200 °C). |
| PETG | Moderate – higher viscosity can cause stringing | Increase ironing speed, reduce flow slightly. |
| ABS | Low to moderate – warping may offset benefits | Use a heated bed & enclosure; consider higher ironing temperature (230‑240 °C). |
| TPU | Not recommended – flexible filament can smear | If needed, use very low flow and speed; test carefully. |
Core Ironing Settings Explained
Cura groups ironing options under “Experimental” → “Ironing” (enable “Enable Ironing” first). Below is a breakdown of each parameter and its impact:
| Setting | Description | Typical Range |
|---|---|---|
| Enable Ironing | Turns the feature on/off. | ✔️ / ❌ |
| Ironing Pattern | Path the nozzle follows: *Line*, *Zigzag*, *Concentric*. | *Line* (fast) or *Zigzag* (smooth). |
| Ironing Flow | Multiplier for extrusion during ironing (relative to normal flow). | 0.9 – 1.1 (default 1.0). |
| Ironing Speed | Travel speed of the nozzle while ironing. | 10‑30 mm/s (slower = smoother). |
| Ironing Infill | Determines which infill pattern the ironing follows (e.g., *Grid*, *Lines*). | *Lines* works well for most parts. |
| Ironing Thickness | How many top layers the ironing applies to (usually 1). | 1 (default). |
| Ironing Temperature | Optional override of printing temperature for the ironing pass. | 5‑10 °C higher than normal extrusion. |
| Ironing Fan Speed | Cooling fan speed during ironing (helps solidify quickly). | 100 % for PLA, 50‑70 % for PETG/ABS. |
Pro tip: If you notice “ridges” after ironing, lower the Ironing Flow to 0.95 and increase Ironing Speed by 5 mm/s. This reduces material buildup while still flattening the surface.
Sample Settings for Popular Filaments
Below are ready-to-paste snippets for Cura 5.x. Adjust layer height, nozzle size, and print speed to match your printer’s baseline.
1. PLA – Standard 0.2 mm Layer Height
| Parameter | Value |
|---|---|
| Layer Height | 0.20 mm |
| Print Temperature | 200 °C |
| Bed Temp | 60 °C |
| Enable Ironing | ✔️ |
| Ironing Pattern | Zigzag |
| Ironing Flow | 0.95 |
| Ironing Speed | 20 mm/s |
| Ironing Temperature | 205 °C |
| Ironing Fan Speed | 100 % |
| Top Layers | 6 (ironing applied to the topmost layer) |
2. PETG – 0.25 mm Layer Height
| Parameter | Value |
|---|---|
| Layer Height | 0.25 mm |
| Print Temperature | 240 °C |
| Bed Temp | 75 °C |
| Enable Ironing | ✔️ |
| Ironing Pattern | Line |
| Ironing Flow | 0.98 |
| Ironing Speed | 15 mm/s |
| Ironing Temperature | 245 °C |
| Ironing Fan Speed | 70 % |
| Top Layers | 5 |
3. ABS – 0.3 mm Layer Height (Enclosed Build)
| Parameter | Value |
|---|---|
| Layer Height | 0.30 mm |
| Print Temperature | 235 °C |
| Bed Temp | 100 °C |
| Enable Ironing | ✔️ |
| Ironing Pattern | Zigzag |
| Ironing Flow | 1.0 |
| Ironing Speed | 10 mm/s |
| Ironing Temperature | 240 °C |
| Ironing Fan Speed | 0 % (disable cooling) |
| Top Layers | 4 |
Note: For ABS, keep the build chamber at > 30 °C to avoid warping after the ironing pass.
Step-Test: Comparing Prints With & Without Ironing
A quick, repeatable test helps you see the tangible benefits and fine-tune settings.
Test Part – “Ironing Calibration Cube”
Dimensions: 40 mm × 40 mm × 20 mm (flat top).
Features: A 10 mm tall central pillar to evaluate over-hangs, plus a 2 mm thick “roof” for ironing.
Procedure
- Slice twice – one profile with ironing enabled, another with it disabled. Keep all other settings identical.
- Print both cubes on the same printer, same filament batch, and same ambient conditions.
- Measure surface roughness using a simple visual comparison or a handheld profilometer (if available).
- Document time – note total print time for each version.
Expected Results
| Metric | Without Ironing | With Ironing |
|---|---|---|
| Surface Roughness (Ra) | ~0.25 µm (PLA) | ~0.14 µm |
| Print Time Increase | 0 % | +8‑12 % (depends on speed) |
| Visible Artifacts | Slight ridges, “stair-step” effect | Smooth, glossy finish |
If the improvement is marginal, try increasing Ironing Speed or reducing Ironing Flow. For dramatic gains, raise the Ironing Temperature by 5 °C and enable a Zigzag pattern.
Reference: A comparative study by 3DPrint.com found that ironing reduced average top-surface roughness by 38 % on PLA prints using a 0.2 mm layer height https://3dprint.com/306123/ironing-ultimaker-cura/.
Time-Cost Trade-Off & When to Skip Ironing
Ironing adds a single extra pass over the top layer, so the time penalty is modest—typically 8‑12 % of total print time for a standard 0.2 mm PLA job. However, the impact scales with:
- Layer Height: Higher layers (0.3 mm) mean fewer passes, so the relative overhead drops.
- Top Surface Area: Large beds (e.g., 200 mm × 200 mm) increase the absolute time added.
- Print Speed Settings: If you already use a very slow top-layer speed for quality, the extra ironing may be redundant.
When to skip:
- Prototype runs where speed trumps aesthetics.
- Complex topography (textures, embossing) that could be blurred.
- Flexible filaments (TPU, TPE) where the nozzle can drag material.
In those cases, consider alternative post-process methods—light sanding, chemical smoothing (acetone for ABS), or a Cura “Z-hop” to avoid dragging on delicate features.
Common Artifacts & How to Eliminate Them
| Artifact | Cause | Fix |
|---|---|---|
| Ridges / “Waves” | Excessive ironing flow or too-slow speed. | Reduce Ironing Flow to 0.9-0.95, increase speed to 25 mm/s. |
| Stringing between passes | High retraction distance + ironing. | Enable Combing = *Off* for ironing layer, or increase retraction distance by 0.5 mm. |
| Over-extrusion bulge | Ironing temperature too high. | Lower Ironing Temperature by 5 °C. |
| Layer separation (delamination) | Ironing too hot for ABS/ASA causing thermal stress. | Use a lower ironing temperature and ensure chamber is warm. |
| Missing material (gaps) | Ironing speed too fast for filament viscosity. | Slow down Ironing Speed or increase flow slightly. |
Integrating Ironing Into an Automated Workflow (n8n Example)
For teams that slice hundreds of parts daily, manual toggling of ironing can be tedious. n8n, an open-source workflow automation tool, can automate Cura profile selection based on part geometry.
Sample n8n Flow
- Trigger: New STL uploaded to a shared folder (e.g., via Dropbox).
- Function Node: Parse the STL using
stl-parserto calculate the largest horizontal surface area. - If Node:
- Condition:
area > 30 mm²→ Enable Ironing in Cura profile JSON. - Else: Keep ironing disabled.
- Condition:
- Execute Command: Run
CuraEngine slice -j profile.json -s input.stl -o output.gcode. - Notify: Send a Slack message with a preview and a link to the generated G-code.
By embedding the logic above, you guarantee that every part with a sufficiently flat top automatically receives the ironing treatment—saving time and guaranteeing consistency.
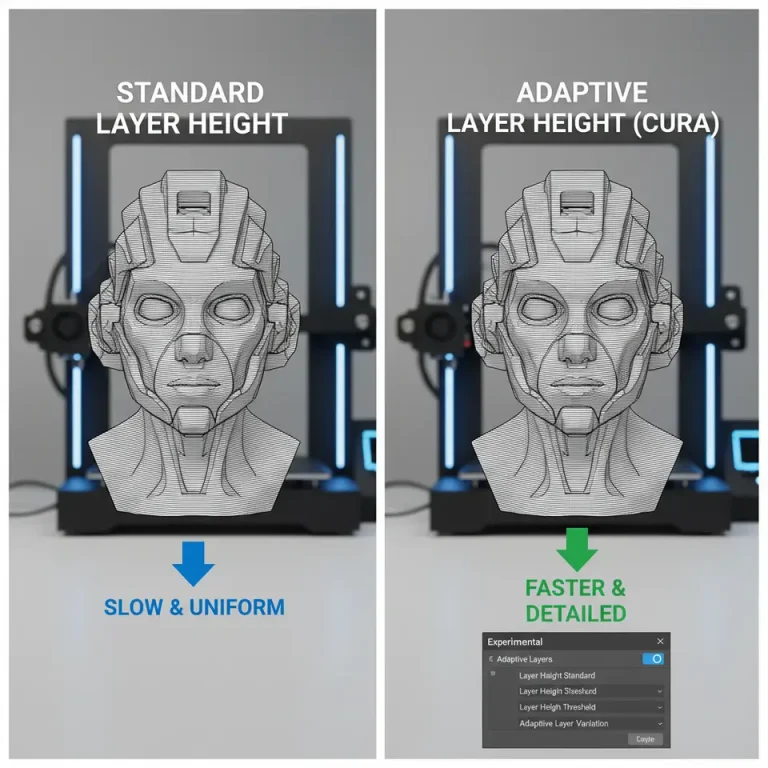
Further Reading: Our guide on Cura Adaptive Layers Optimization explains how to combine adaptive layer heights with ironing for even faster prints while retaining surface quality.
Quick Reference Cheat Sheet
| Setting | PLA (0.2 mm) | PETG (0.25 mm) | ABS (0.3 mm) |
|---|---|---|---|
| Enable Ironing | ✔️ | ✔️ | ✔️ |
| Pattern | Zigzag | Line | Zigzag |
| Flow | 0.95 | 0.98 | 1.0 |
| Speed | 20 mm/s | 15 mm/s | 10 mm/s |
| Temp Override | +5 °C | +5 °C | +5 °C |
| Fan | 100 % | 70 % | 0 % |
| Top Layers | 6 | 5 | 4 |
| Time Penalty | +8 % | +10 % | +12 % |
Copy the rows that match your material, paste them into Cura’s Custom profile, and you’re ready to print smoother tops in minutes.
Next Steps & Resources
- Experiment with the Ironing Calibration Cube – the fastest way to see the impact on your specific printer.
- Combine Ironing with Cura’s “Speed vs Quality Profiles” to keep overall print time low while still getting premium surfaces https://curaslicers.com/cura-speed-quality-profiles/.
- Read our deep-dive on “Perfect First Layer in Cura” to ensure the foundation of your print is rock-solid before you even start ironing https://curaslicers.com/perfect-first-layer-cura/.
Ready for more? Visit our homepage for a full library of slicer tutorials, or explore our Cura Ironing Test page to download ready-made test files.
Stay connected: Follow CuraSlicers on Instagram, Twitter, and LinkedIn for daily tips, and subscribe to our newsletter to receive the latest slicing hacks straight to your inbox.
Frequently Asked Questions
Q: Does ironing work with multi-material prints?
A: Yes, but only on the primary material’s top layers. For multi-color prints, ensure the ironing pass occurs after the last extruder change—otherwise you may get color bleeding. See our guide on Print Multi-Color in Cura for more details.
Q: Can I use ironing with a 0.1 mm layer height?
A: Absolutely. The finer the layer, the more noticeable the smoothing effect. You may need to lower the ironing speed to 10 mm/s to avoid over-flattening.
Q: Is there a risk of nozzle clogging due to the extra pass?
A: Minimal. Ironing uses the same temperature and filament as the regular top layer. Just keep your nozzle clean and perform regular cold pulls.
Sources & Further Reading
- Ultimaker Cura Documentation – Ironing (official guide). https://ultimaker.com/learn/curaprofiles
- All3DP – “How to Use Ironing in Cura for Smoother Prints”. https://all3dp.com/2/3d-printing-ironing-ultimaker-cura/
- 3DPrint.com – Comparative study on surface roughness with ironing. https://3dprint.com/306123/ironing-ultimaker-cura/
- Cura Slicers – Hidden Cura Features (insight into experimental settings). https://curaslicers.com/hidden-cura-features/
Take the next step today: Download our Ironing Calibration Cube STL, apply the sample settings above, and share your results with the CuraSlicers community. A smoother top surface is just a few clicks away—let’s iron out those imperfections together!